Starpery.com

Sephonia goes under the knife (Finger replacement + various)

Ding! POP! Crash! Thud! oops...let's get her all fixed up!
User avatar
Mau5
Senior Member
Senior Member
Posts: 427
Joined: Sat Oct 19, 2019 9:20 pm
Location: Ontario, Canada
Contact:

Sephonia goes under the knife (Finger replacement + various)

Post by Mau5 »

Hi there, I got the lovely Sephonia, WM 157-B, in October 2019. Being a doll rookie, she has sadly suffered from my handling mistakes. As I'll soon be getting into doll photography, some repairs have been necessary to undertake. I'm just taking a short break from working on her, I'm in the middle of replacing the fingers on her left hand. I did the right hand yesterday, which had all broken fingers. My first attempt I inserted all the wires into the fingers, and then tried to epoxy them into the hand plate. Somehow, the pinky finger didn't go into the plate (ended up between the top of the plate and the hand's TPE. OOPS! :( So, I had to remove all the finger wires again. This time, I've epoxied them in place outside of the fingers, and will fit them back into the hand once the epoxy has cured. I'm using 12 Ga stranded automotive primary wire (since I had it handy). It offers far more flexibility compared to solid wire (16 Ga solid, really WM?), and should hold up well over time (extension cords are made of very fine stranded wire), while still able to bend and hold a pose. She won't be able to hold anything overly heavy, but I anticipate no issues with basic props like a phone.
Fingers setting up
Fingers setting up
20200223_163638.jpg (666.76 KiB) Viewed 1829 times
A small incision was made where the hand plate ends. Broken fingers can be pulled out, then the intact fingers were cut at the base and also removed. They'd break soon anyway, so might as well replace them with a more durable option while I'm in there.
Incision
Incision
20200223_201948.jpg (817.14 KiB) Viewed 1829 times
I'm going to be trying to free up the epoxy from the plate to remove the whole thing, drilling the right hand got messy so I'd like to avoid that.
Surgery
Surgery
20200223_202800.jpg (858.38 KiB) Viewed 1829 times
Layout to determine replacement finger size.
Finger length layout
20200223_202844.jpg (720.59 KiB) Viewed 1829 times
Sephonia has been on the operating table for a week now (I haven't been able to work on her everyday) and it is killing me being apart from her and seeing her in this state :cry: I've also been working on sealing up the tears in her feet around the standing foot pegs, a puncture in her leg I assume from my dog putting a paw on her (the only other pointy thing that's been near her wouldn't have done that :razz: ), a piece of nipple that nearly flaked off, vaginal tearing, and various abrasions. I don't know if I'm going to detail/post about all of those things, but I will be showing the hand operation up to the final sealing/smoothing of the incision.

Well, I better get back to her so that the epoxy can set up in her left hand overnight. I'm using 5min quickset epoxy, so I have to work fast once I mix it to fill the hand plate and insert the replacement fingers. It still needs a day to fully cure, even though it starts to set-up and hold the pieces together quickly. Missing my snuggles, and hoping I patch her up acceptably. I think I need a drink... This is rough :drinking:

User avatar
Mau5
Senior Member
Senior Member
Posts: 427
Joined: Sat Oct 19, 2019 9:20 pm
Location: Ontario, Canada
Contact:

Re: Sephonia goes under the knife (Finger replacement + vari

Post by Mau5 »

The left hand went much smoother than the right (the wonders of experience, eh?). I got the old finger stubs/epoxy out of the hand plate without drilling. They didn't come out cleanly in one piece, but out they are without metal dust and crap getting all over her hand. I'm going to have to clean her right hand very well before the healing operation, or she'll have permanent stains around the cut.
Empty Plate.jpg
Empty Plate.jpg (958.63 KiB) Viewed 1816 times
Hand Junk.jpg
Hand Junk.jpg (1.26 MiB) Viewed 1816 times
To determine how long to cut the finger wires, I cut some stubs from my replacement wire and inserted them into the hand plate. With all wires down as far as they'd go, I taped them together, with the tape flush to the end of the hand plate.
Length Measurement.jpg
Length Measurement.jpg (860.24 KiB) Viewed 1816 times
Now I could use this as a reference. Where the old fingers were cut was extended from the hand plate about a 1/4", as the factory epoxy oozed out that much.
Cutting Fingers.jpg
Cutting Fingers.jpg (699.66 KiB) Viewed 1816 times
I stripped a little insulation from the end of the wire to go into the hand plate, for the epoxy to better lock it in place, and wiped them all down with some rubbing alcohol to degrease them.
Finger Prep.jpg
Finger Prep.jpg (908.83 KiB) Viewed 1816 times
Epoxy was mixed and filled into the hand plate, wires are now inserted. You can spot in the background the nipple I had to work on. Not too shabby from a distance, eh? It's a little larger than the other one as I added some (perhaps too much) filler to correct it going out of round after heat-treating it to re-adhere the flake. It's not perfect, could maybe use some more work but I might just leave it for now.
Setting Up.jpg
Setting Up.jpg (824.89 KiB) Viewed 1816 times
Well, all there is to do now is have a much needed beer and wait for the epoxy to cure. Hopefully I can get to putting her fingers back into the hand tomorrow and seal her up. Once that's done, she can come off the operating table and back to the bedroom 8)

:glou:

seagull
Doll Oracle
Doll Oracle
Posts: 8516
Joined: Wed Jun 12, 2019 4:06 am
Location: Down Under
Contact:

Re: Sephonia goes under the knife (Finger replacement + vari

Post by seagull »

Another doll surgeon has arrived :)

User avatar
-Ragnar66-
Doll Guru
Doll Guru
Posts: 5972
Joined: Wed Mar 20, 2019 7:19 pm
Location: Germany
Contact:

Re: Sephonia goes under the knife (Finger replacement + vari

Post by -Ragnar66- »

very interesting, thanks! 8) I still have that wire replacement works all before me.

User avatar
Arthur1960
Doll Visionary
Doll Visionary
Posts: 13956
Joined: Fri Feb 24, 2017 1:44 pm
Location: Suffolk, UK
Contact:

Re: Sephonia goes under the knife (Finger replacement + vari

Post by Arthur1960 »

Hi there, this all looks very familiar! I did about 4 hands last year and used what looks like the same replacement wire as you have. What occurred to me is that nearly all finger wire breaks occur where the wire enters the palm plate so I figured that maybe something that could bind well but still be flexible might help reduce the risk of this happening. I experimented with using Permatex RTV silicone to embed the new wires rather than using epoxy again and it worked surprisingly well. After several hours it sets very firm but still has a bit of 'give' and the replacement wires in my old YL148D all remain intact after several months of rigorous testing. In fact a couple of times I've accidentally bent a finger right back and it didn't snap so I'm encouraged by this. I presume the factory are stuck with using epoxy due to the high temperatures involved when pouring molten tpe but the Permatex is worth considering for a later repair job.

User avatar
Mr_Ducati
Doll Elder
Doll Elder
Posts: 3055
Joined: Fri May 04, 2018 4:43 pm
Contact:

Re: Sephonia goes under the knife (Finger replacement + vari

Post by Mr_Ducati »

GREAT thread Mau5! I really appreciate you walking us through this procedure. We hope everything ends will with Sephonia and she's good as new! Take care!

Mr. Ducati

seagull
Doll Oracle
Doll Oracle
Posts: 8516
Joined: Wed Jun 12, 2019 4:06 am
Location: Down Under
Contact:

Re: Sephonia goes under the knife (Finger replacement + vari

Post by seagull »

Wire really hates sharp bends.
In the manufacture of wire, there are curves of 6" diameter or more even for fine gauge wire in the path it takes through the wire drawing process.

These curves are not practical in a doll hand but Arthur1960 has come close with the softer Permatex adhesive :)

User avatar
Mau5
Senior Member
Senior Member
Posts: 427
Joined: Sat Oct 19, 2019 9:20 pm
Location: Ontario, Canada
Contact:

Re: Sephonia goes under the knife (Finger replacement + vari

Post by Mau5 »

seagull wrote:Another doll surgeon has arrived :)
I'm not sure how to interpret your comment :?:
New Surgeon?
New Surgeon?
Dr Nick.jpg (27.61 KiB) Viewed 1734 times
Mr_Ducati wrote:GREAT thread Mau5! I really appreciate you walking us through this procedure. We hope everything ends will with Sephonia and she's good as new! Take care!

Mr. Ducati
Thanks Mr. Ducati, your support and well wishes are much appreciated through this procedure. I'm learning as I go, I only became a doll owner 4 months ago, and really didn't expect to have to get into repairs like this so soon, even though I understood it was kinda inevitable. There is no way I'd kick my sweet Sephonia to the curb, she deserves a good long life in the best health I can provide for her, so here I dive headfirst into the unknown.

@Arthur, I picked up several good ideas for how to perform this operation from your posts :) Your work inspired me, I went from "Oh no, I'm screwed" to "Hey, I think I might actually be able to do this!". You have a good idea with the silicone sealant, that little bit of give will help buffer against some sharp bends. Ultimately, if the bend is extreme enough, the wire will bend back sharply around the hand plate no matter what. It's a real engineering challenge for these fingers. They have to be stiff enough to hold a shape and hold some weight for props, yet flexible enough to bend, and malleable enough to do it repeatedly without failure. What material can fulfill all of these requirements? Rubber core would take all the bends you throw at it, but it won't hold a position. Solid wire (as is currently used) is just terrible because it breaks after several extreme bends, it really shouldn't have even been considered. I think we'd be better off with fingers that we couldn't pose, but didn't break from bending, while a real solution is developed.

I didn't have much time to work on her tonight since I had to stay a little late at work. I got her left hand sealed up, and the fingers at least inserted into the right hand plus clean up of the mess drilling made on her right hand. Thankfully, her right hand cleaned up pretty well just wiping with baby oil. Here is the left hand after the wires were inserted. I used scissors to make the incision, whereas on the right hand I put tension on the TPE and sliced it with a scalpel. I think the scalpel cut compresses back together much better than the scissor cut.
Wide Incision
Wide Incision
IMG_8415.jpg (1.48 MiB) Viewed 1734 times
In it's resting state, the TPE wants to spread apart.
Natural state
Natural state
IMG_8417.jpg (1.4 MiB) Viewed 1734 times
It pressed together neatly, so I figured a good bond could be made.
Pressed Closed
Pressed Closed
IMG_8416.jpg (1.37 MiB) Viewed 1734 times
I put a small strip of filler into the bottom of the incision and bonded it with a soldering iron. I could have used more, and built up thin strips to the top of the incision. I had to add a few more filler pieces of TPE as the joint cratered a little. I just worked in a small piece at a time until I was satisfied that the joint was filled appropriately.
Filler In the Bottom
IMG_8418.jpg (1.55 MiB) Viewed 1734 times
All sealed up! I haven't done any finishing/smoothing work yet, just not enough time tonight.
Sealed and Healed!
Sealed and Healed!
IMG_8419.jpg (1.48 MiB) Viewed 1734 times
Here's how I went about inserting the wires (demonstrated on the right hand). I lubed a Q-Tip with vaseline and swabbed each finger channel in the hand, plus the wire. I curled the wires at the base, and started working them into their finger channels. I have no way to describe it, other than you just have to "feel" and finagle it into place while being careful not to poke it out the side of the hand/finger. The wire has to be straightened as it goes into place.
Wire Insertion
Wire Insertion
IMG_8421.jpg (1.56 MiB) Viewed 1734 times
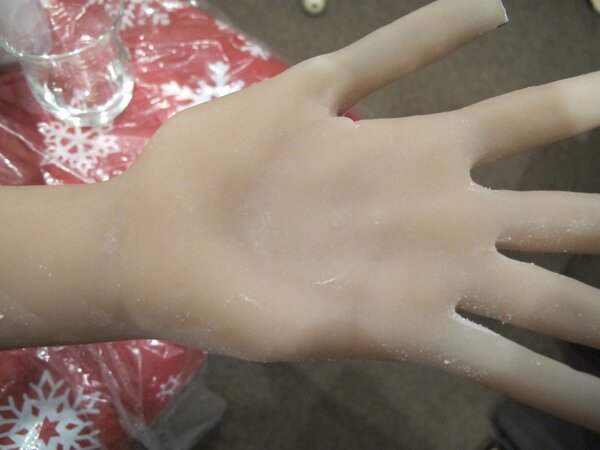
Right hand cleaned up and in resting position. You can see how the scalpel cut comes together very nicely.
Right hand cleaned up, not yet sealed
IMG_8422.jpg (1.43 MiB) Viewed 1734 times
Well, tomorrow is another day. This job takes time, and you don't wan't to rush these things.

User avatar
Arthur1960
Doll Visionary
Doll Visionary
Posts: 13956
Joined: Fri Feb 24, 2017 1:44 pm
Location: Suffolk, UK
Contact:

Re: Sephonia goes under the knife (Finger replacement + vari

Post by Arthur1960 »

Hi again, great work, the repair looks impressive and I'm glad I was able to help a bit with my work last year. I like some of the different things you have done and the way you inserted the new wires looks to have been a little less traumatic than the way I did it! One thing I will say, after doing this a few times is that you have to be careful not to use too much oil on the fingers and in fact most of the hand. Of course you need to use it for preparation and when smoothing with heat etc but it's a good idea to use it sparingly and wipe away excess where possible. As the tpe is at its thinnest on the hand and fingers it can weaken significantly if over oiled, after doing the work you can improve things by powdering the area well and maybe slipping some cotton or lace gloves on the hand for a while. I've found that with care the tpe can recover but there does come a point when it's structure just looses integrity and will become too soft. I've seen others post about this in recent months so I now avoid oiling the hands just dab a tiny bit of vaseline in-between fingers now and then. Thanks for posting the pics as these help so much when folk are planning to do this themselves, Cheers!

User avatar
Jimmy_71
Doll Patriarch
Doll Patriarch
Posts: 3852
Joined: Sun Sep 09, 2018 9:37 am
Location: Quebec, Canada
Contact:

Re: Sephonia goes under the knife (Finger replacement + vari

Post by Jimmy_71 »

Very impressive Mau5. :thumbs_up: :thumbs_up:

I bookmarked this thread, as I need to do this to my Alyssa one of these days.
My girls:
Karissa (Zelex SLE 172E with head 204)
Karine (WM158D / #273)
MG (WM172G)
Anya (WM172D Gel / #370)
Andrea & Veronica (WM172D Hollow / #370 & #S19 shared body)
Patricia & Tatiana (WM166C / #252 & #266 shared body)
Alyssa & Isabelle (WM158D / #74 & #162 shared body)
Karissa's Thread
Jimmy's WM Babes
Link To Their Old Threads
Link To Their Photo Albums
Link To Their Instagram

seagull
Doll Oracle
Doll Oracle
Posts: 8516
Joined: Wed Jun 12, 2019 4:06 am
Location: Down Under
Contact:

Re: Sephonia goes under the knife (Finger replacement + vari

Post by seagull »

Mau5:
Dr Nick was definitely not at the forefront of my mind when posting 8O

The repair work in sealing up the incision gets me tipping my hat to you :thumbs_up:

User avatar
Mr_Fix_it
Doll Elder
Doll Elder
Posts: 3039
Joined: Sun Jan 29, 2017 4:36 am
Location: Over the Horizon turn left and about half way up the hill
Contact:

Re: Sephonia goes under the knife (Finger replacement + vari

Post by Mr_Fix_it »

Hi, I don't want to rain on anyone's parade, But,,, Correct me if I'm wrong... I was under the impression that there is a fairly high concentration of silicone in multi filament wire insulation.
To facilitate the high temperature rating of said wire.
If my suspicions are correct, then that might (in part) explain the TPE degradation as noted in one of Arthur1960's posts.
As I said I'm not here to piss in anyone's cornflakes... Just putting it out there.
Cheers.

User avatar
Mau5
Senior Member
Senior Member
Posts: 427
Joined: Sat Oct 19, 2019 9:20 pm
Location: Ontario, Canada
Contact:

Re: Sephonia goes under the knife (Finger replacement + vari

Post by Mau5 »

Arthur1960 wrote:Hi again, great work, the repair looks impressive and I'm glad I was able to help a bit with my work last year. I like some of the different things you have done and the way you inserted the new wires looks to have been a little less traumatic than the way I did it! One thing I will say, after doing this a few times is that you have to be careful not to use too much oil on the fingers and in fact most of the hand. Of course you need to use it for preparation and when smoothing with heat etc but it's a good idea to use it sparingly and wipe away excess where possible. As the tpe is at its thinnest on the hand and fingers it can weaken significantly if over oiled, after doing the work you can improve things by powdering the area well and maybe slipping some cotton or lace gloves on the hand for a while. I've found that with care the tpe can recover but there does come a point when it's structure just looses integrity and will become too soft. I've seen others post about this in recent months so I now avoid oiling the hands just dab a tiny bit of vaseline in-between fingers now and then. Thanks for posting the pics as these help so much when folk are planning to do this themselves, Cheers!
Thank you, sir. My pleasure to post pics et all, "If it saves just one doll" :wink: :lol: I appreciate the tip about over-oiling, would hate to have gone through all this just to ruin the TPE. All said and done I will later post a review of my work detailing what I liked about it, what I didn't, and what I'd do differently if I had to do it again.
Jimmy_71 wrote:Very impressive Mau5. :thumbs_up: :thumbs_up:

I bookmarked this thread, as I need to do this to my Alyssa one of these days.
Thanks Jimmy, I'll need to catch up on your Alyssa thread. If you do half as good at surgery as you do photography, Alyssa will be just fine :thumbs_up:
seagull wrote:Mau5:
Dr Nick was definitely not at the forefront of my mind when posting 8O

The repair work in sealing up the incision gets me tipping my hat to you :thumbs_up:
Aww shucks... :oops: I ain't never done this before. No worries man, I'm new here and just didn't have any context for the comment. I was part thinking "Have there been a bunch of newbs that posted about how they wrecked their dolls, and it's like 'oh, here's another "surgeon"'. Then on the other hand, to receive praises before the job is even finished and I've got no history of repair work, kinda like, well, a tad premature. I wasn't professing myself to be a doll surgeon going into this, just showing what I'm doing is all. Dr. Nick was my attempt to bring some humour into the thread, this whole operation has been weighing heavy on my heart. Funny enough, I somewhat resemble Dr. Nick, what with the wispy moustache, goatee, and medium hair 8) I kinda liked this meme for the theme of this project, too :lol:
:)
:)
Dr Nick Ad.jpg (102.46 KiB) Viewed 1670 times
Mr_Fix_it wrote:Hi, I don't want to rain on anyone's parade, But,,, Correct me if I'm wrong... I was under the impression that there is a fairly high concentration of silicone in multi filament wire insulation.
To facilitate the high temperature rating of said wire.
If my suspicions are correct, then that might (in part) explain the TPE degradation as noted in one of Arthur1960's posts.
As I said I'm not here to piss in anyone's cornflakes... Just putting it out there.
Cheers.
Speaking as a Journeyman Electrician who started in the trade 15 years ago, silicone in wire insulation is not common. One might only see that in specialty applications such as industrial machine wiring in a forge. Temp ratings of typical wire are 75-90C, and are jacketed with PVC or nylon, usually. The stuff I used was rated to 85C. That's really not that high of a rating, think about silicone oven mitts where you could be handling something that is over 200 C. Silicone would suck as a wire jacket, it is very "tacky" and "delicate". It'd get torn to bits being pulled through conduit on the job.

A little blurb from wikipedia:
Electrical wires may be insulated with polyethylene, crosslinked polyethylene (either through electron beam processing or chemical crosslinking), PVC, Kapton, rubber-like polymers, oil impregnated paper, Teflon, silicone, or modified ethylene tetrafluoroethylene (ETFE)

Tonight had me sealing up the right hand. Using my gut feeling after working on the left hand, I blended in two strips of TPE filler about the size pictured sitting on her palm into the bottom of the incision. I then only needed a very thin 3rd strip to level off the top of the bond.
Filler
Filler
IMG_8423.jpg (1.43 MiB) Viewed 1670 times
How it looked after the first pass through with the soldering iron, but that's not good enough.
First Pass
First Pass
IMG_8425.jpg (1.44 MiB) Viewed 1670 times
Alright, got that blended out about as well as the iron will do
Blended
Blended
IMG_8426.jpg (1.55 MiB) Viewed 1670 times
\

I then utilized the hot spoon method to smooth out the work area, and then retextured with sand paper (220 grit) after heating the area with the hot air gun on my workstation set to 135. Powder application reveals a little kind of "skin tag" in the middle of the palm. I can deal with that later.
Powdered after schmooothing
IMG_8427.jpg (1.55 MiB) Viewed 1670 times
Did the same to the left hand, powder reveals what appears as a "scratch" at the edge of where the spoon smoothed out to, in line horizontally with the pinky. That could possibly come away with mineral oil on a Q-tip gently rubbed/rotated on it. Again, I can deal with that later. As an aside, I have a family member arriving tomorrow and staying for a week, so after all this... I have to clean everything up and put Sephonia away :|
Left hand Schmoooth
Left hand Schmoooth
IMG_8428.jpg (1.45 MiB) Viewed 1670 times
As I was powdering her hands, her eyes fluttered open as the anesthesia wore off.

Sephonia: Mau5, I feel funny... down there (pointing to her crotch)

Mau5: Well, I just fixed you up. Must be the anesthetic wearing off.

Sephonia: No, it's different.

Mau5: Well, it looked like you'd given birth 1000 times so I patched you up.

Sephonia: *giggles* Not what I'm talking about. I don't know what was in that anesthetic, but I am HORNY! You need to take care of me, RIGHT NOW!

Mau5: Hun, I've been taking care of you all week, surely you need some rest after what you'e just been thr...

*Mau5 gets cut off mid-sentence as Sephonia plants a sloppy wet kiss on his lips*

*grinning* Mau5: Well, I think I know just how to take care of you now :twisted:

Sephonia thinks her nipple job was OK, and gives a *thumbs up* to her hand repair :glou:
Seph Approves
Seph Approves
IMG_8429.jpg (1.59 MiB) Viewed 1670 times

User avatar
bigchilli
TDF Staff Alumni
TDF Staff Alumni
Posts: 8381
Joined: Sat Mar 24, 2012 7:40 pm
Location: Bonnie Scotland
Contact:

Re: Sephonia goes under the knife (Finger replacement + vari

Post by bigchilli »

Awesome work
Loved the finger wire idea
I replaced all Mia's finger wires but the replacements quickly snapped again
Not sure if I missed it but what gauge wire did you use?

User avatar
Mau5
Senior Member
Senior Member
Posts: 427
Joined: Sat Oct 19, 2019 9:20 pm
Location: Ontario, Canada
Contact:

Re: Sephonia goes under the knife (Finger replacement + vari

Post by Mau5 »

Hey bigchilli, it was 12ga stranded wire. White insulation might be a better idea, the TPE in the fingers/hands is so thin that the black wire shows through a little.

OK, time to do a little self-review. As I just mentioned, the colour of wire insulation used should be given some consideration as it can show through the fingers/hands. I had the wire already as I used it on my motorcycle, and I'm thrifty by nature :)

I was going to cap the wires with some heat-shrink tubing. I thought I had some, but I couldn't find where I'd put it. In my haste to wrap up the project and put things away before my visitor arrived, I went without caps. I stretched the wire insulation a little so that the wire strands were slightly recessed at the tip. The open end made running the wires down the fingers a little more difficult than it should have been, and increased the risk of poke-through. I would definitely cap the wires next time. I like Arthur's wire cap idea, but rather than fit the cap over the wire insulation, I'd size it to the copper and strip off a little insulation at the wire tip so the cap covers the copper and is as flush as possible to the insulation.

For incision sealing, a few filler strips of TPE added to the bottom of the cut is necessary as the incision will crater if using the heat method of bonding. I'm quite pleased with the final finish after smoothing.

The stranded copper wire can be posed, but expect to over-bend and have it spring back to the desired position. Finger TPE can get a little twisted since it is no longer bonded to the wire, but that is easily straightened out. Just exercise due care when handling the fingers.

The TPE work was the most daunting aspect of the job for me, as it was a new skill to learn. I recommend acquiring a sample piece from your vendor to learn on before working on your doll. It's not too difficult, but you do need to get some "experience" with how the TPE reacts to the tools/heat. Once you feel comfortable working on the sample piece, try it on a less visible area of your doll that needs repairs. I have standing feet that had some tears around the foot pegs, so I practiced there first.

The first cut is the most difficult, there is no turning back once you do it, you are committed. I understand the anxiety that comes along with doing something like this for the first time, wondering if your doll will ever be OK again. Try to relax and take things a step at a time. Walk away for a bit if a certain task is causing frustration. It's better to come back fresh and relaxed than to make a mistake out of haste. I don't know if others have felt the same, but after I finished the final smoothing an incredible feeling of relief washed over me and I was smiling, she was back :) It is so worth everything involved to do this for your girl.

Post Reply

INFORMATIONS