help! how do I use the repair kit
I just got a 2nd hand 4woods, Natsuki face. She is about one year old and in very good condition. I think the previous owner did not use her much.
She is such a beauty!!! But I do not need to tell you
So there is a little trouble. Actually under her shoulders there are little cracks. You do not see them unless you lift her arms. But I am afraid that it will get worse.
Now I got the entire repair kit with her .. but no instruction manual. The stuff looks like a basic chemistry kit and I have no idea how to proceed. Can someone please give me an advice what I should do to fix that. Can it even be fixed? Or will it rip open again when her arm is lifted.
Thank you,
bob
p.s. since the skeleton does not allow movements that exceed a certain range I wonder how this happened. Is is a problem with 4woods dolls?
- Attachments
-
- right side only on the surface
- repair2.jpg (18.55 KiB) Viewed 4184 times
-
- left side is quite deep
- repair1.jpg (20.59 KiB) Viewed 4184 times
Re: help! how do I use the repair kit
thank you again!
- Attachments
-
- glue.jpg (33.78 KiB) Viewed 4182 times
Re: help! how do I use the repair kit
I have no experience with the 4Woods repair kit, but I do have a suggestion. PM a mod to move this thread to the Repair and Maintenance forum. Someone over there can provide the advice you need. You might be able to find your answer by searching through that forum. Good luck.
Cheers,
r4m
- Everhard
- ~ Member ~
- Posts: 6115
- Joined: Thu Jul 19, 2001 12:00 am
- Location: Stepford-on-Sea, England
Re: help! how do I use the repair kit
However, it might be best to send a carefully worded and short email to 4woods asking for advice.
(I have not yet needed to repair Laura.)
Re: help! how do I use the repair kit
BFbob i will have it moved for you
sorry about that damage, but i have seen wonderfull repair done here
so lets get you some help
fair seas
- Mechwizard
- Doll Elder
- Posts: 2015
- Joined: Wed Jan 09, 2008 12:00 am
- Location: Australia
- Contact:
Re: help! how do I use the repair kit
This type of damage occurs when parts are pushed together and left for some time, the silicone compresses and then holds that position so when the parts are moved apart a tear is formed. Tin RDs keep best if they are hung with legs and arms apart, as close as possible to the molded position.
You are right in that if left alone these tears will get worse. They need attention. Hold the tears open and fill with new silicone. Ev's mix ratio may be right but it would be best to check with the maker. Tin silicone I work with is mixed 10% by weight of catalyst to the mix, so 18 grams of silicone is mixed with 2 grams of catalyst. Mixing with a higher ratio of cat will only cure the mix faster, it won't mean its harder. However none of this applies if your doll is made from platinum cure. Also you cannot use platinum silicone on a tin silicone doll, it just won't cure at all.
If you can confirm whether or not she is tin or plat cure then we can go the next step.
- Erika
- Doll
- Posts: 2438
- Joined: Sat Dec 06, 2008 12:00 am
- Location: I'm a satellite, I revolve around EBF
- Contact:
Re: help! how do I use the repair kit
There's two small bottles and one container.
The container has the silicone.
The small bottle with C on it has the primer.
The bottle with B on it has the hardener.
Add hardener to the silicone. Mixing ratio is 100:1 (100 drops of silicone, 1 drop of hardener). You might want to put a small amount of the silicone in a flat-bottomed container. Then add some hardener, using the syringe of the repair kit. Stir it to get it evenly mixed. Uneven mixing might cause hardening failure. If you added too much hardener, hardening will occur too early, and also detoration might occur.
Apply primer to the part that needs fixing. White awhile for the primer to dry (manual doesn't say how long. I guess about 10 minutes will be fine?).
Apply the silicone with a flat spatula-like object. Silicone should be added in excess. The excess amount should be removed with the spatula.
We had another sister Annika, her album also has a lot of pics of me.
- Everhard
- ~ Member ~
- Posts: 6115
- Joined: Thu Jul 19, 2001 12:00 am
- Location: Stepford-on-Sea, England
Re: help! how do I use the repair kit
I assume my doll is tin cure because she was made in 2007. However, I have no hard information about that.Mechwizard wrote:Perhaps Everhard can confirm if these dolls are made of tin cure?
Strange thing is, Laura sits with her arms at her sides in a natural position; not spread out like a Realdoll in 'neutral' (hanging up) position. Yet she has suffered no compression damage at all. She is made of a firmer silicone rubber than most of my Realdolls. BFbob's doll is newer than Laura, so I guess she might be made of a softer silicone.
I looked more closely and I see Erika is correct: One of the two small bottles is marked B and the other is marked C.Erika wrote:(From my user manual)
There's two small bottles and one container.
The container has the silicone.
The small bottle with C on it has the primer.
The bottle with B on it has the hardener.
In my repair kit, it is more of a pipette than a syringe: Made of transparent/translucent plastic.Erika wrote:Then add some hardener, using the syringe of the repair kit.
Thanks for the info, Erika. I have written it down on paper and put it with the repair kit. (If I had any original instructions, I have mislaid them.)
Re: help! how do I use the repair kit
thank you all so much for your information. I tried around a bit and in fact the arms lift up quite far making the silicon really streched. Maybe her previous owner did not treat her carefully and that is how the rip appeared. It is really the only spot where she has damages.
In the repair kit I got one cup with a colored liquid makred with A ... I guess that is the silicone. Then there are two small bottles marked B and C. Tere is very little in them. Like 1cm maximum. Finally there is a small cup with a white powder with no label. Not sure what that is.
And there is glue as well. Speaking about glue. To me it looks like the previous owner has tried to fix it with the glue. Should I remove it? And if so, how?
I am really happy for getting so much feedback. I was so surprised. Thank you all again.
bfbob
- Everhard
- ~ Member ~
- Posts: 6115
- Joined: Thu Jul 19, 2001 12:00 am
- Location: Stepford-on-Sea, England
Re: help! how do I use the repair kit
As per Erika's info, you only need one percent hardner (B) to mix with the liquid silicone. The primer (C) likely goes a long way too (a guess).BFbob wrote:Then there are two small bottles marked B and C. Tere is very little in them. Like 1cm maximum.
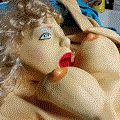
Actually, looking at the photos, another thing occurs to me. The underarm damage appears to be straight-forward tearing (although jagged). The way I would fix those is with adhesive. (Save the two-part for true external repairs.) In other words, carefully clean out the tear (I use dilute washing up liquid but others reccommend acetone or rubbing alcohol) and let dry. Apply adhesive thinly to the surfaces to be joined, close the joint (lower the arm) and wipe away any excess that squeezes out of the crack. When the advesive has hardened (overnight), you should have an almost invisible and strong repair. (I have successfully done that on underarm tearing on at least one of my Realdolls.)
For the pit I see in one of the photos, I think you need to fill it with two-part silicone because it looks like it is not a simple case of tearing. It is also in a more visible place than the underarm tearing, so the tinted two-part is essential for an invisible repair.
Not sure. However, if you do, do it carefully.BFbob wrote:To me it looks like the previous owner has tried to fix it with the glue. Should I remove it? And if so, how?
Corn starch powder. (Another guess, but it feels exactly like Johnson's Baby Powder, but without any odour.) It is for powdering the doll so her skin feels realistically frictionless to the touch. (Buy plenty more...)BFbob wrote:Finally there is a small cup with a white powder with no label. Not sure what that is.
- Erika
- Doll
- Posts: 2438
- Joined: Sat Dec 06, 2008 12:00 am
- Location: I'm a satellite, I revolve around EBF
- Contact:
Re: help! how do I use the repair kit
Primer should be applied with a brush onto the silicone which needs repair (so in this case in the tear). It makes sure the silicone/adhesive sticks to the silicone.Everhard wrote: As per Erika's info, you only need one percent hardner (B) to mix with the liquid silicone. The primer (C) likely goes a long way too (a guess).
You don't need much of it. And if it's not enough, you can always get some primer at a hardware store.
We had another sister Annika, her album also has a lot of pics of me.
Re: help! how do I use the repair kit
I finally decided to write to 4woods to ask for advice. I was very surpised to get a reply right away. HIROO OKAWA gave me very detailed instructions.
The method of repair :
1)Please wipe off the dirt of ARM PIT by ethanol
2)Please carry out wet compress to the portion (ARM PIT) which damaged the
brown bottle (C). The display of C is indicated on the lid of the brown
bottle.
3)Please apply Shin-etsu silicone (tube) to arm pit. Please hold as you
opened the arm about 30 degrees then.
4)Please neglect it as it is for about 5 hours.
5)Shin-etsu silicone (tube) has a sour smell. It stops however, generating
it immediately.
6)You must be cautious of the handling of her arm pit from now on.
That is how I proceeded and I am very happy with the result. The only thing that stays are marks of glue where the previous owner seems to have tried to fix it. I think if the silicon was skin color it would even be hard to spot.
I am very happy. Maybe these instructions can also help others with similar problems.
Thank you all again!
BFBob
- Attachments
-
- repair3.jpg (25.62 KiB) Viewed 4046 times