

JOINT ADJUSTMENTS ON A SILICONE DOLL: AN INTERVENTION REPORT
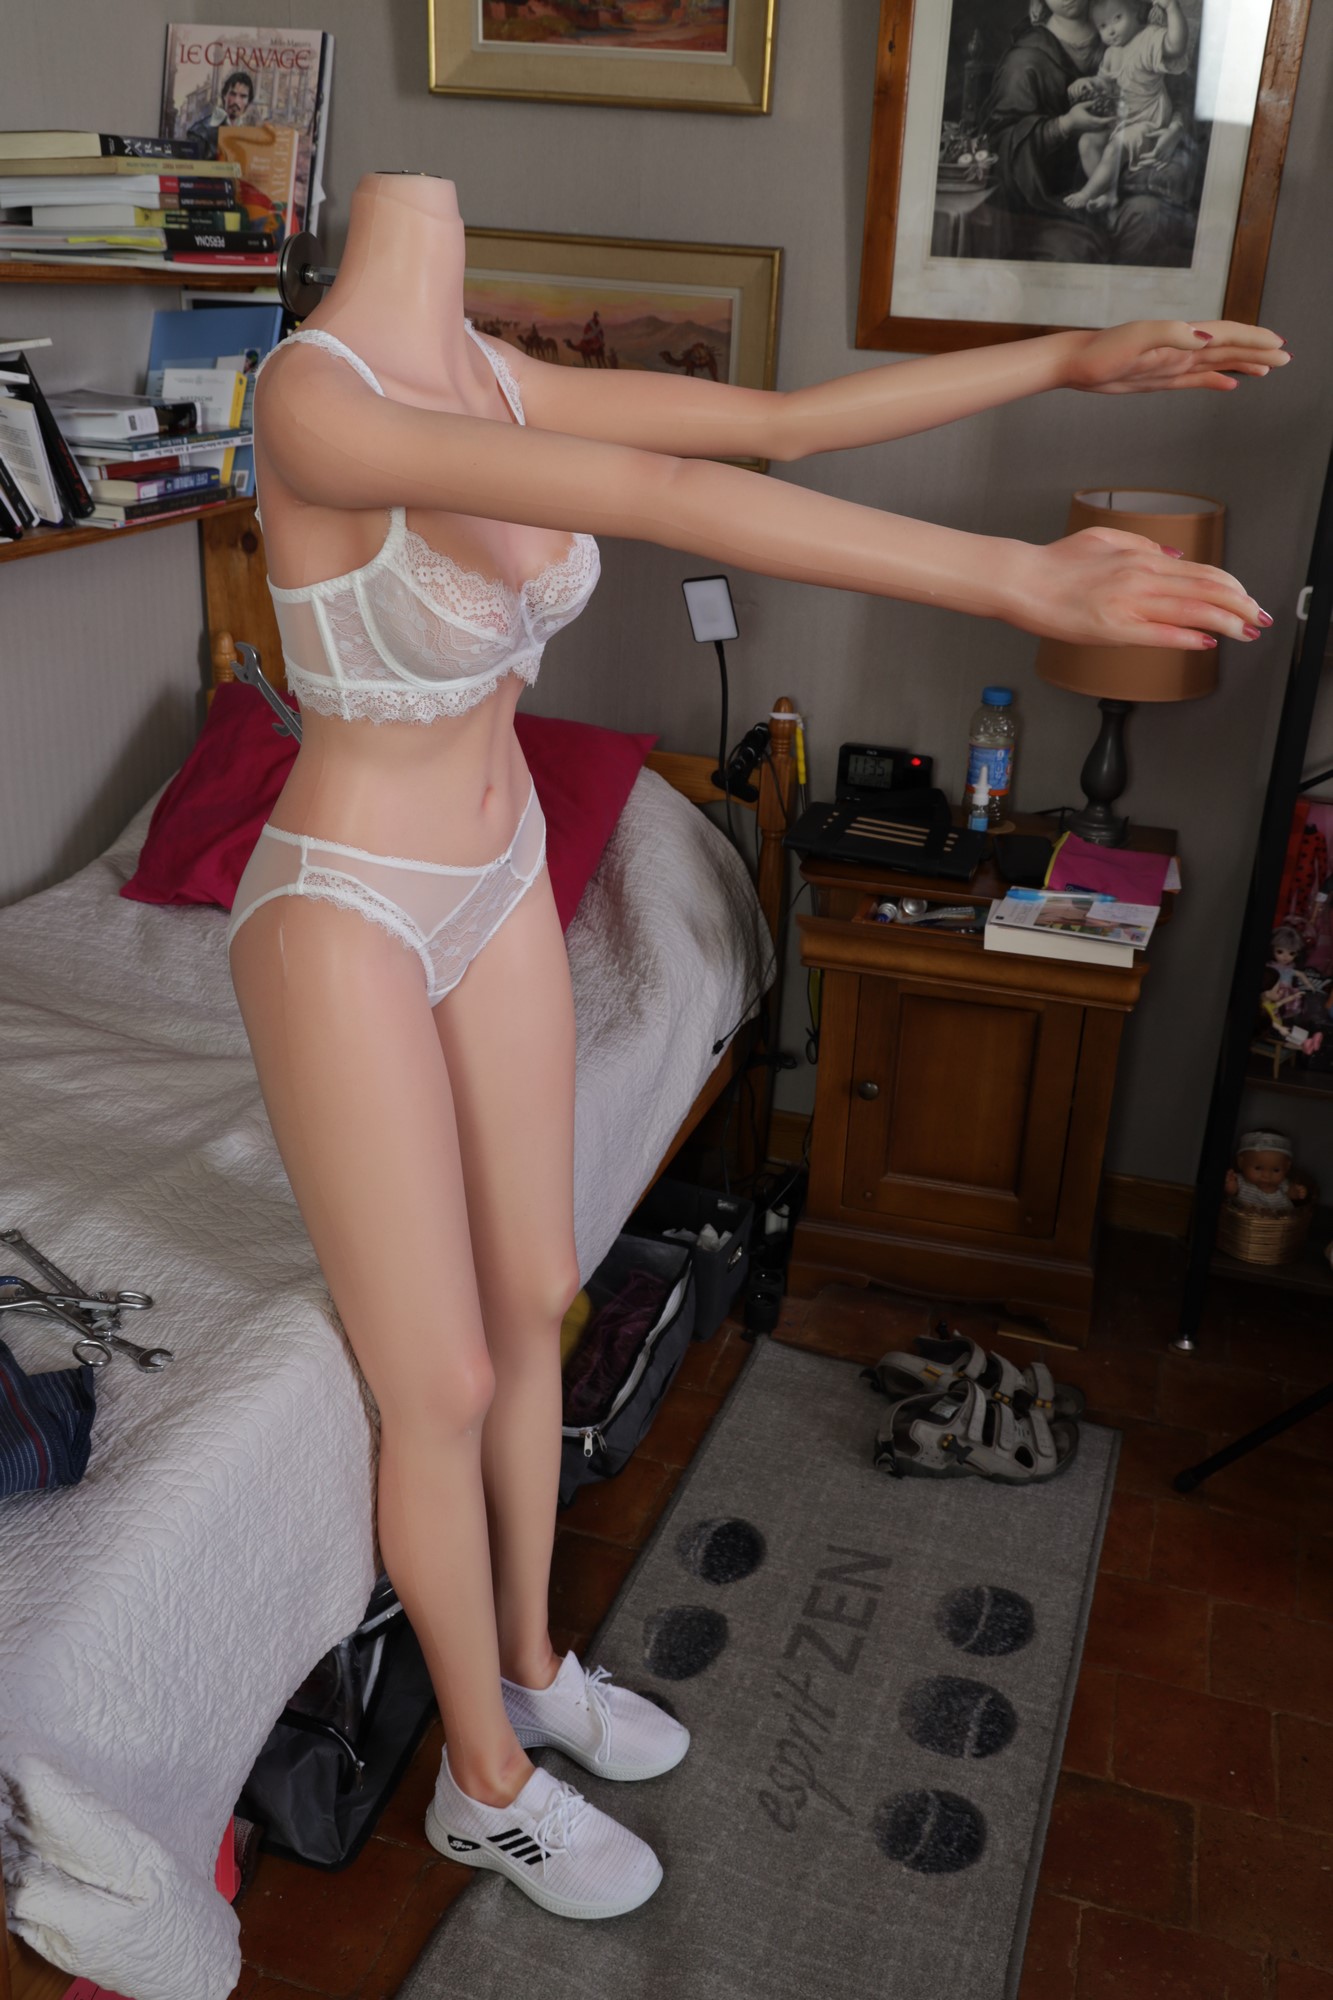
Following an intervention on Hadaly's first body (Xycolo 163 Organic silicon Small breast), I decided to write a report to share this experience and give a few pointers to those who would like to tackle the same type of project.
Background
When the Xycolo 163 SB OS body arrived in August 2021, I immediately noticed that the hips were very tight, on both sides. My first concern was not to force them too much when folding and unfolding. After a few months, a slight softening had occurred, but the hips remained hard and squeaky. This didn't stop me from having Hadaly do the poses, and I'd come to terms with this rigidity, telling myself that perhaps it was better than too much flexibility... Except that, over time, the back joint, which is solicited by every movement of the hips, began to loosen.
Here are the two videos made to show the manufacturer the problem:
- Video 1 : Hip movements, grinding, and stress on the lower dorsal hinge;
https://vimeo.com/849225733/46eac81329?share=copy
- Video 2 : The standing position had become dangerous, as the doll tended to tip forward, sometimes with delay...
https://vimeo.com/849227405/7ad82e3cd1?share=copy
It was this difficulty in holding a standing position that led me to consider and then decide to operate on this body, despite the risk of damaging it more or less severely, even though it was otherwise in perfect condition.
Information gathering
When questioned, the manufacturer confirmed that the back joint had to be tightened, without mentioning the hips. I told him I had my doubts about an operation limited to this joint. As the hips remained very rigid, there was a clear risk that the tightened back hinge would eventually loosen again, and in my opinion before long...
Here are photos and videos supplied by Xycolo, published here with his express permission :
https://vimeo.com/849227443/bdee55014a?share=copy
https://vimeo.com/849227475/b4da4e1f93?share=copy
After careful examination of these documents and a few additional exchanges, I decided to intervene on all three joints, by means of three incisions]. The reasons for this decision were:
- Keep incisions as short as possible. The one shown on the Xycolo documents, which allowed the dorsal skeleton to be reached from a single lateral incision, seemed very long (around twenty cm), and in my opinion difficult to close;
- In any case, I had to make at least one contralateral incision to loosen the hip on the side opposite the large incision;
- By proceeding in three stages, I reserved the possibility of suspending each stage of the operation if necessary, and proceeding to complete closure of each wound before moving on to the next.
Préparation
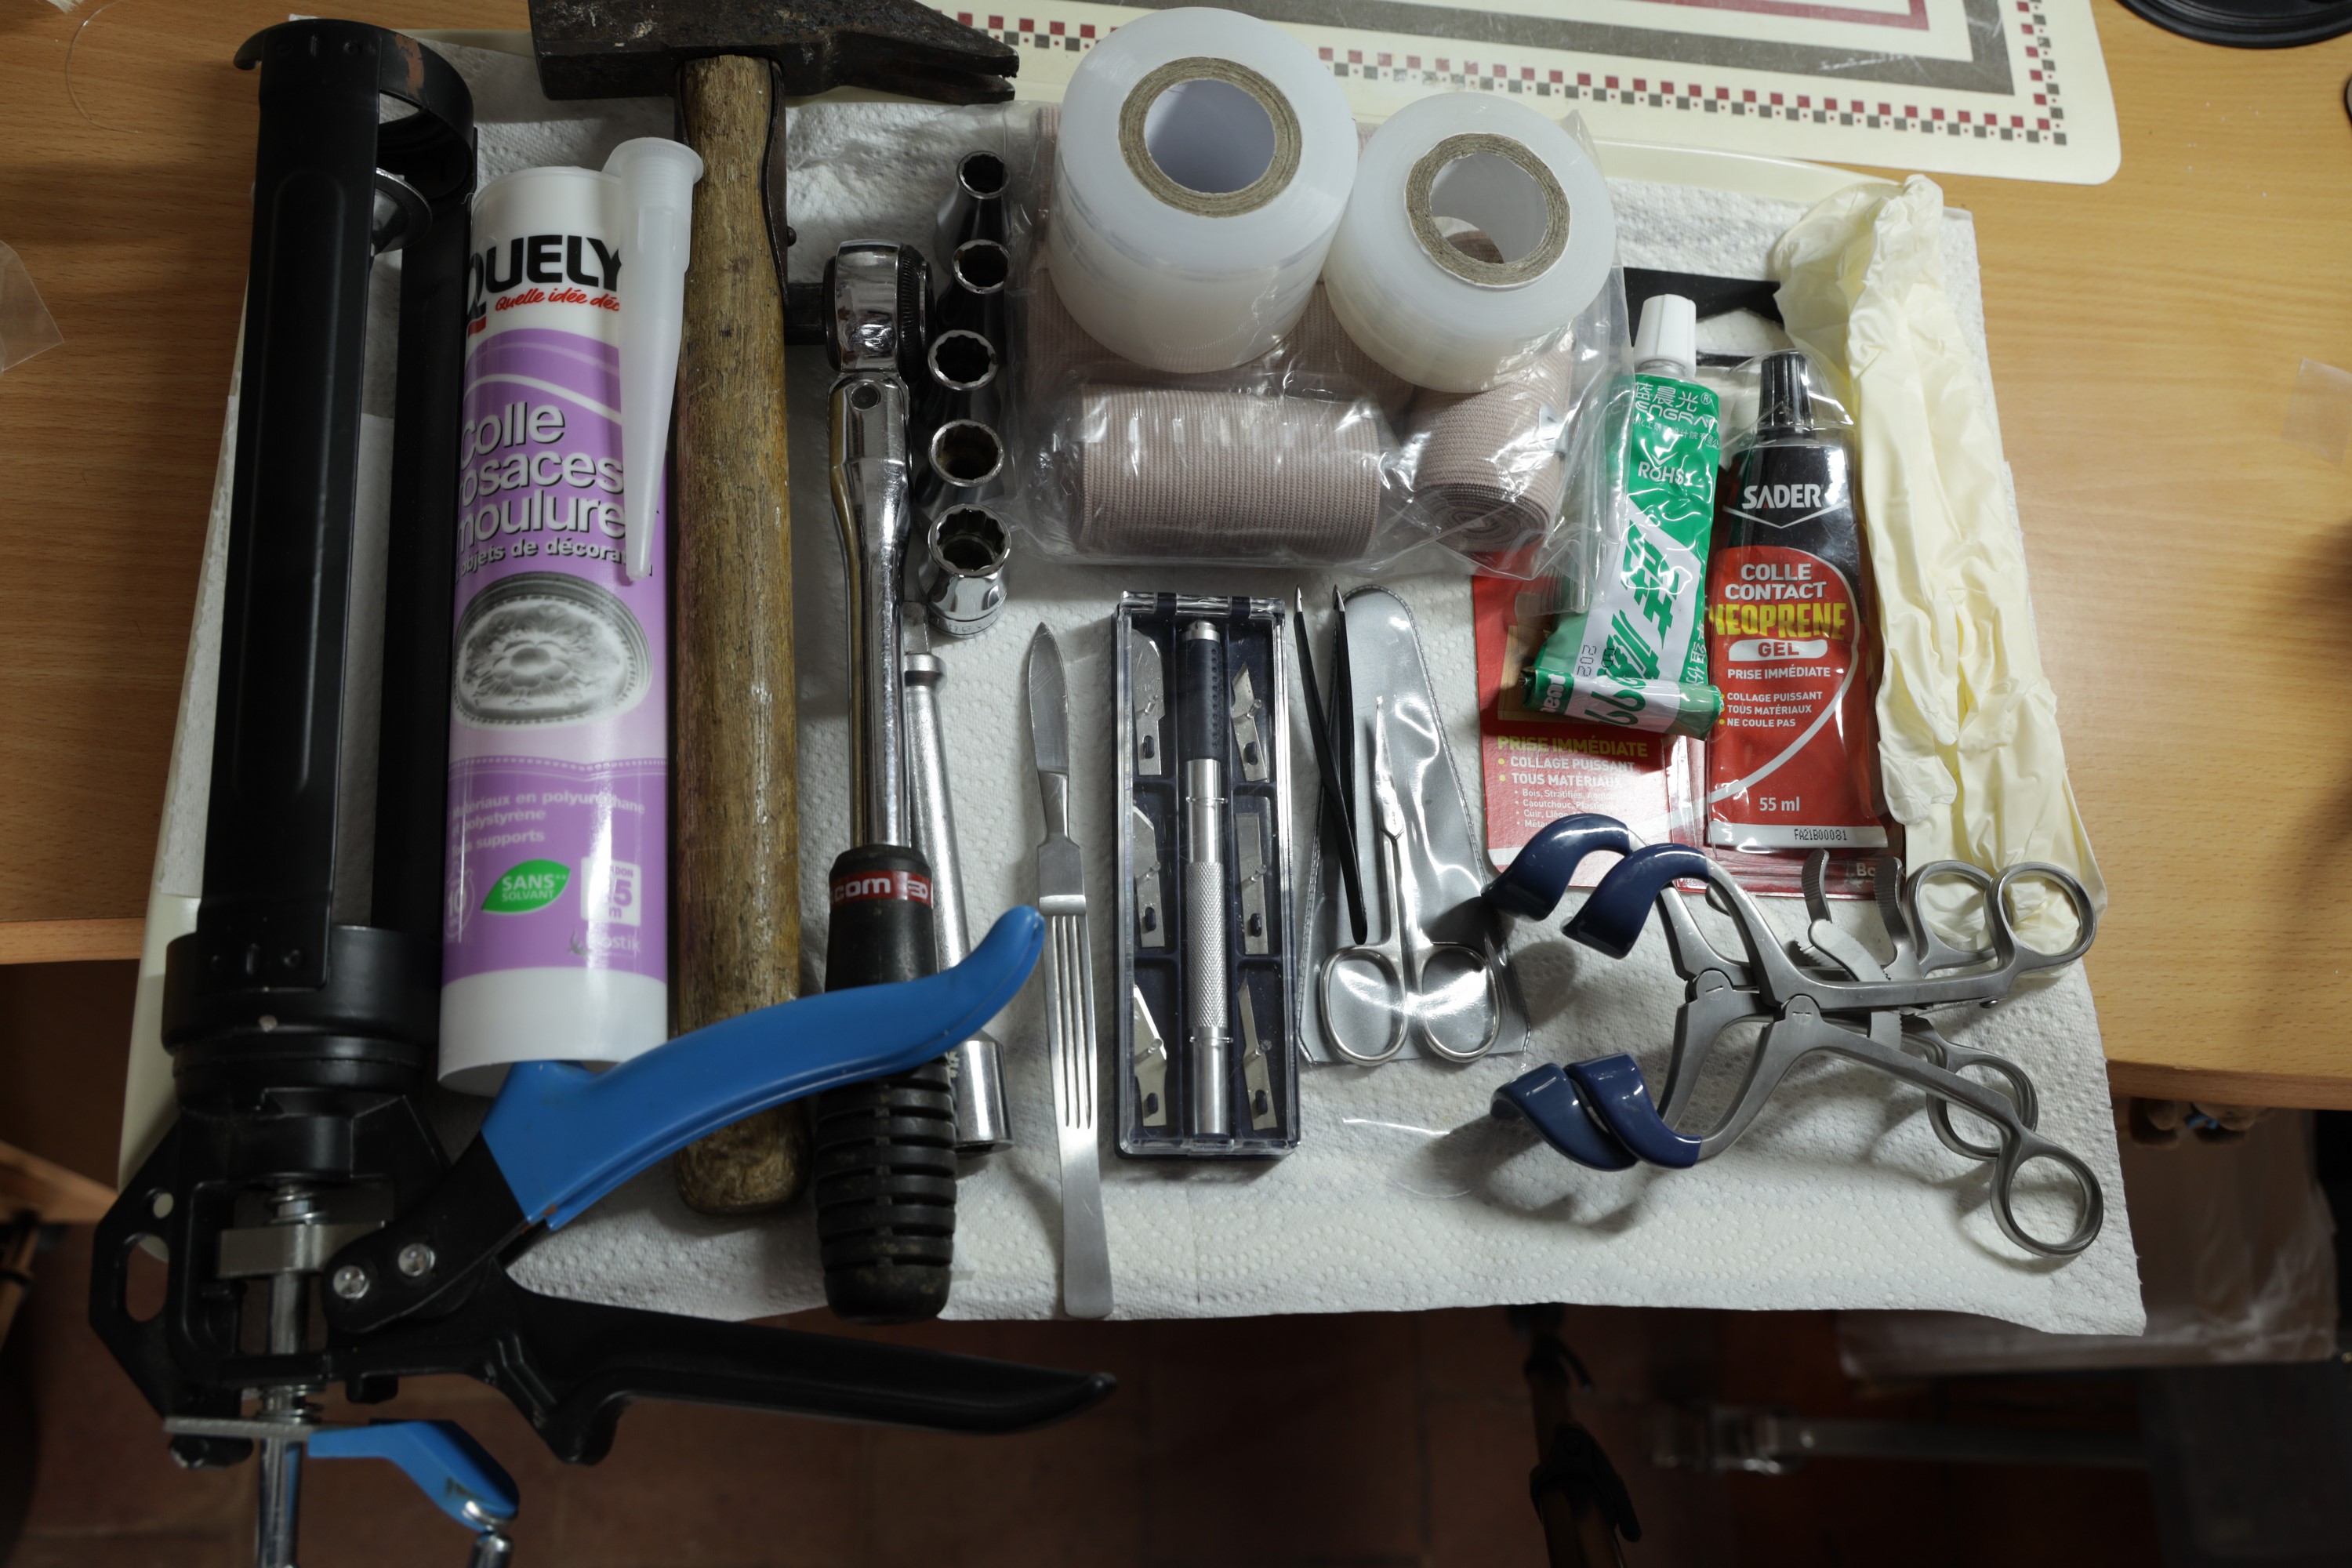
- Material preparation
At this point, I'll present the equipment originally planned. At the end, we'll see that the equipment we actually need is a little different and, above all, smaller.
A photo summarizes the equipment gathered on a tray:
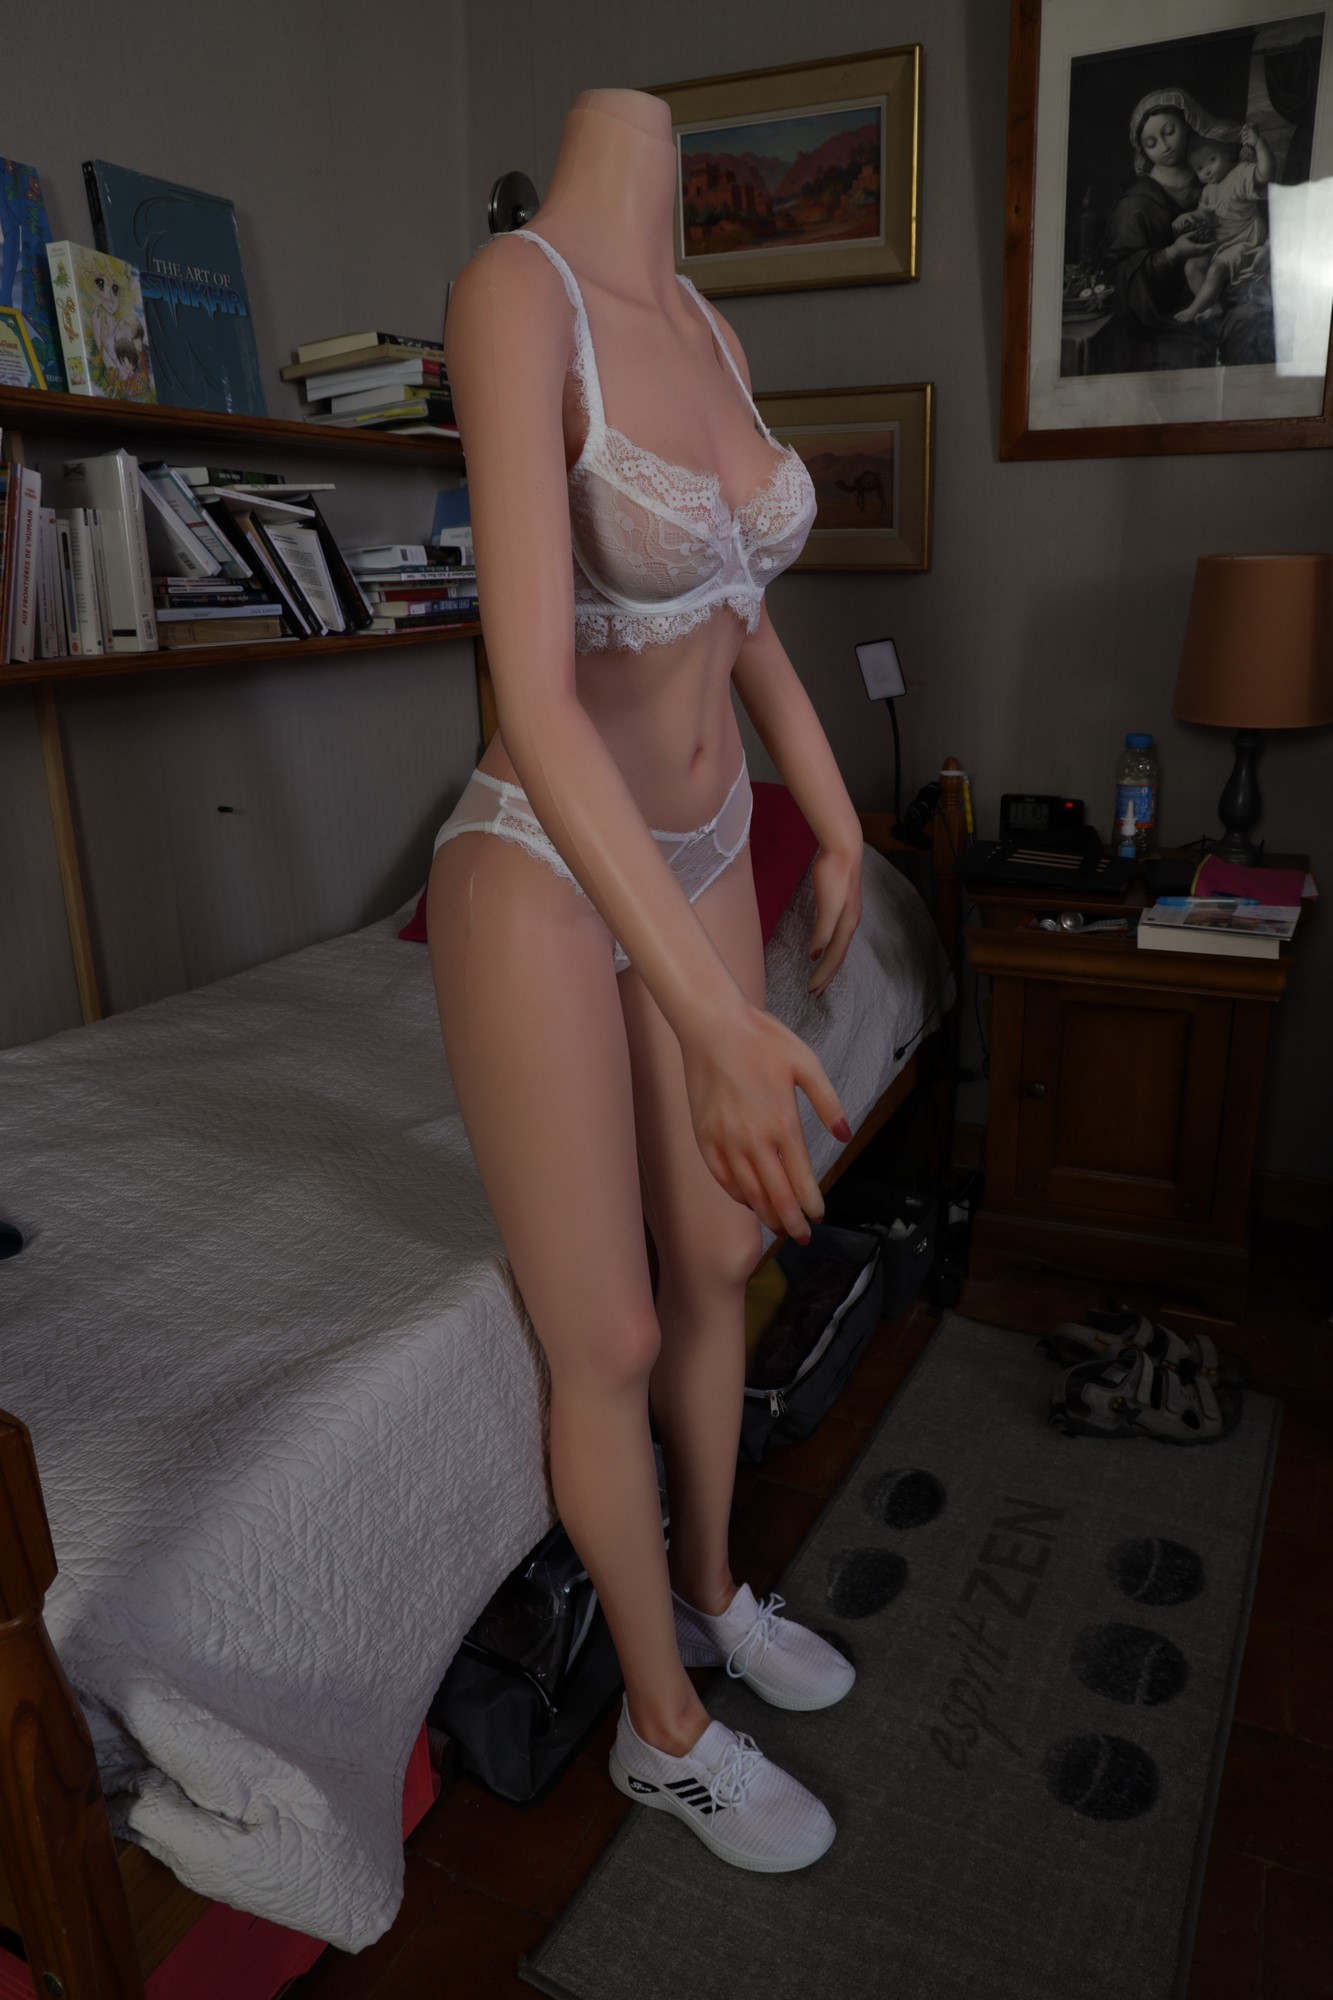
- Body positioning
I hesitated between the vertical and horizontal positions. I chose the former because of :
+ My comfort: this position allowed me to operate while seated on a swivel stool, without too much back strain;
+ the need to test hip and back movements during loosening. We shall see that this position was perfectly adapted to the hips, but that for the back I had to get the body into a complementary position to perfect the tightening;
+ The relative ease with which this position can be used to contain the wound after glue has been applied, using a plastic film, especially for the dorsal wound, as the whole pelvis has to be wrapped, which is virtually impossible when the doll is lying down.
However, I wanted to avoid the heavy lifting that would have been required with a fixed dollstand. So I used a motorized jack dollstand from Coeros.
Here's the body positioned for the left hip operation:
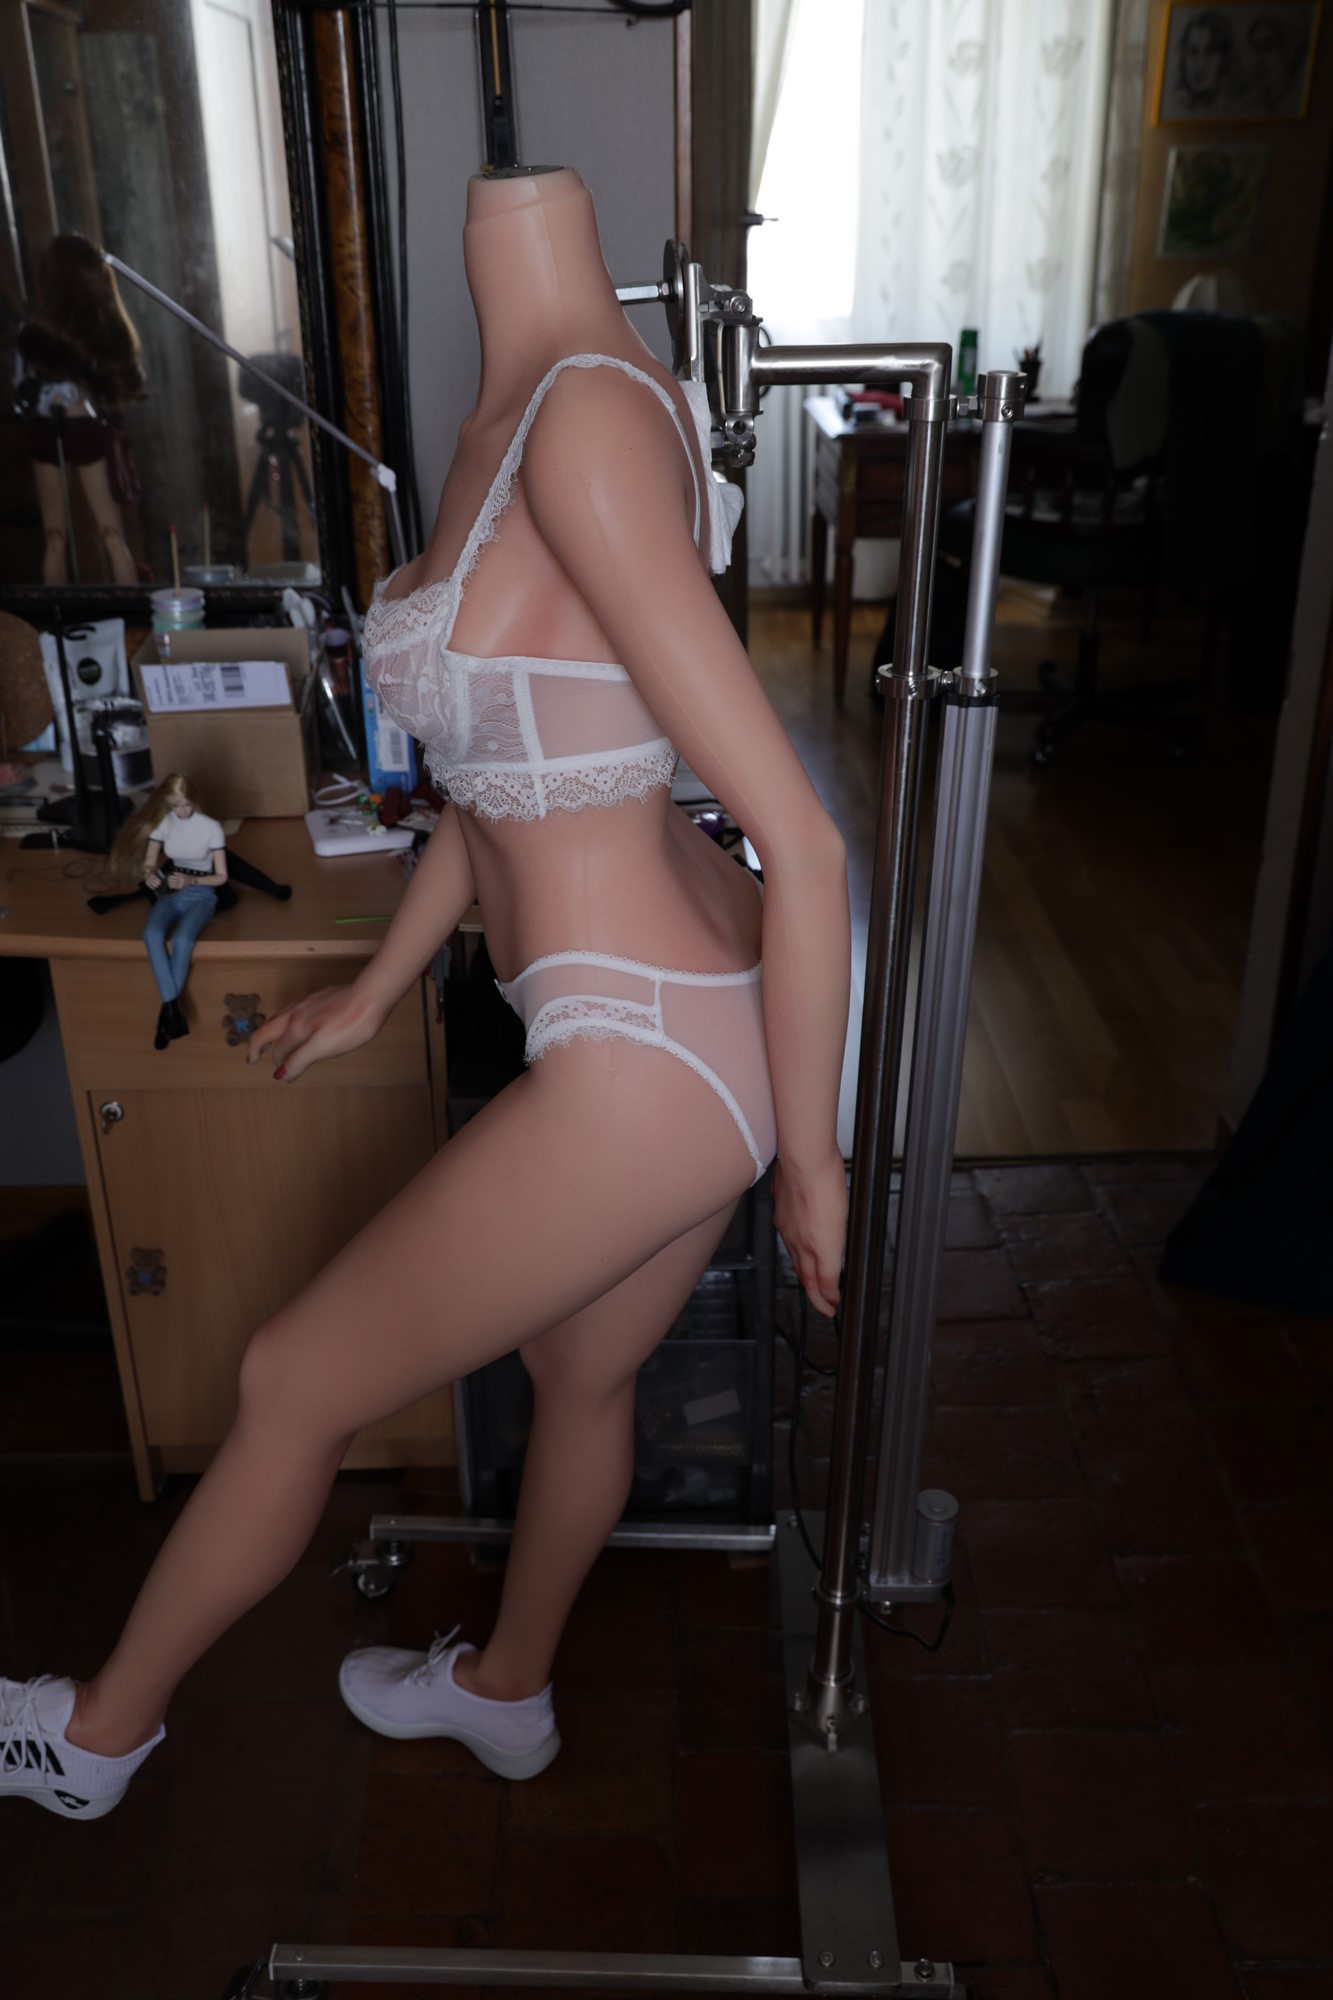
The second photo shows how the body is attached to the dollstand by means of the backhole on the body and a special part that fits into it.
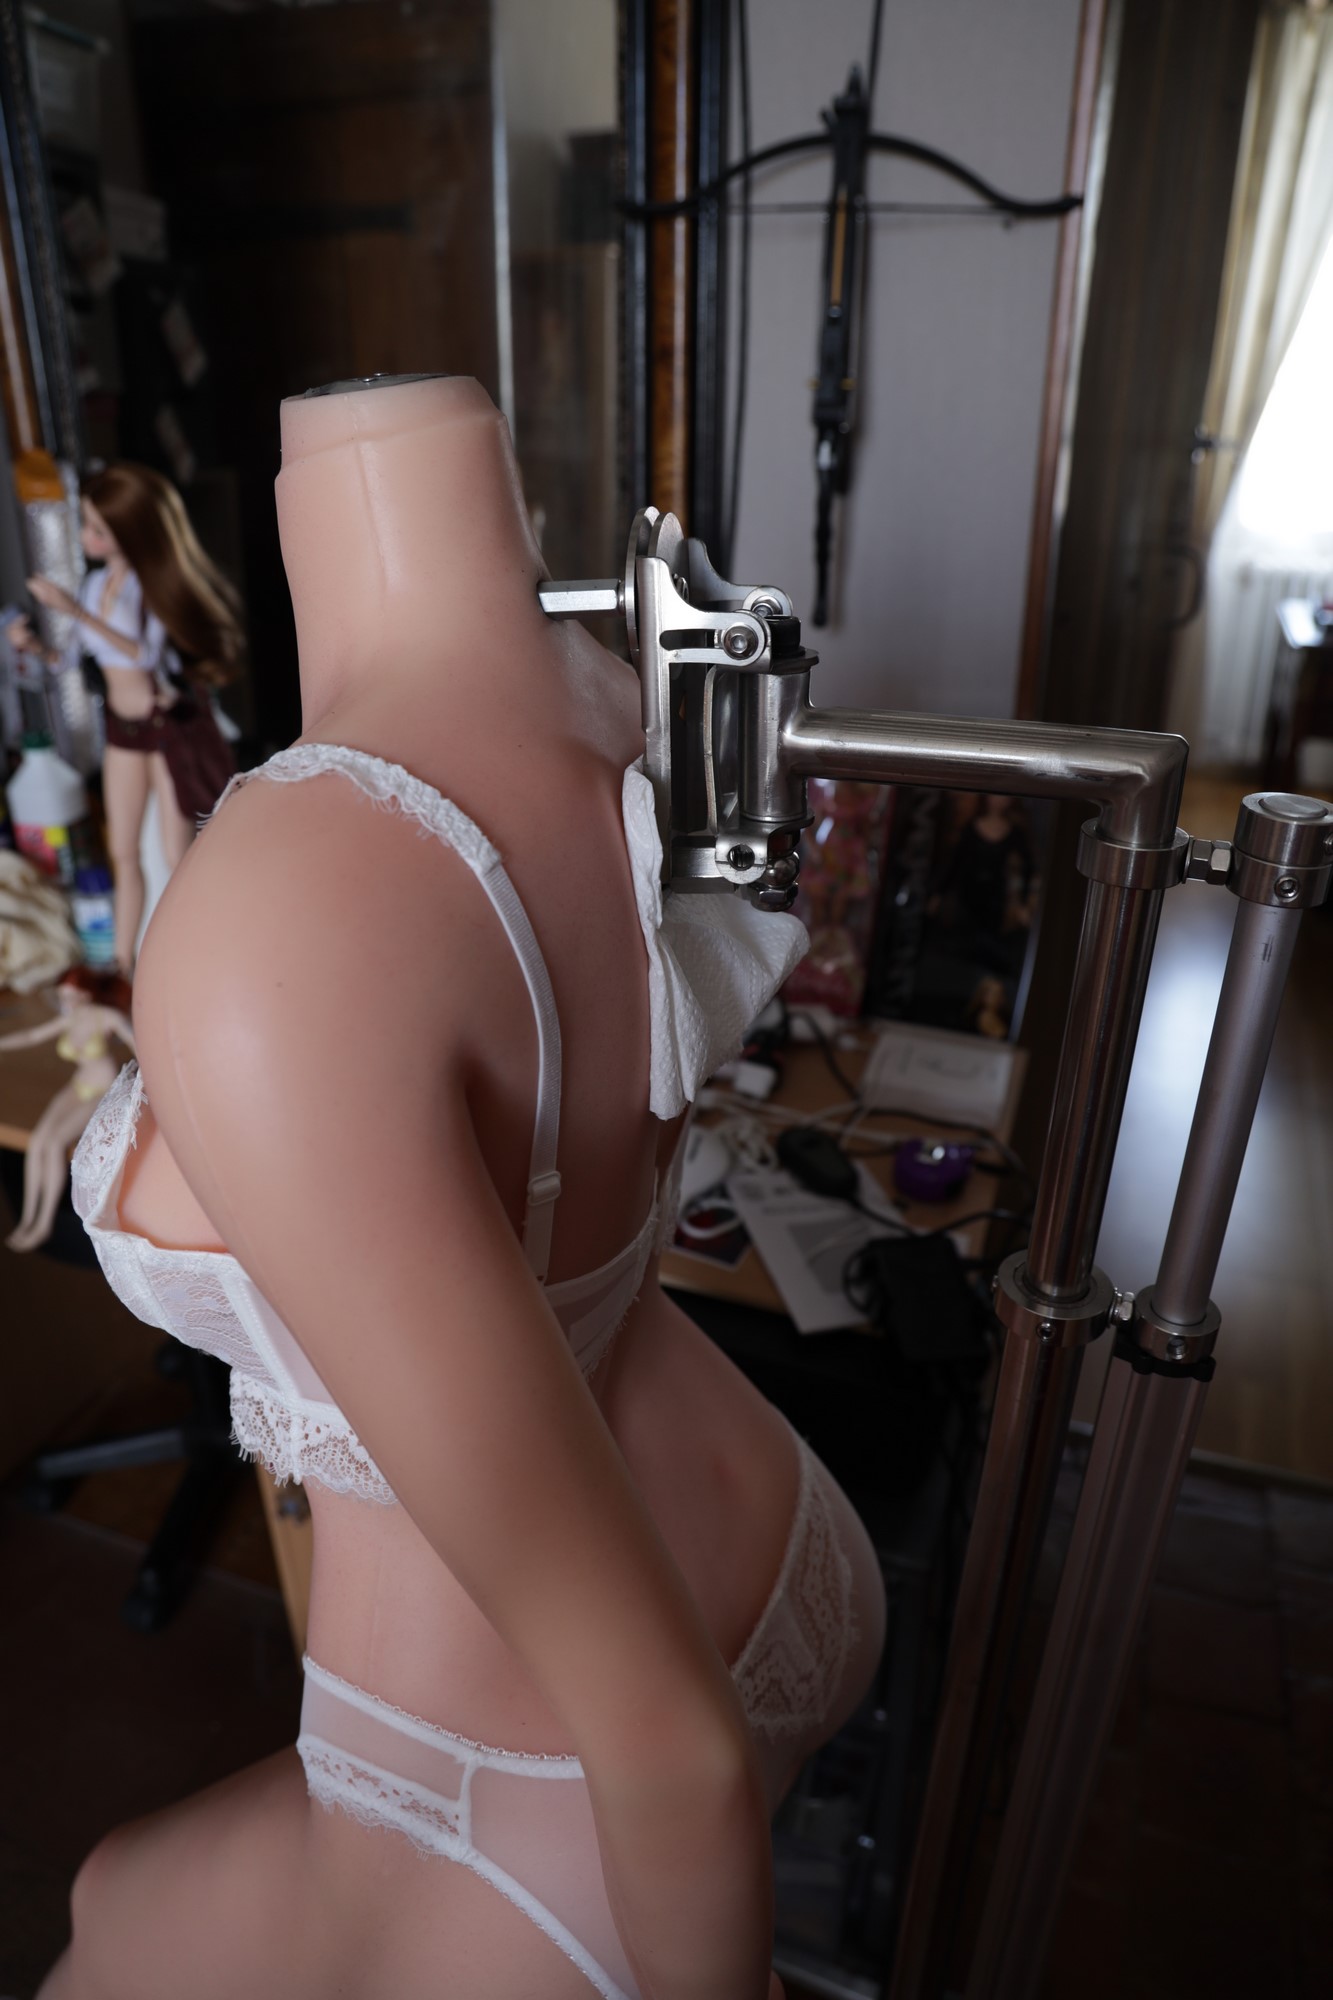
- Lighting
This is an important point. In addition to good ambient, solar or artificial lighting, you need at least two sources:
+ A sufficiently powerful fixed main light source positioned behind the operator, providing good illumination of the operating field. Here I used a 400w photo softbox,
+ A small independent led lamp with a fairly concentrated beam, to visualize the inside of wounds. Here I used a small Smallrig equipped with a focusing cone (also known as a "snoot").
This is the equipment I use for photo shooting. You can replace them with equivalents, such as a construction site spotlight or a powerful spotlight, and a flashlight with a concentrated beam.
Left hip surgery
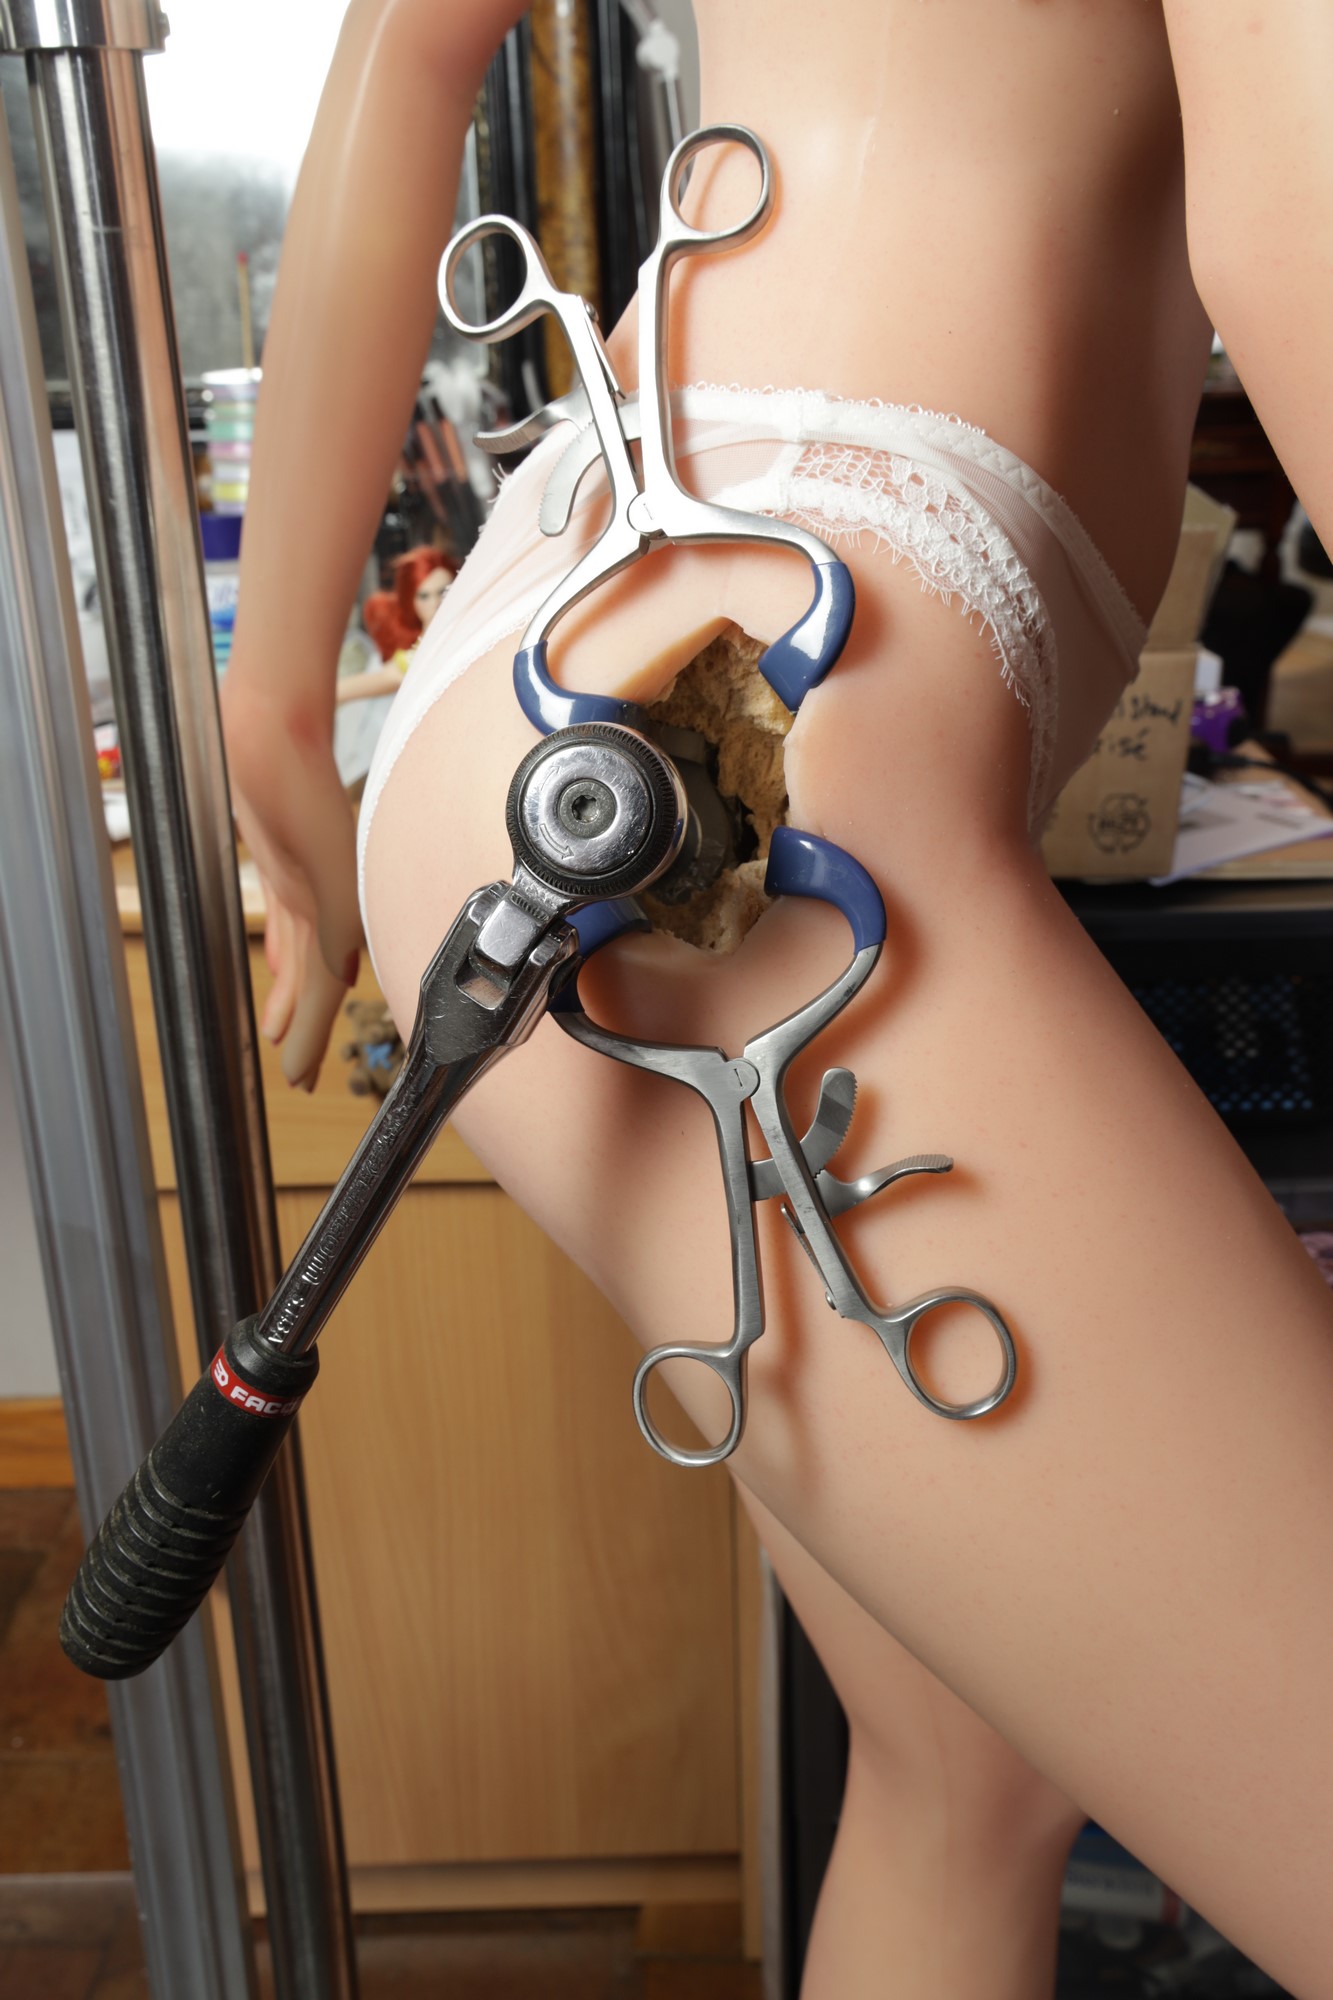
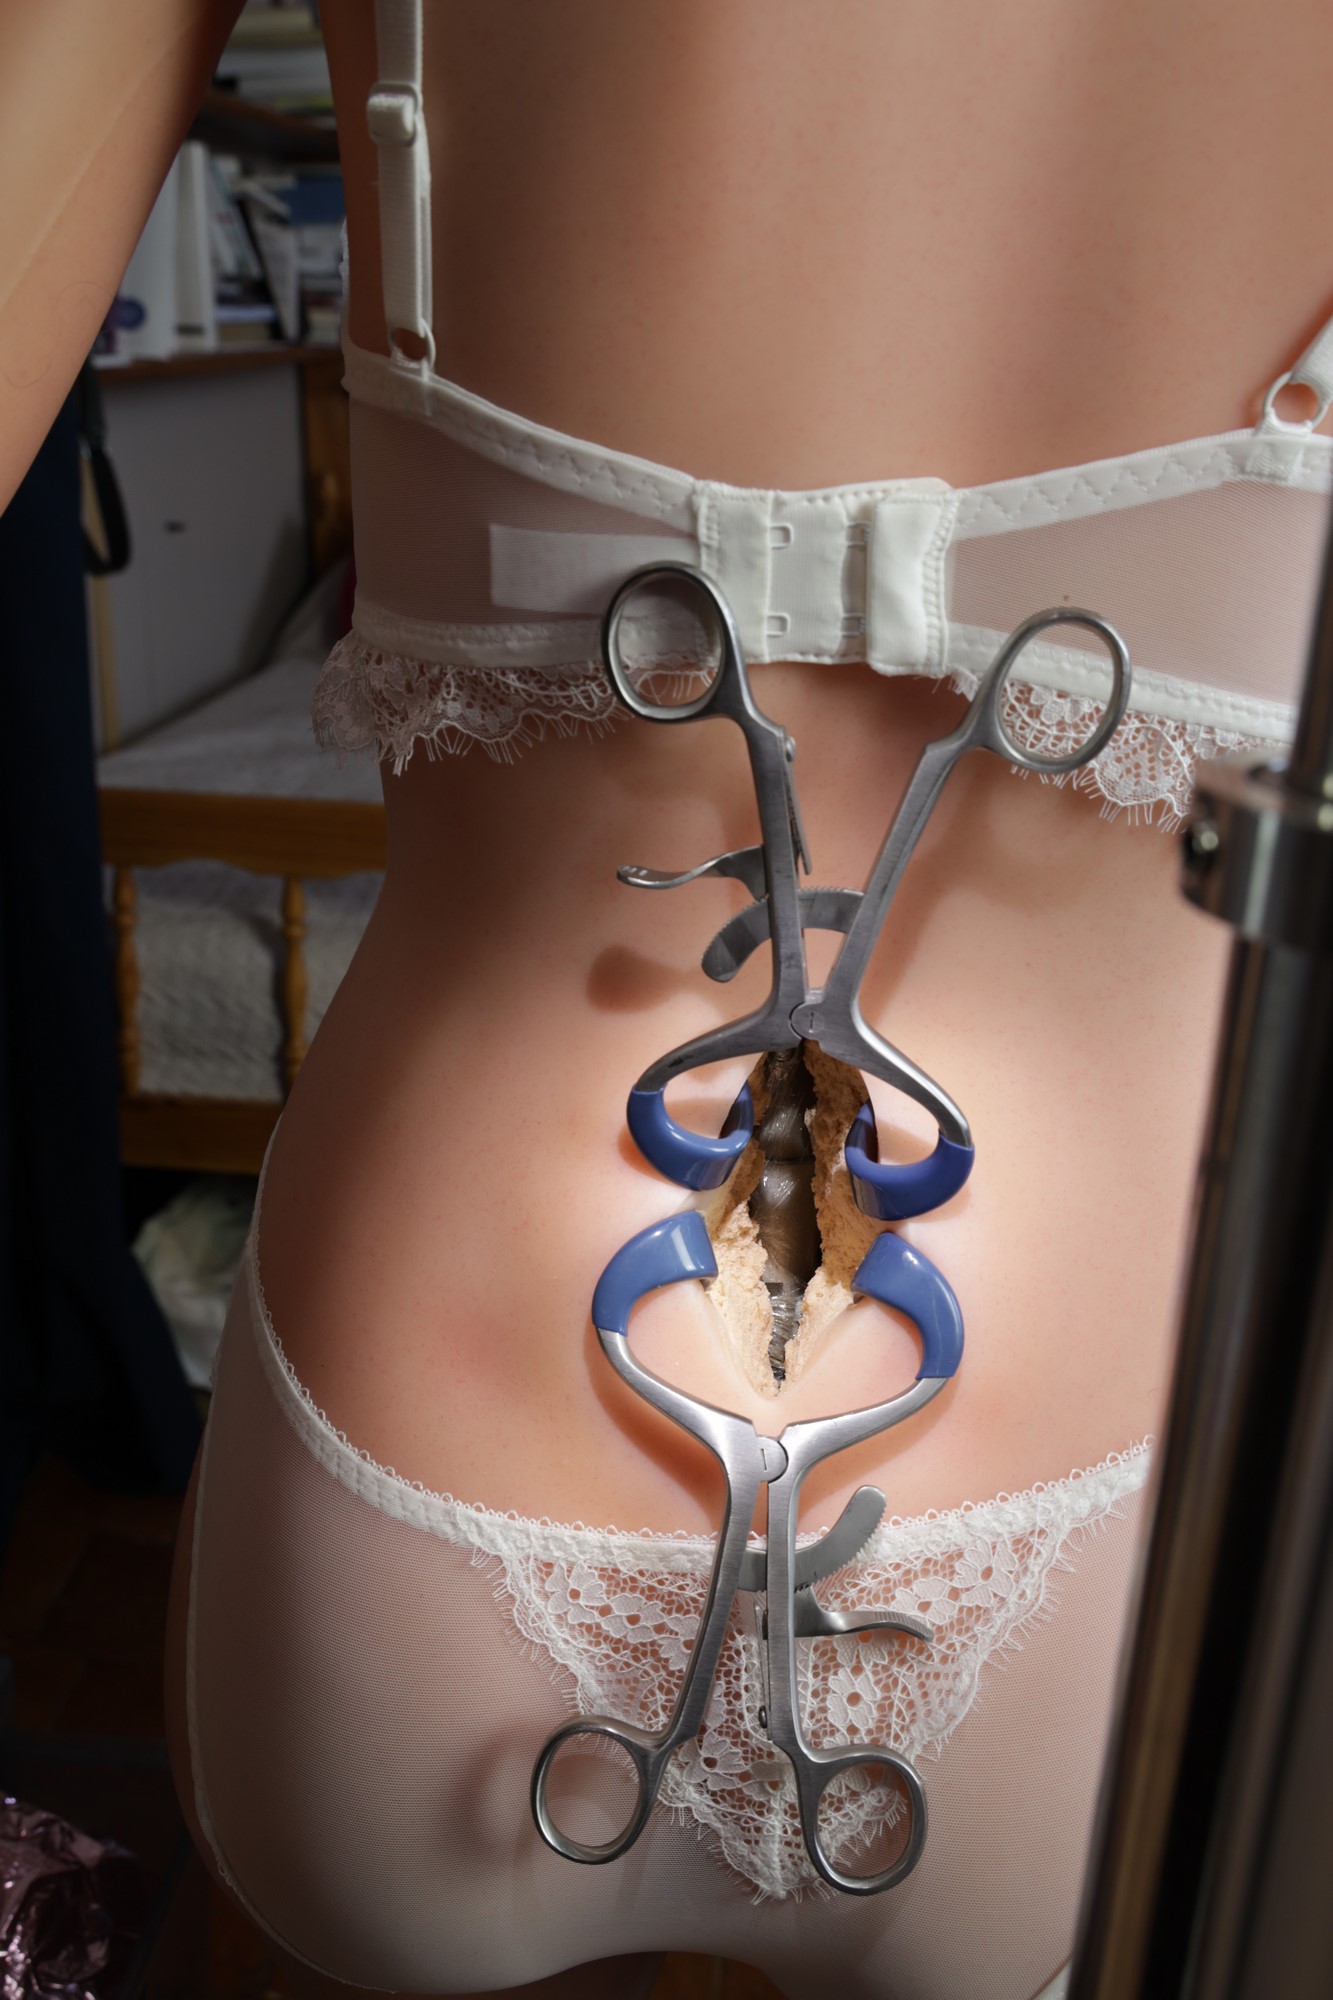
- Locating, incising and loosening
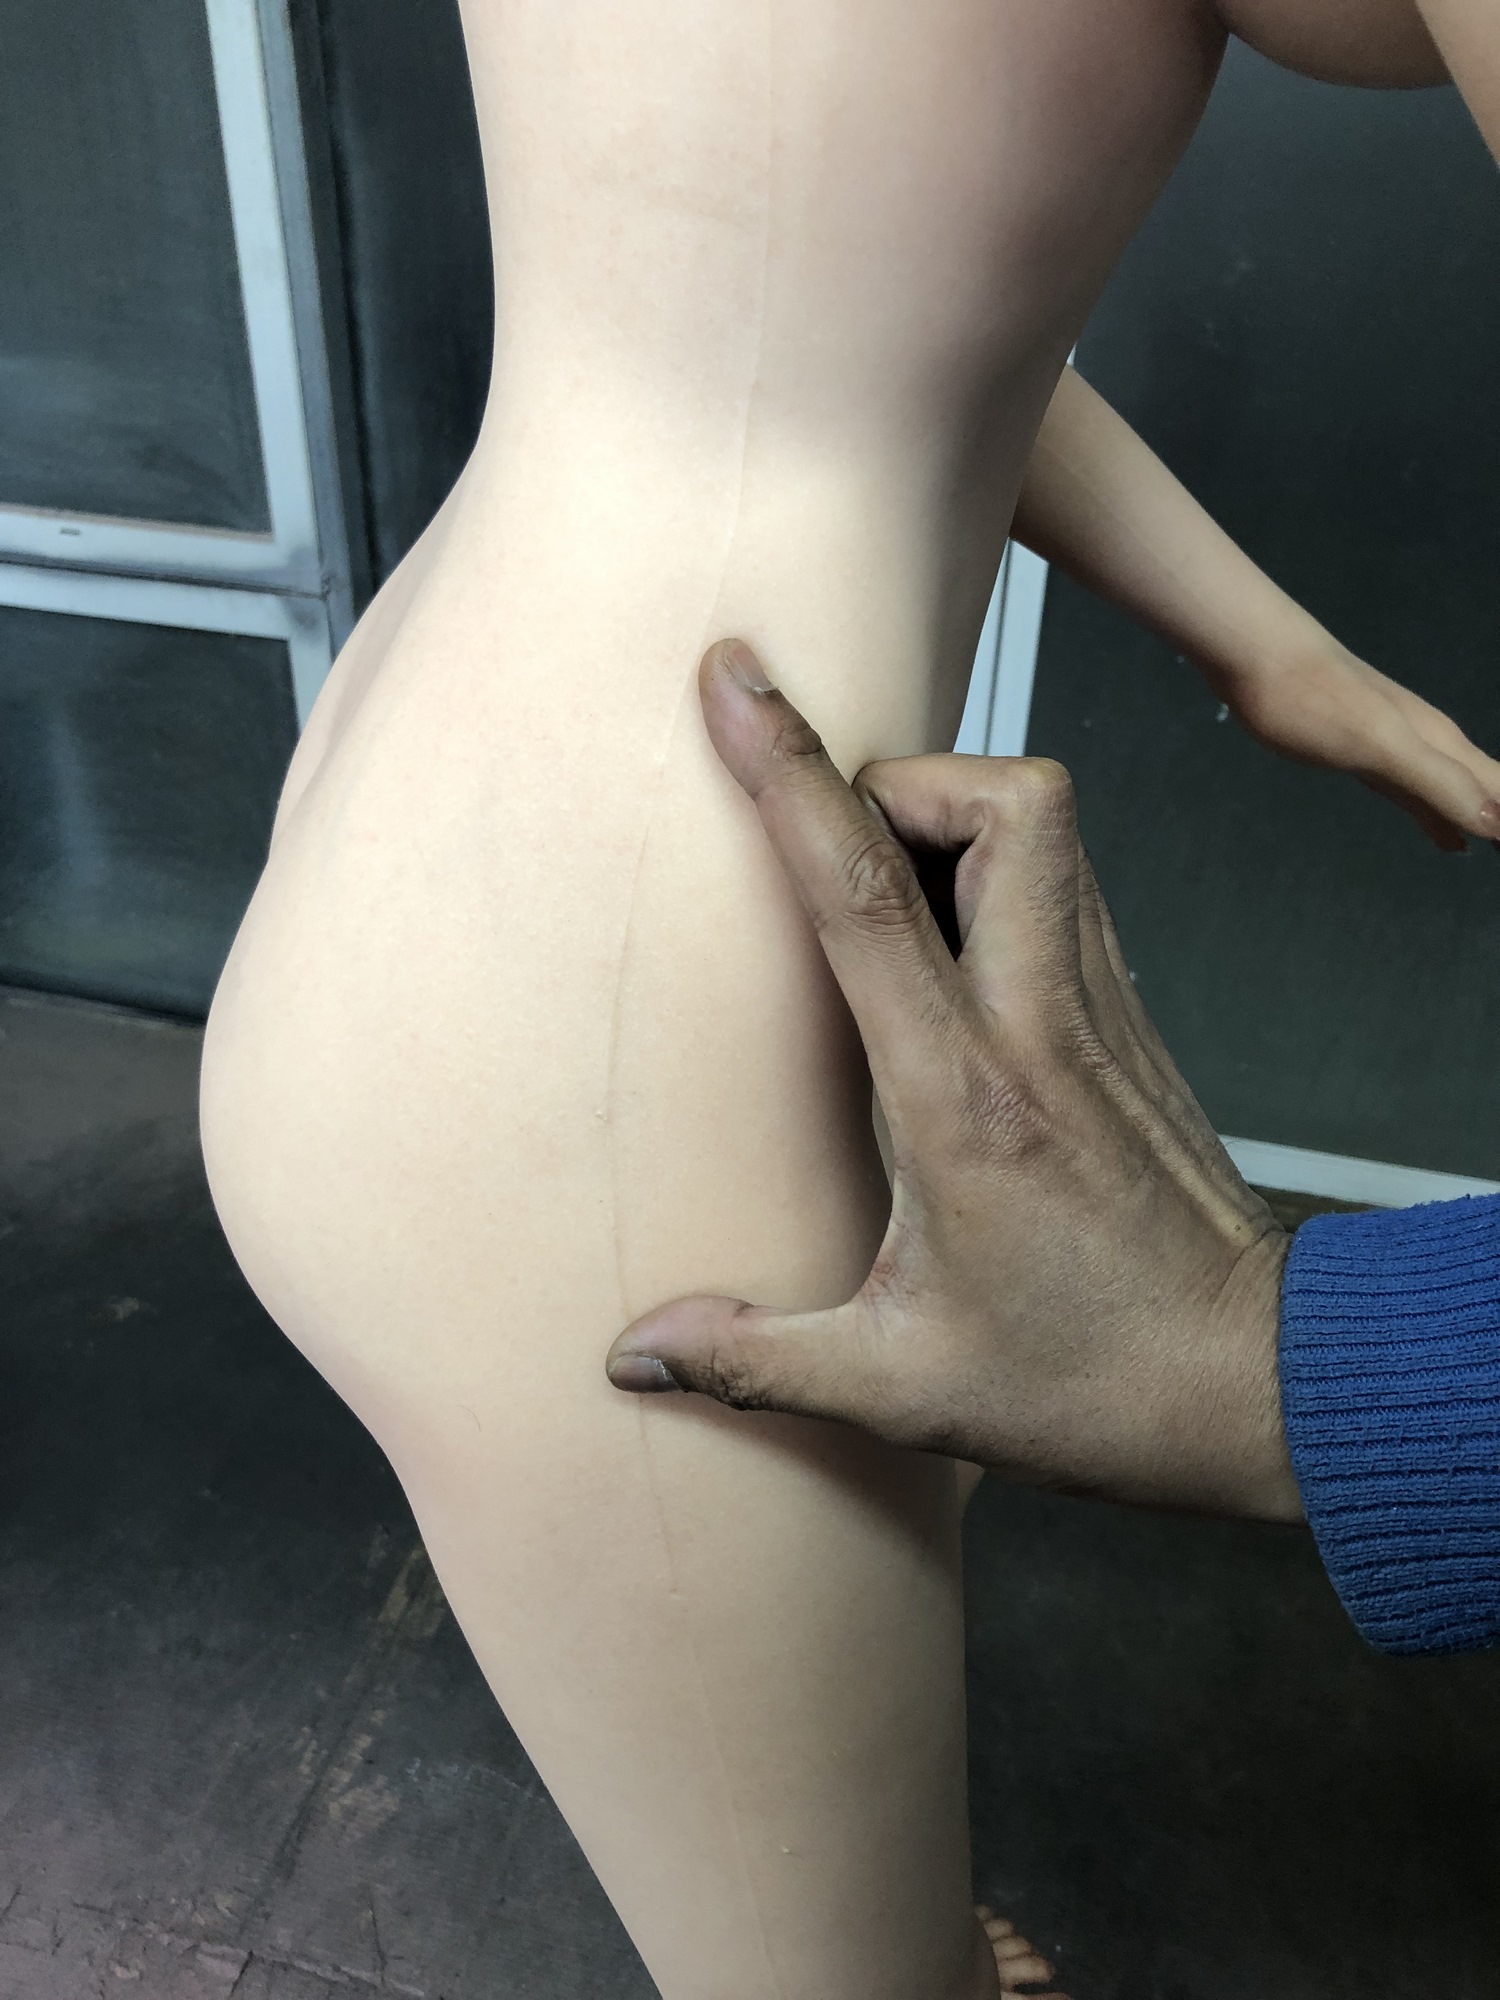
Approximate location, based solely on the photo supplied by Xycolo. Palpation of the area gives no reliable information on the position of the lateral nut;
Vertical incision of the silicone, 9cm long, using a surgical scalpel sharpened beforehand;
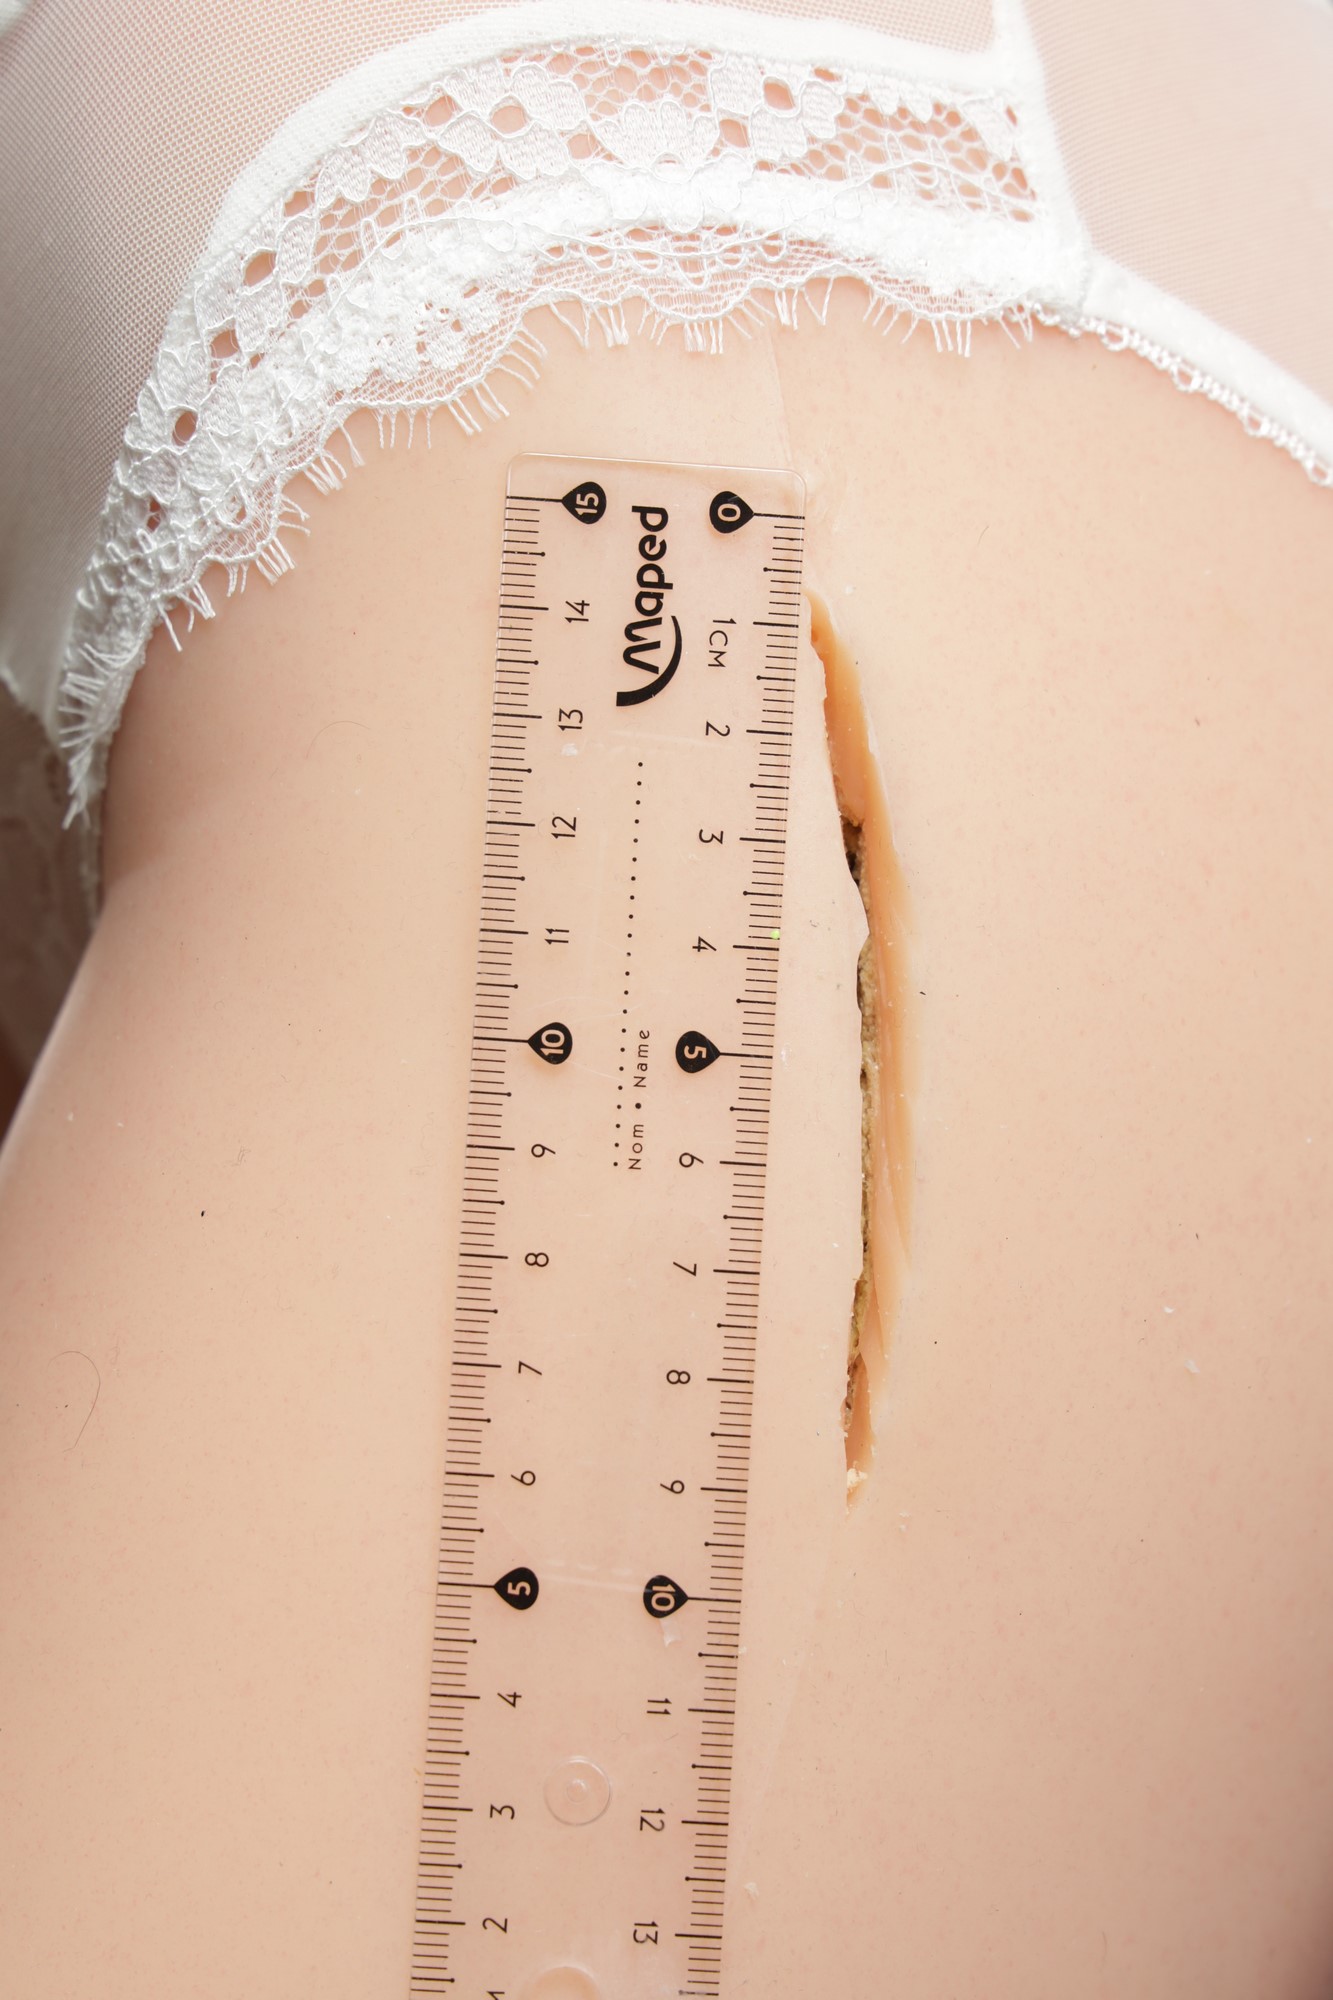
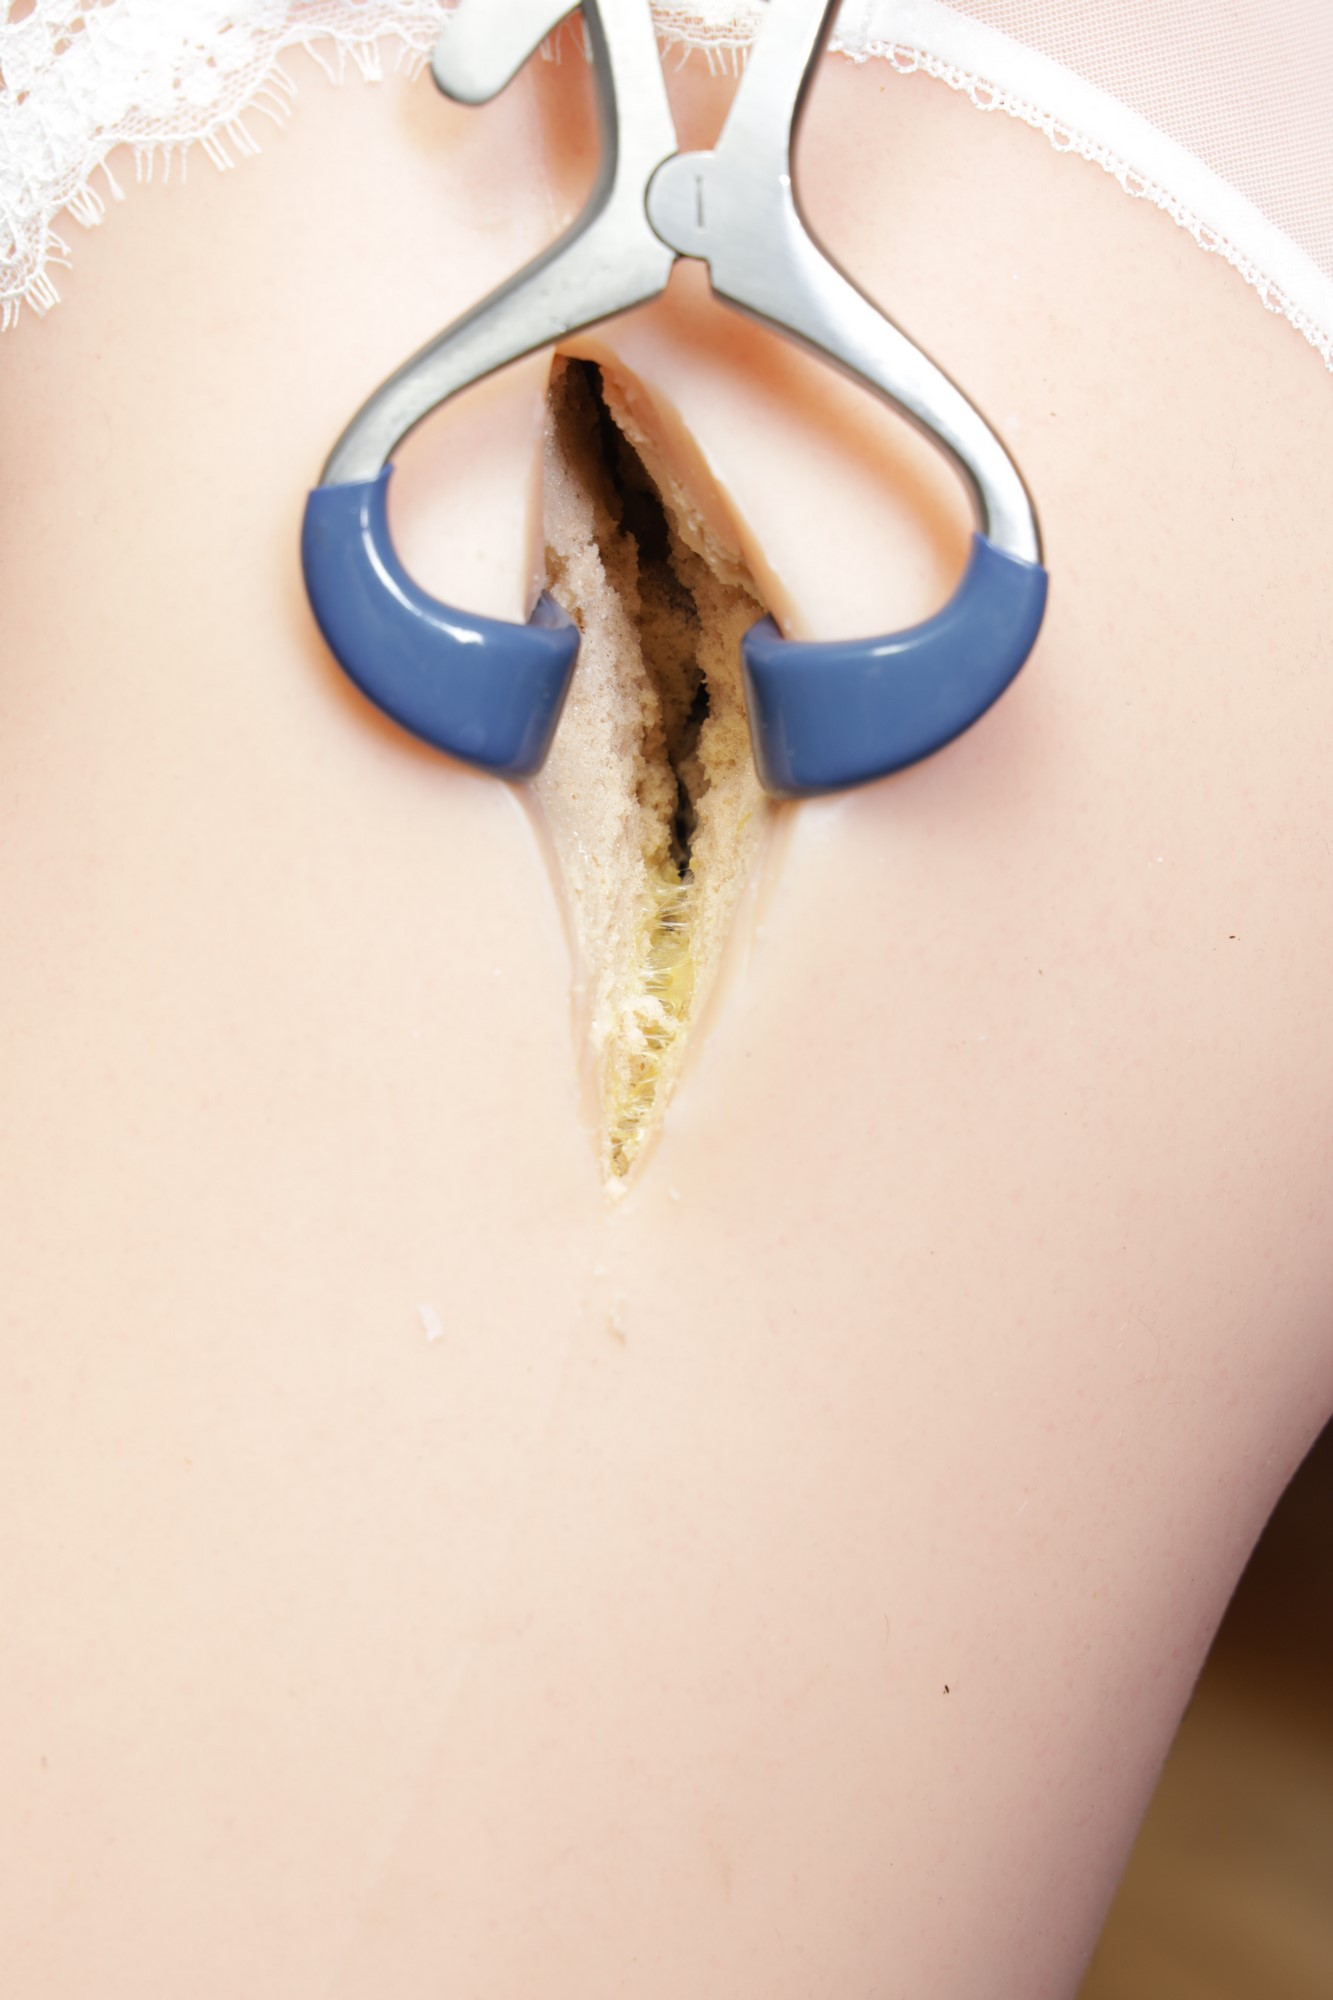
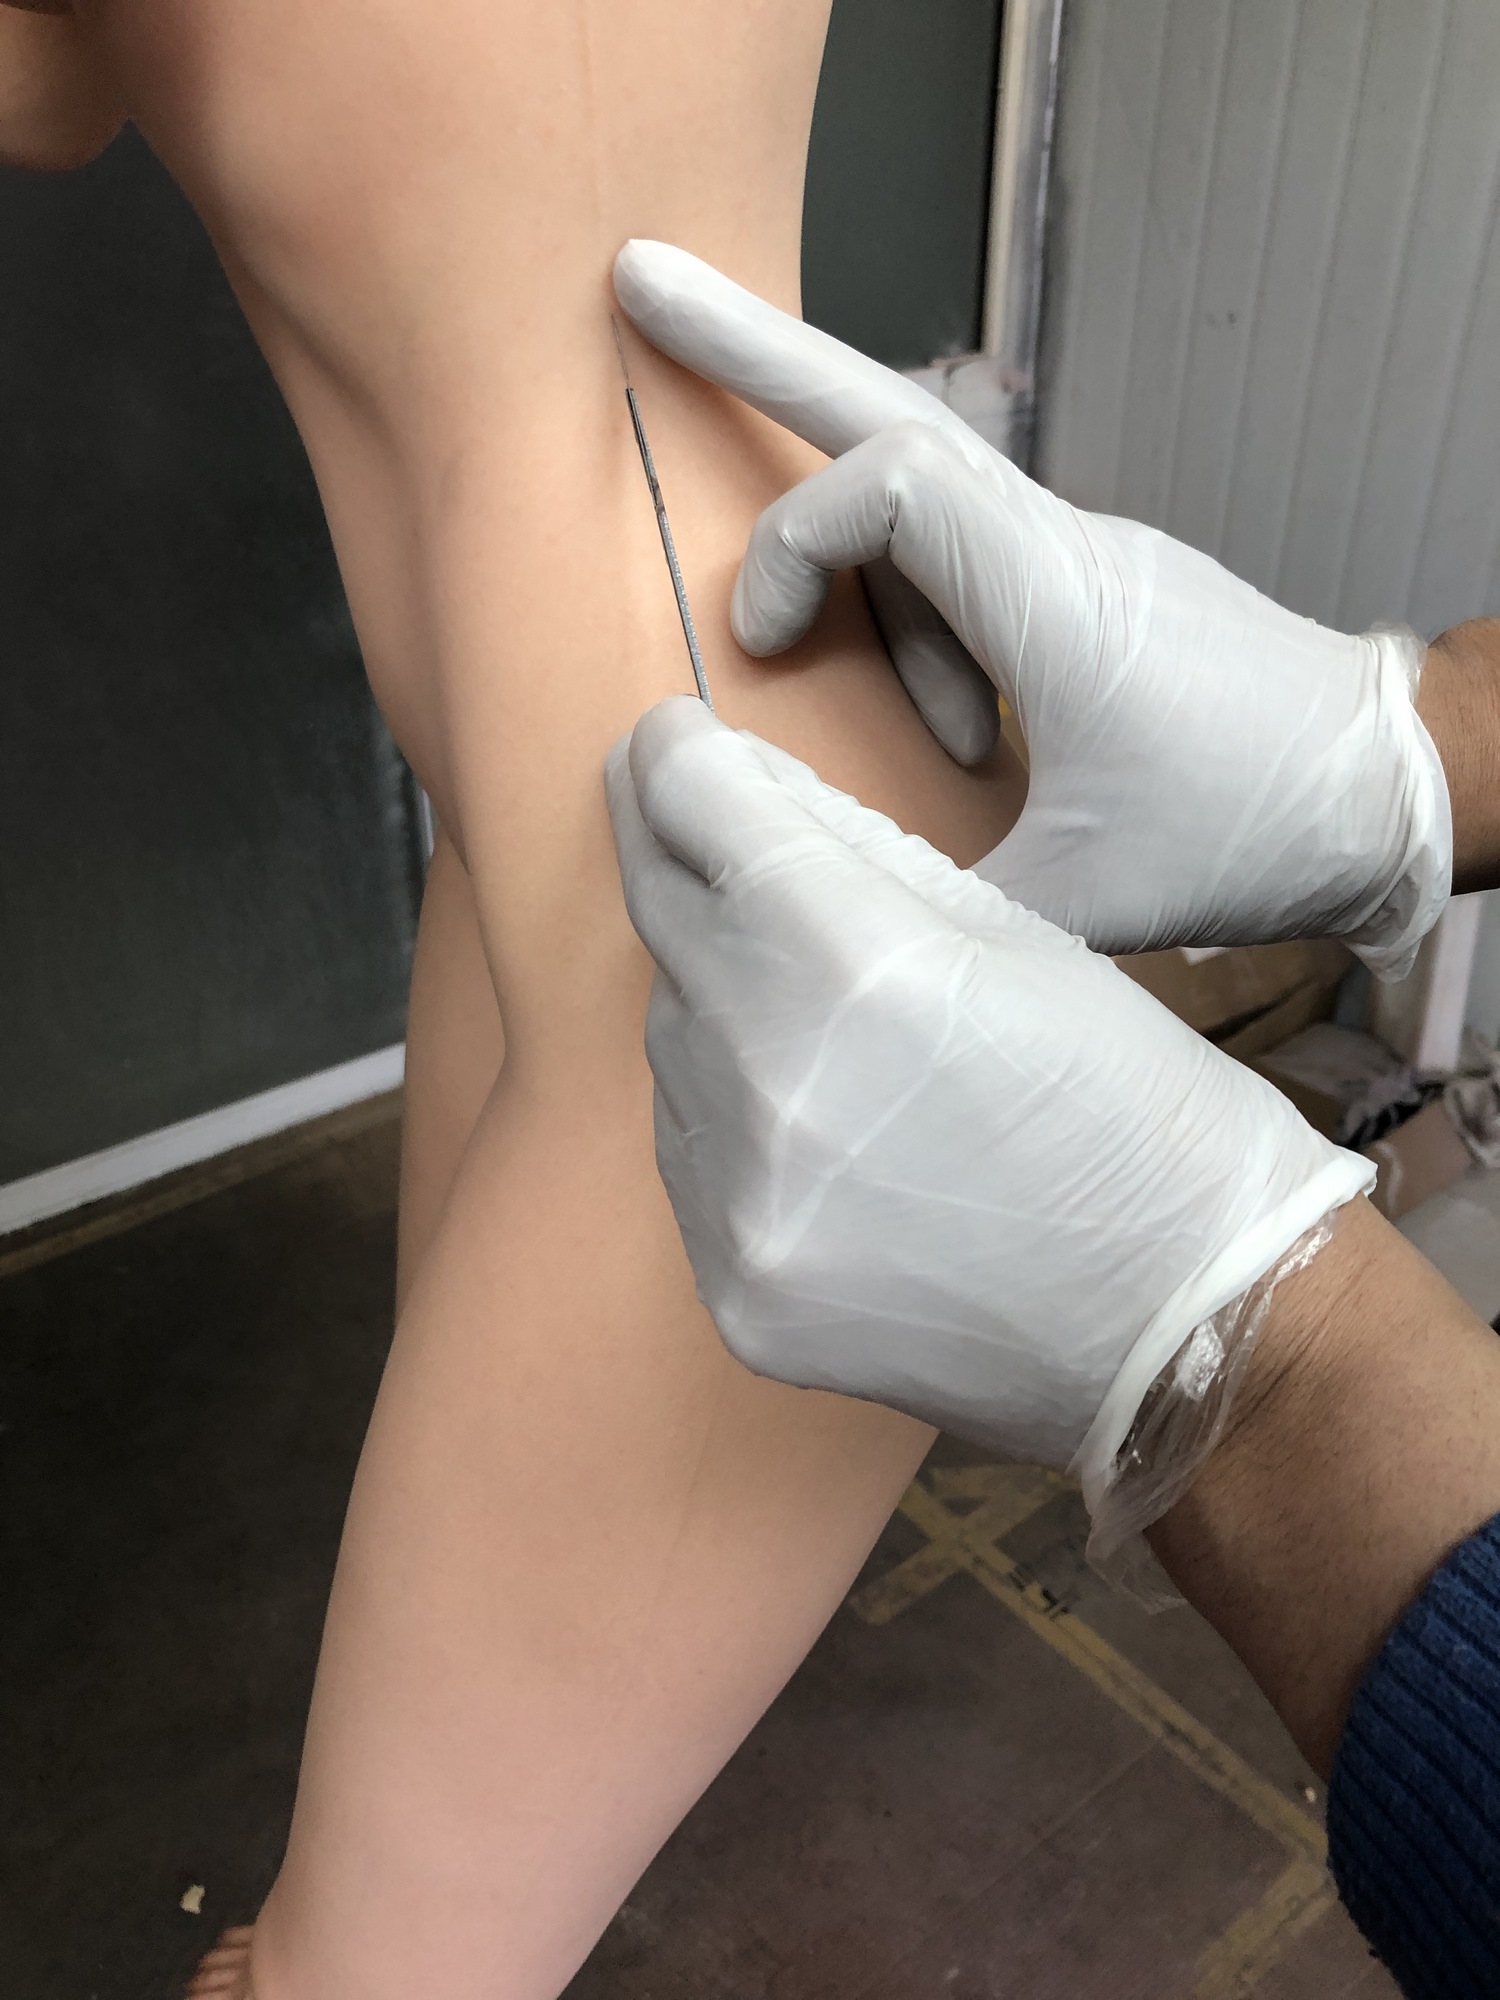
Find the nut with a finger;
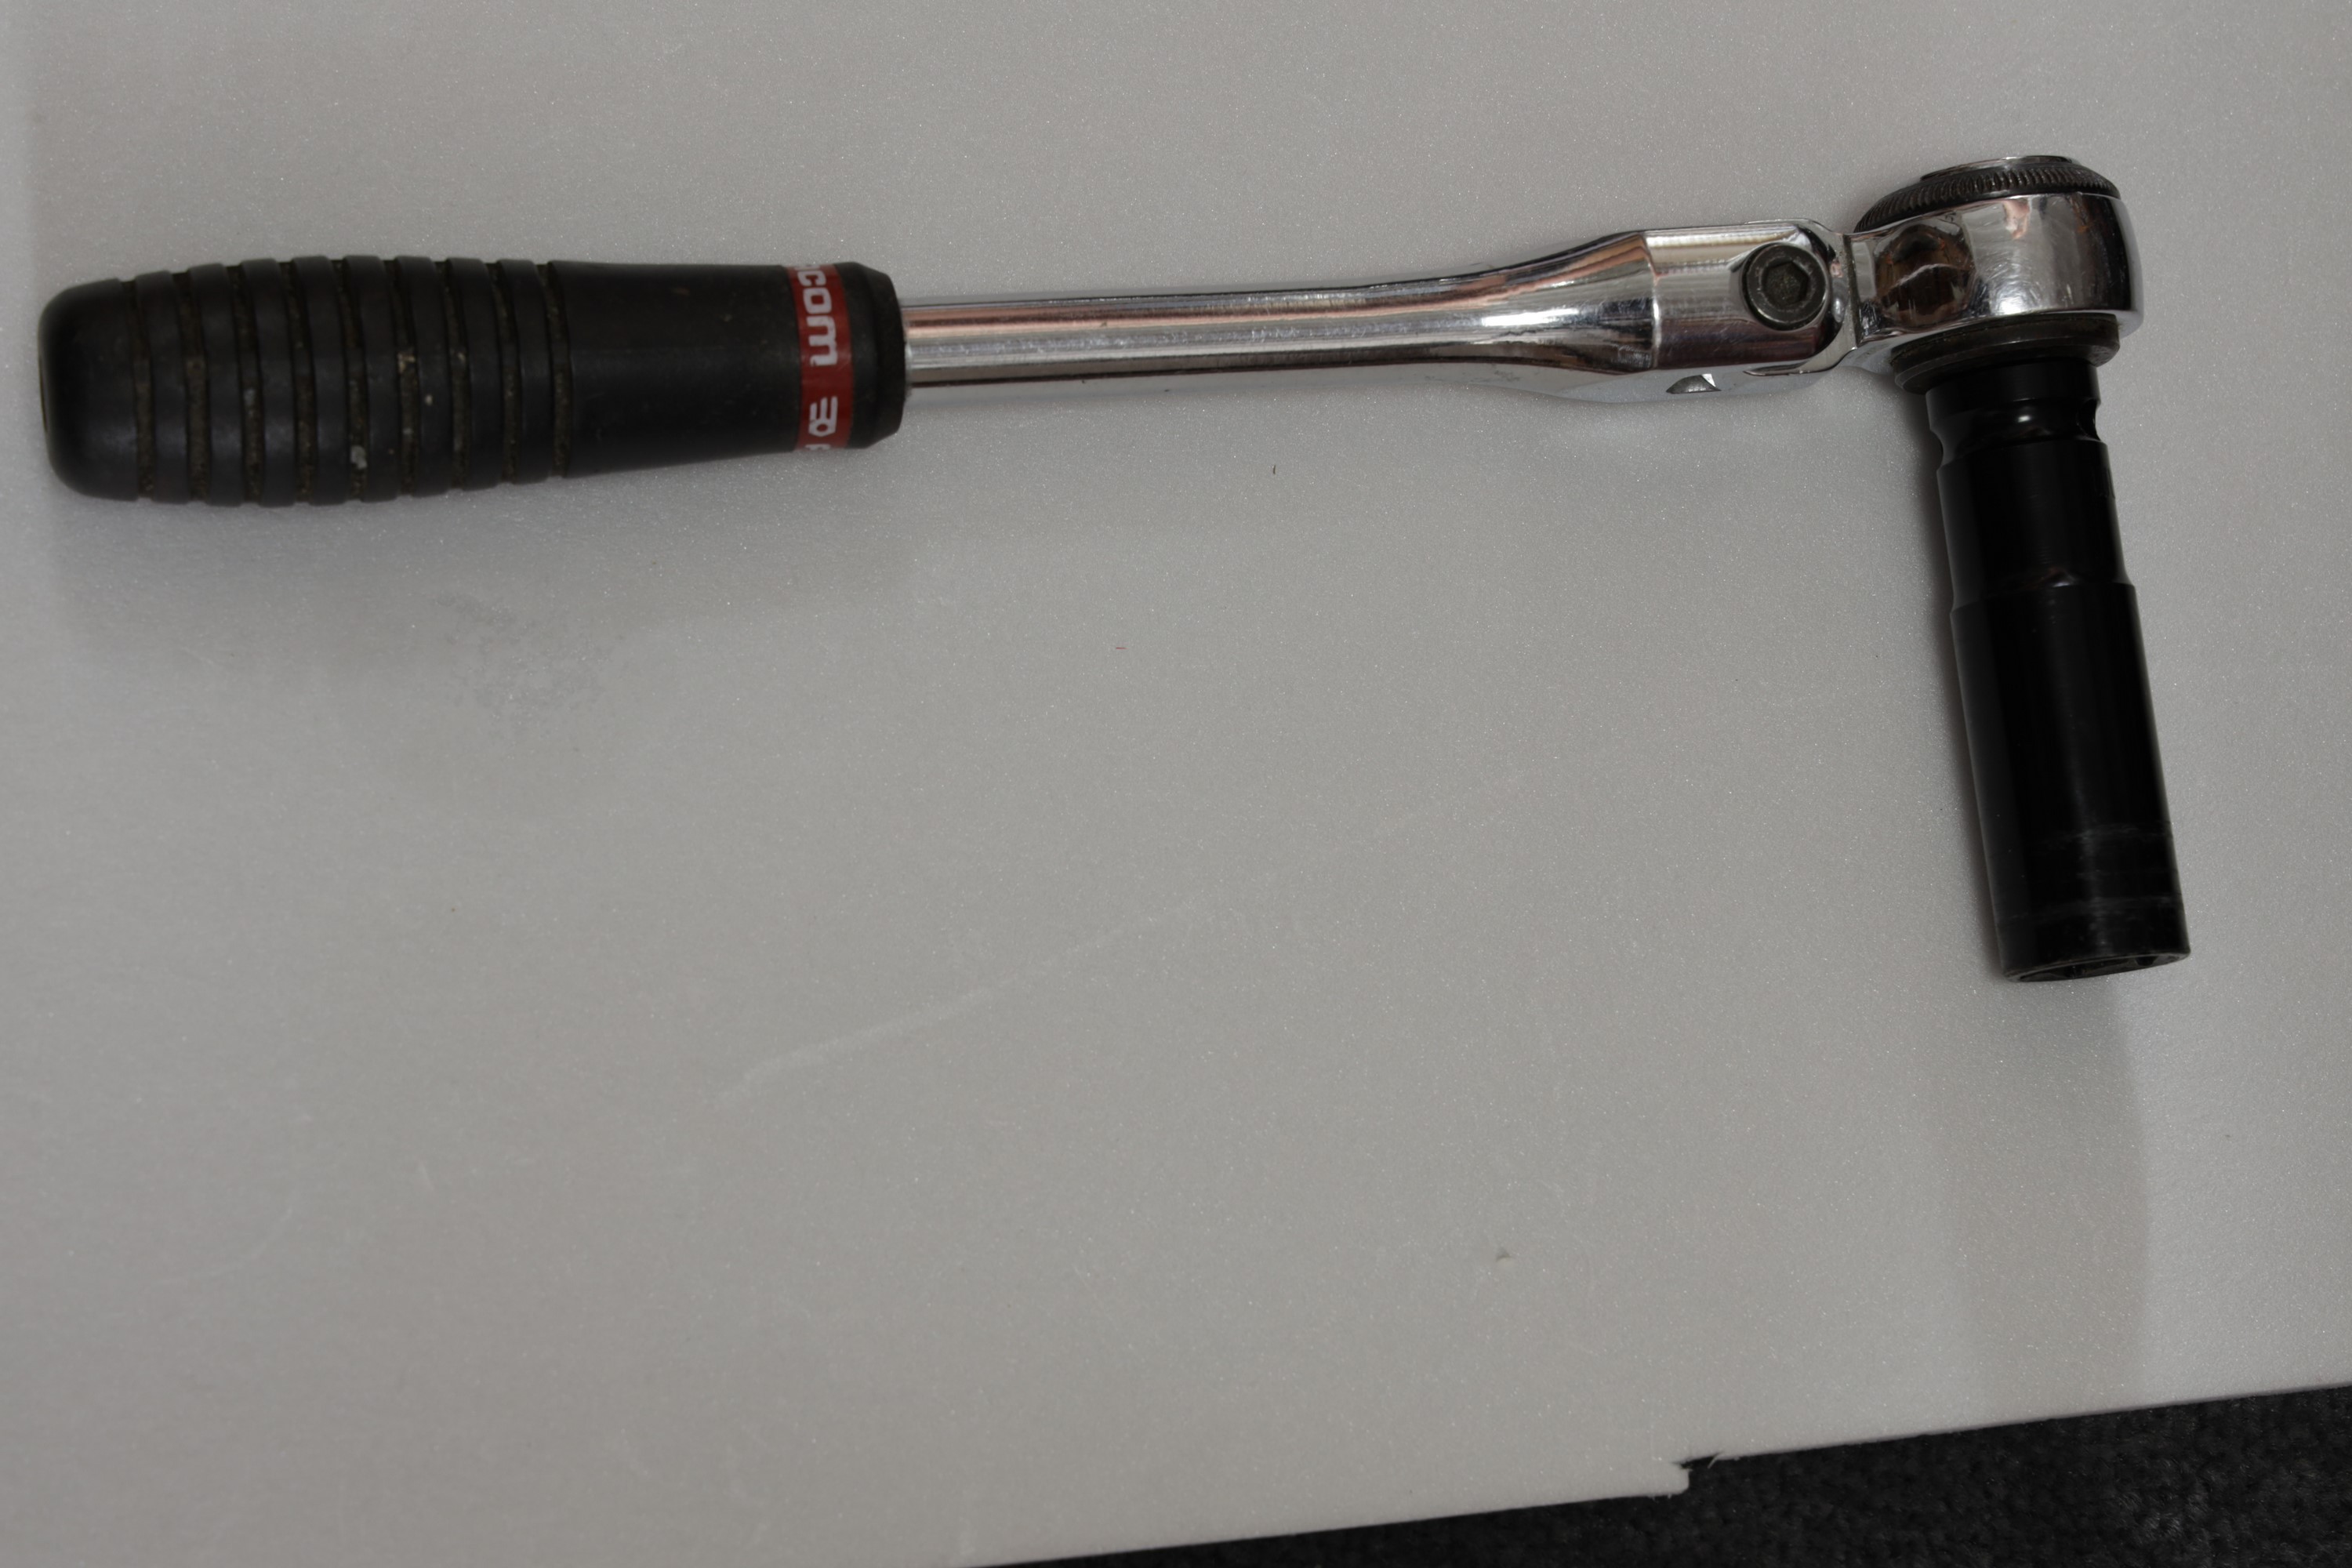
- Once the nut has been located with certainty, fit the socket (here, a long 17 mm automobile socket, otherwise a standard 17 mm socket + extension) and the ratchet;
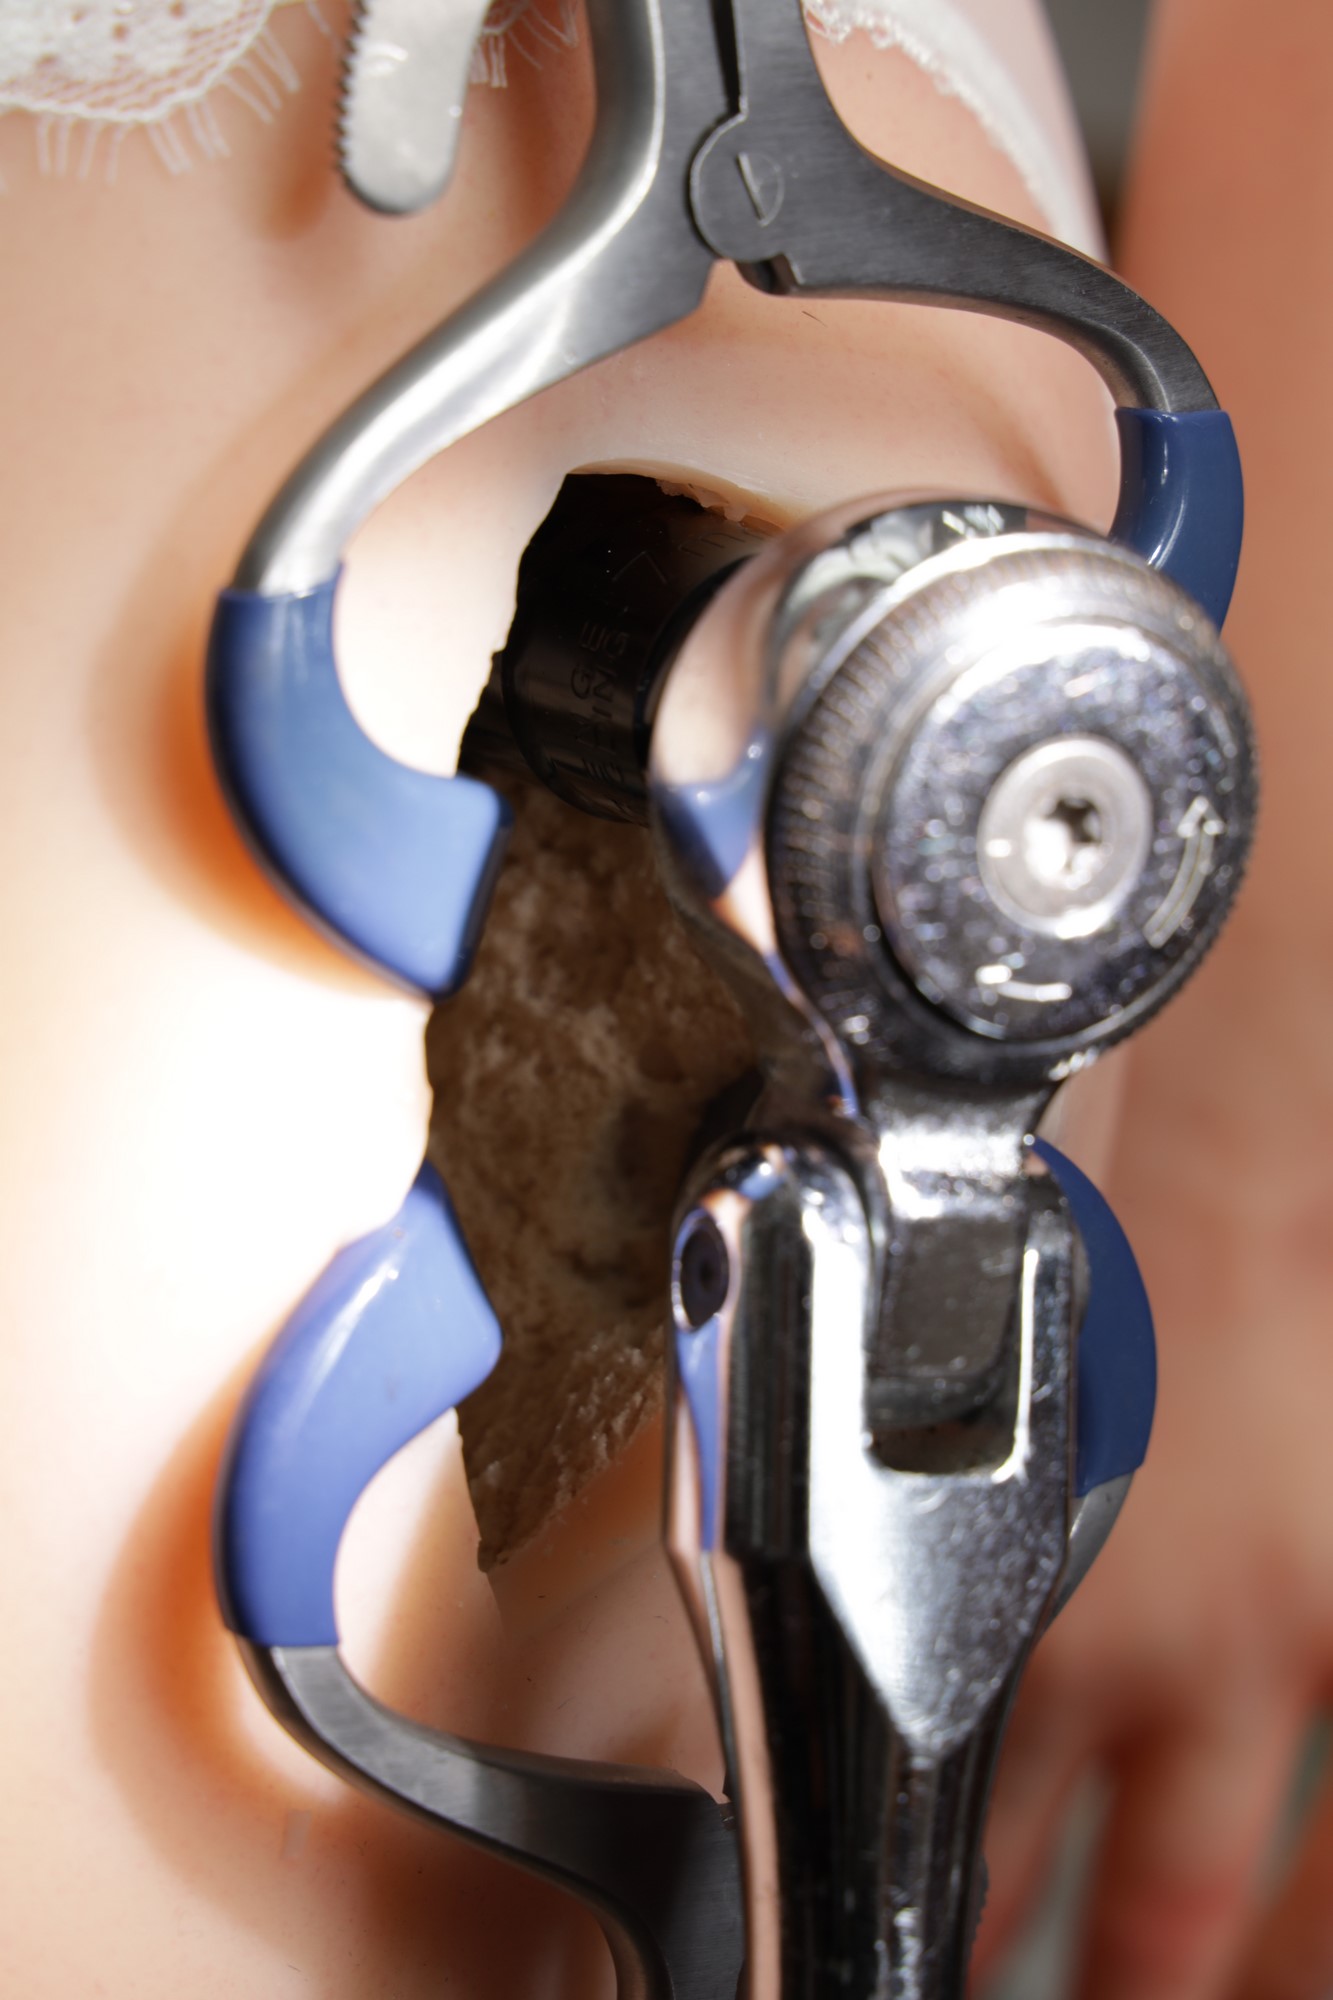
- Loosening the joint ;
- Checks and adjustments for correct tightening .
Once this first stage was completed, I had to test gluing on small pieces of polyurethane that had been detached during the incision of the "small body", as I hadn't found any references on this type of gluing, and the manufacturer couldn't give me any precise information on this point.
Example of a piece of polyurethane from the "small body":
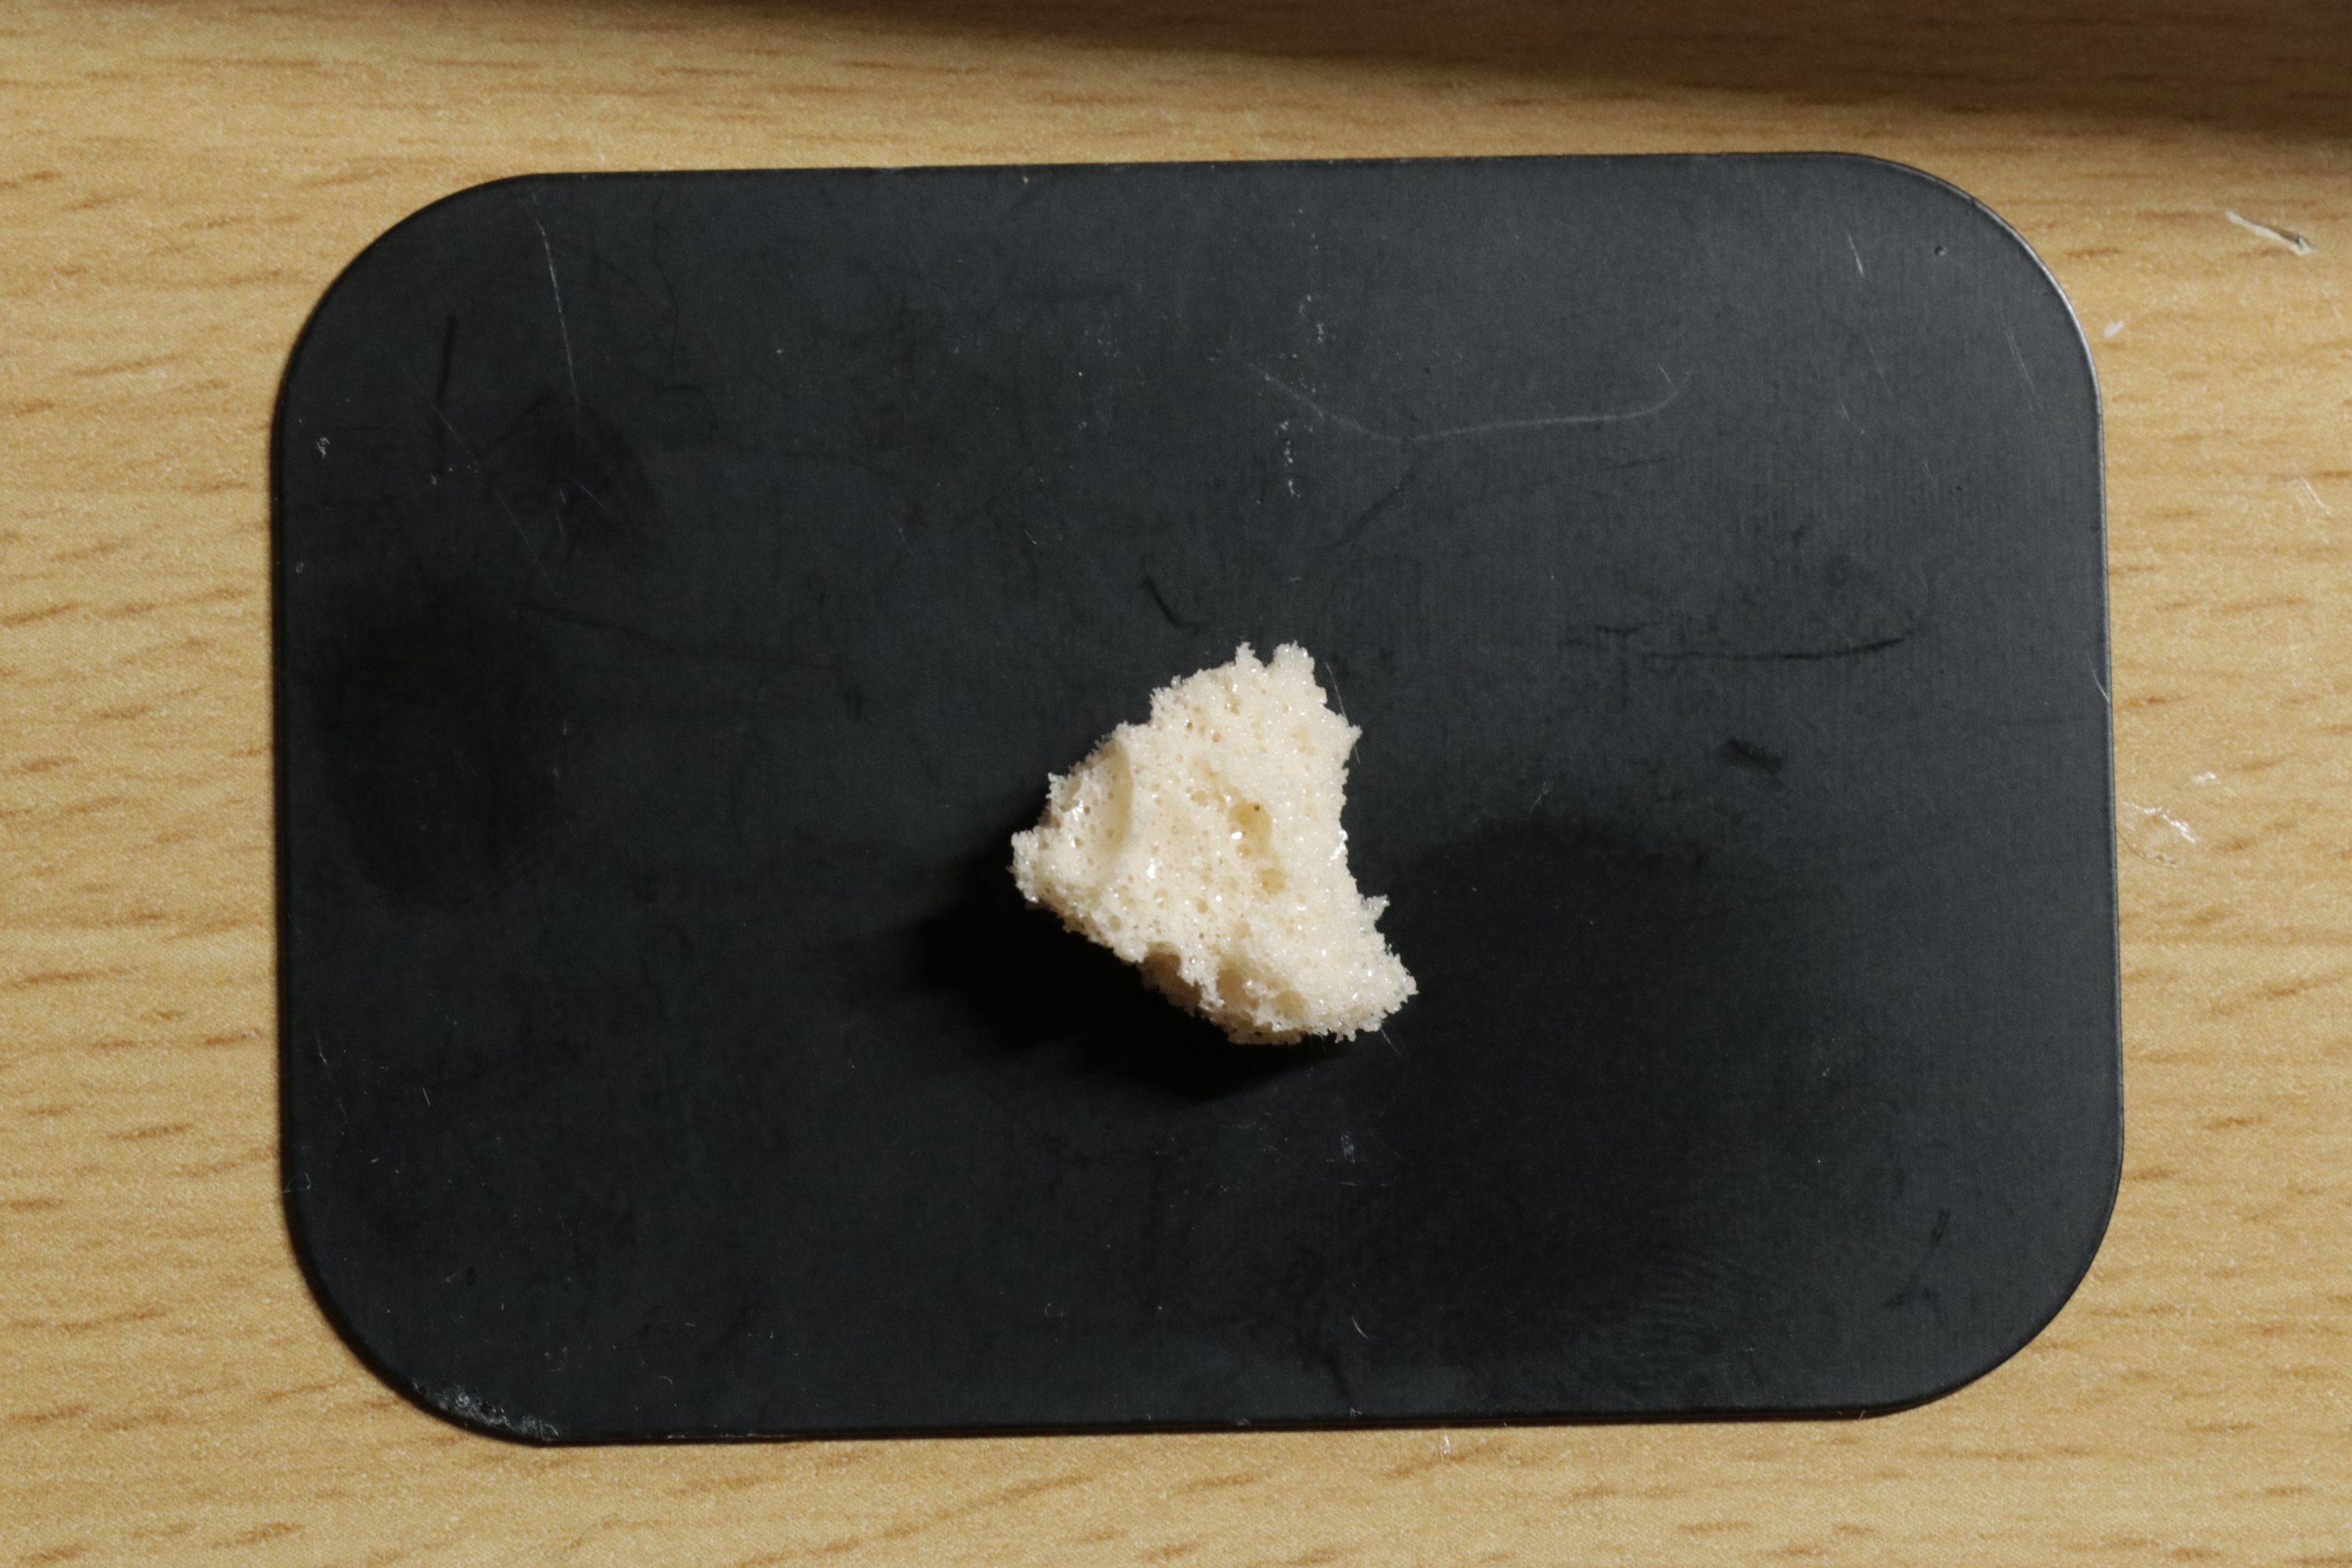
- good quality bonding,
- no dissolution or alteration of the "little body" material
- Two-step wound closure
Closing the "little body with neoprene glue. No special features: spread on both sides of the wound (here with a nail file) without overlapping the silicone. Let the wound in air, spread as wide as possible, for 10 to 15 minutes (the glue should be dry on the finger), then remove the retractors and apply maximum pressure on the back and front of the wound to close the small bodysuit for a few seconds to a minute.
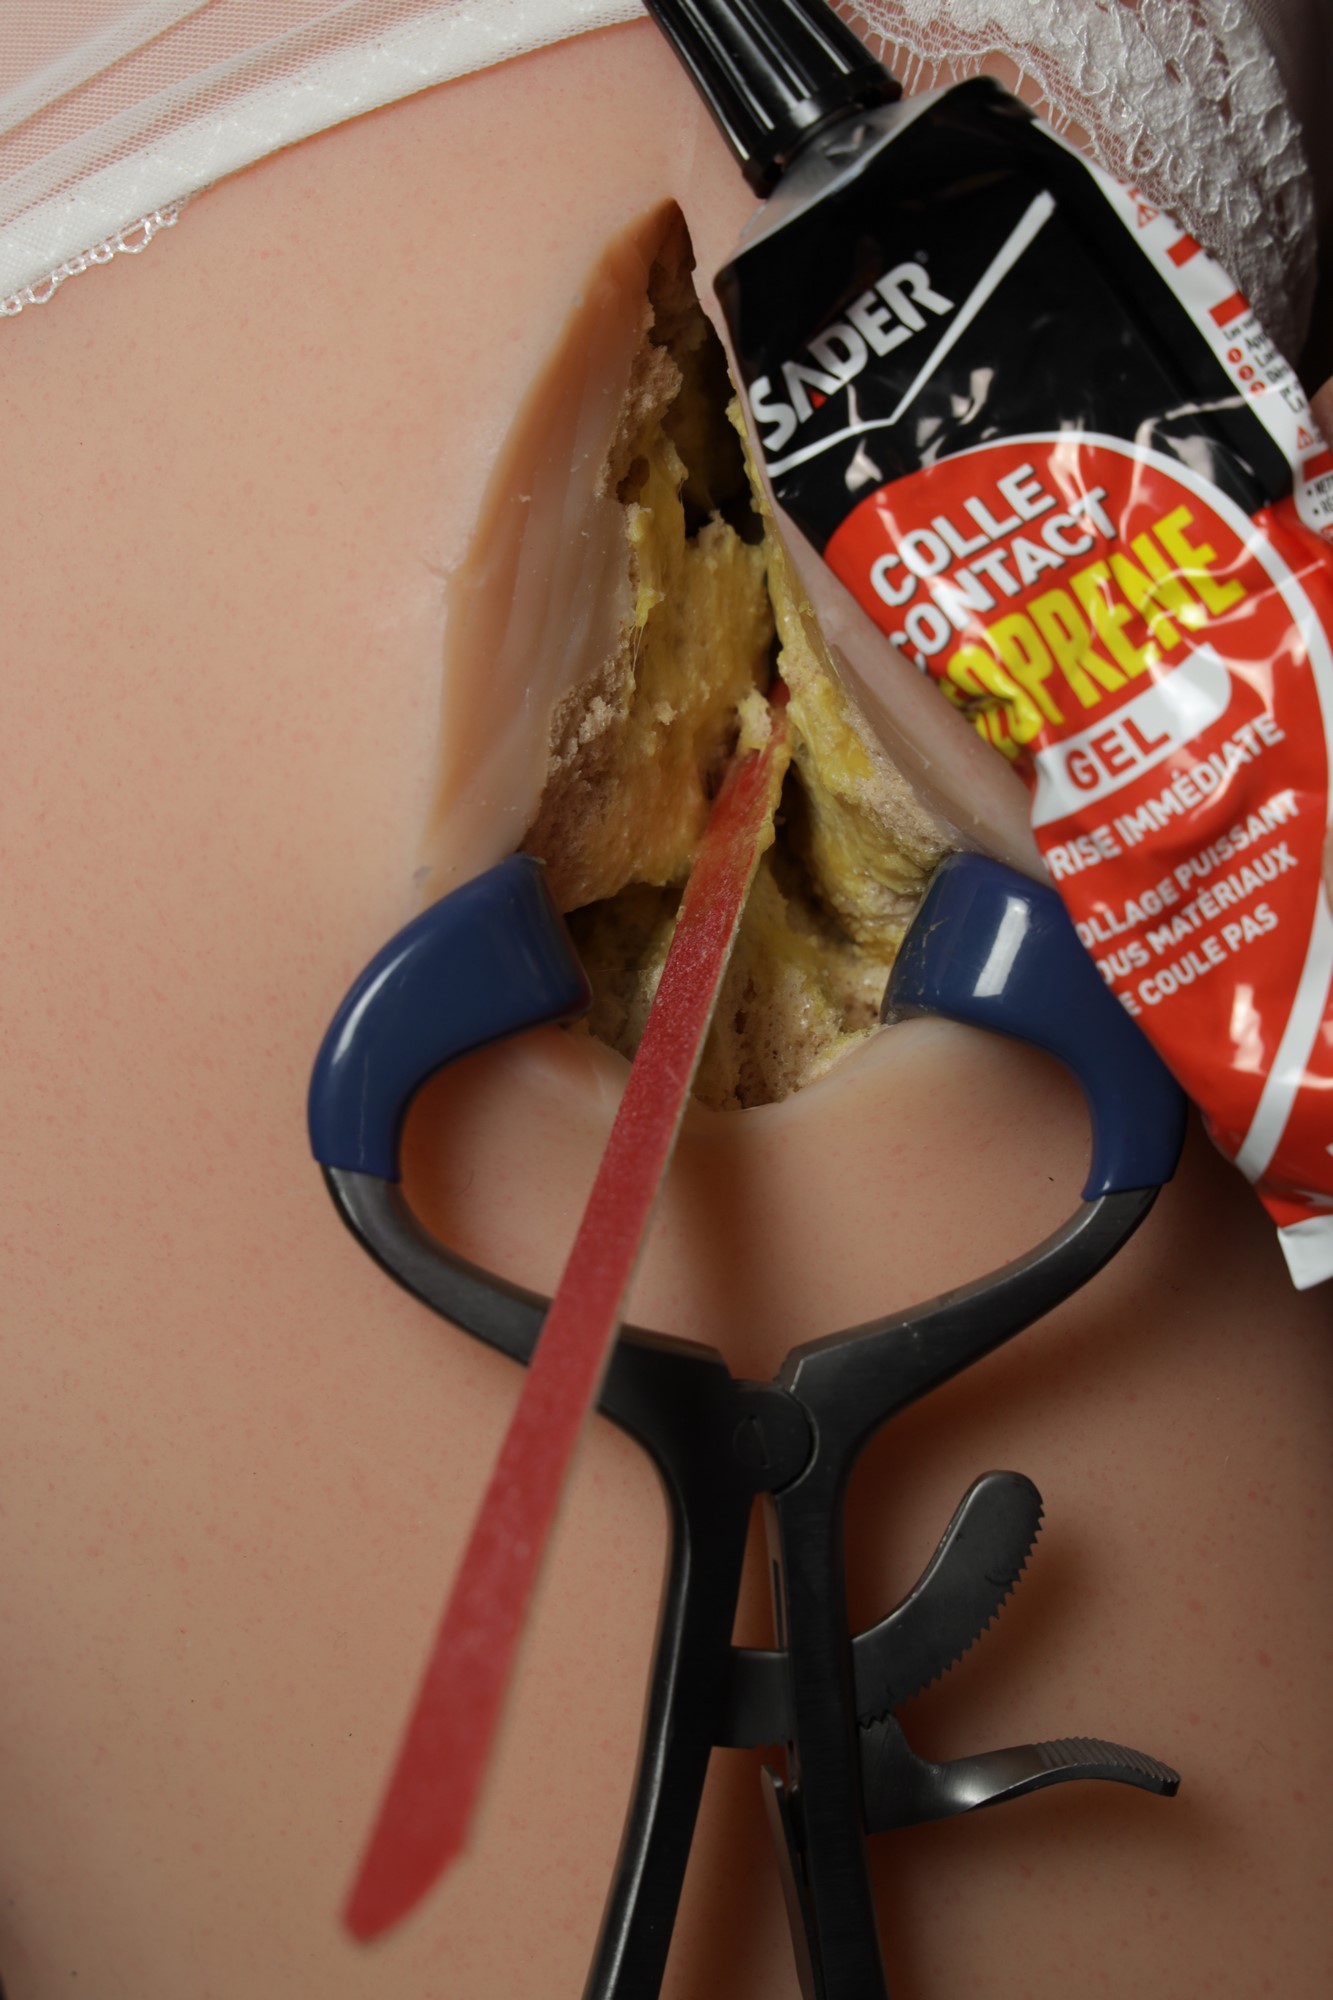
Silicone wound closure , using the glue putty supplied by the manufacturer. This is a delicate stage, and the final aesthetic result will depend on how well it is achieved. In addition to some previous experience of repairing minor wounds, I had carried out tests on silicone samples, to fully understand the bonding process. The main recommendations I would make are:
+ Don't use too much glue: it won't make the bond any stronger, and the glue will be visible after repair, in the form of a line, or even a small protruding bead, which will be difficult to remove cleanly and mask;
+ Use a toothpick to spread a thin layer of adhesive over the entire surface of both sides of the wound. This must be done with great care, covering both surfaces completely. There's plenty of time for this;
+ Bring the edges together and squeeze to see if any excess glue comes out. If so, remove it quickly with white absorbent paper or a clean white cloth impregnated with a little acetone.
Bandage : It's a tricky part too, since you have to keep the two edges of the wound together for the duration of the bonding process (a few hours), and as flat as possible, without deforming them. I used :
+ Flexible transparent plastic grafting film, which comes in a 5cm-wide roll.
+ In order to reinforce the restraint pressure, I used strips of clear, reinforced packing tape laid tightly over the plastic bandage. This last point is important because if the adhesive side comes into contact with the silicone, it could damage it.
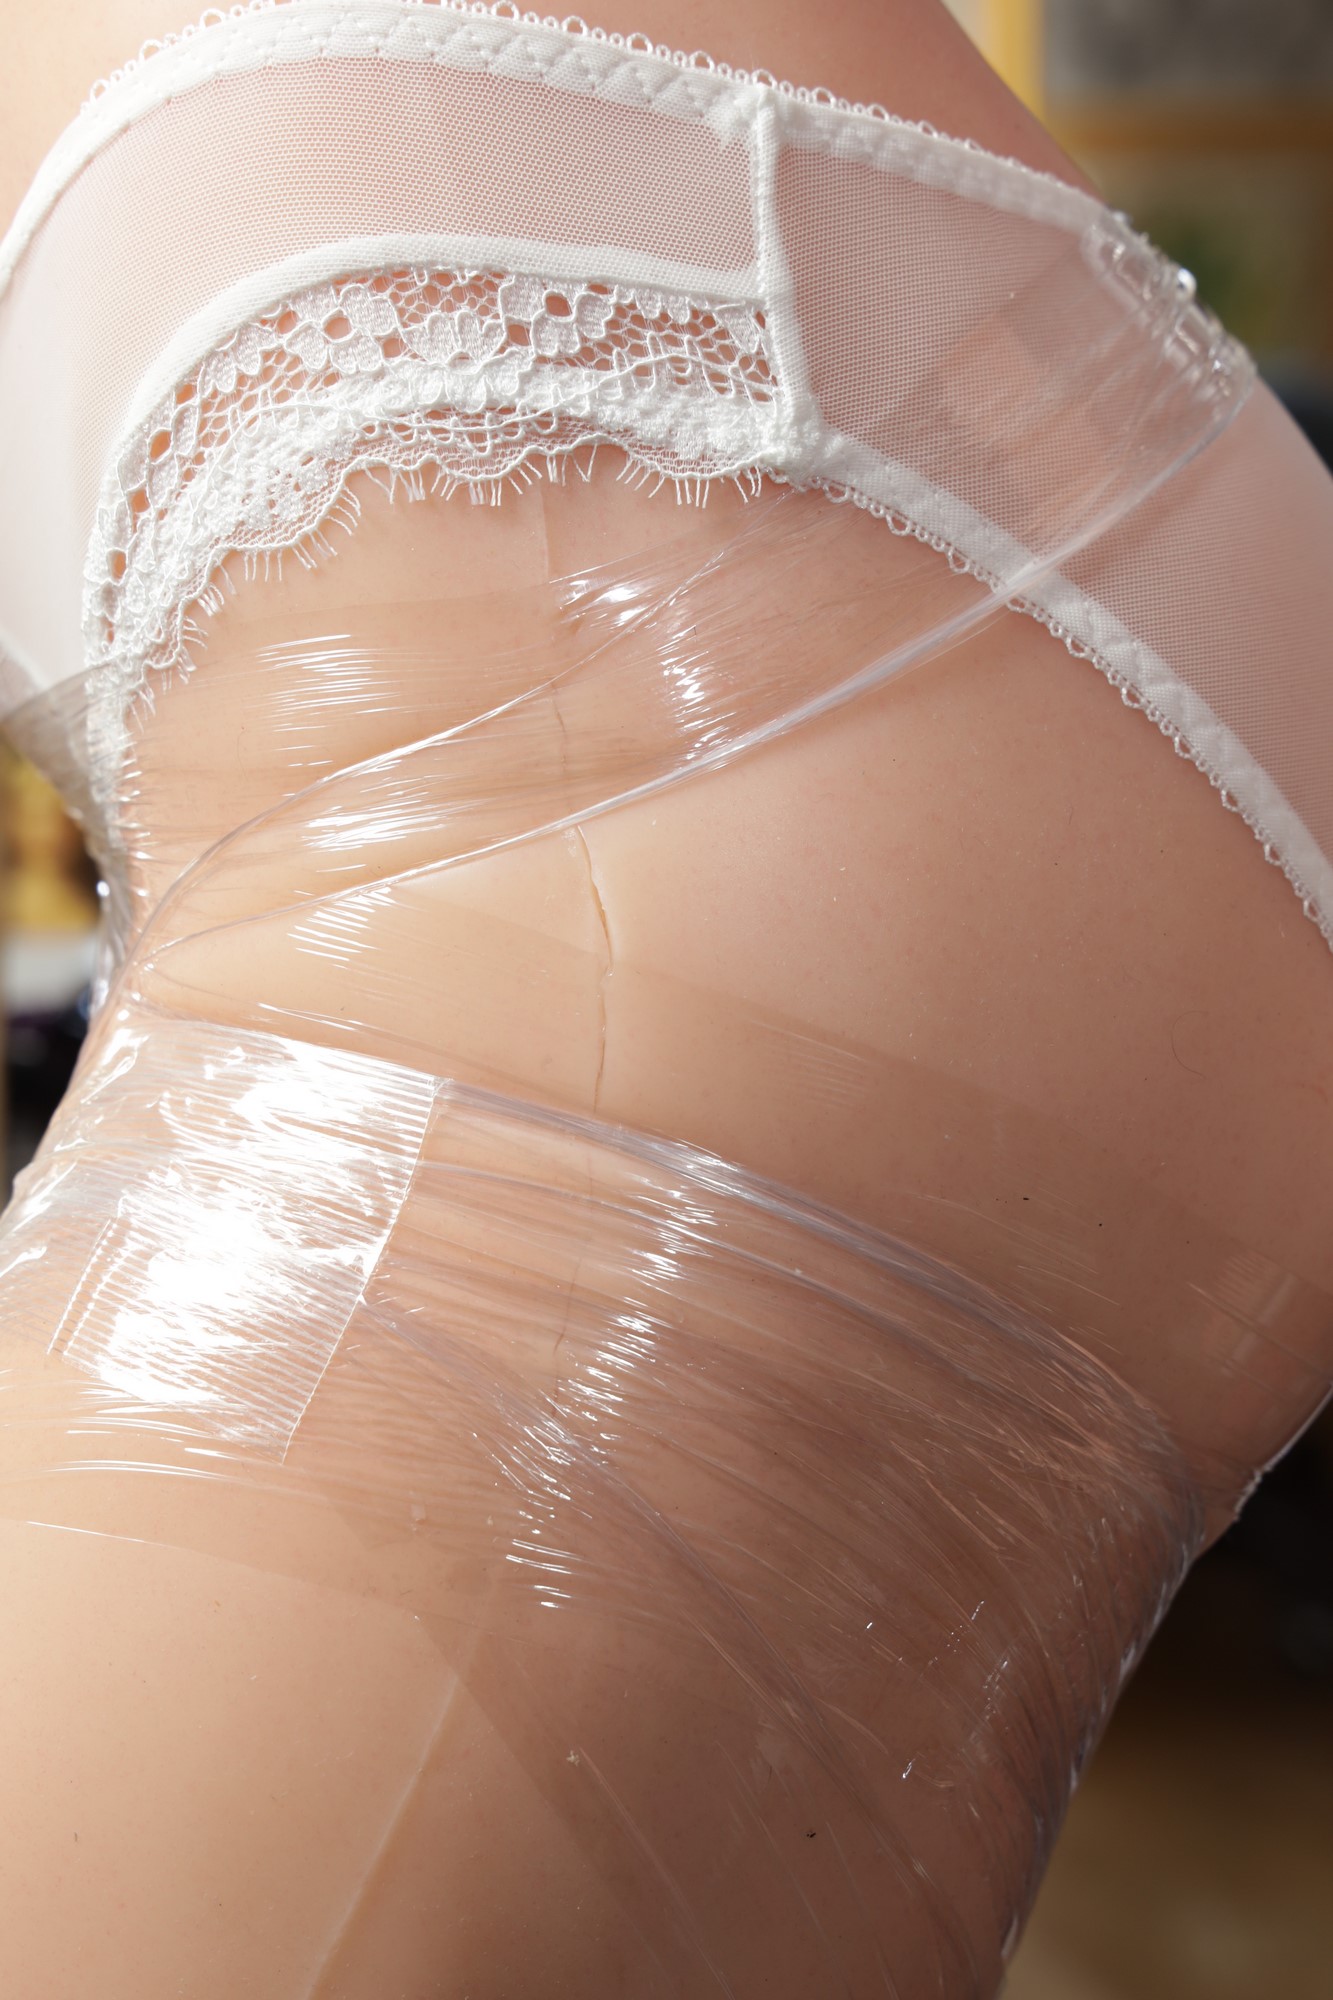
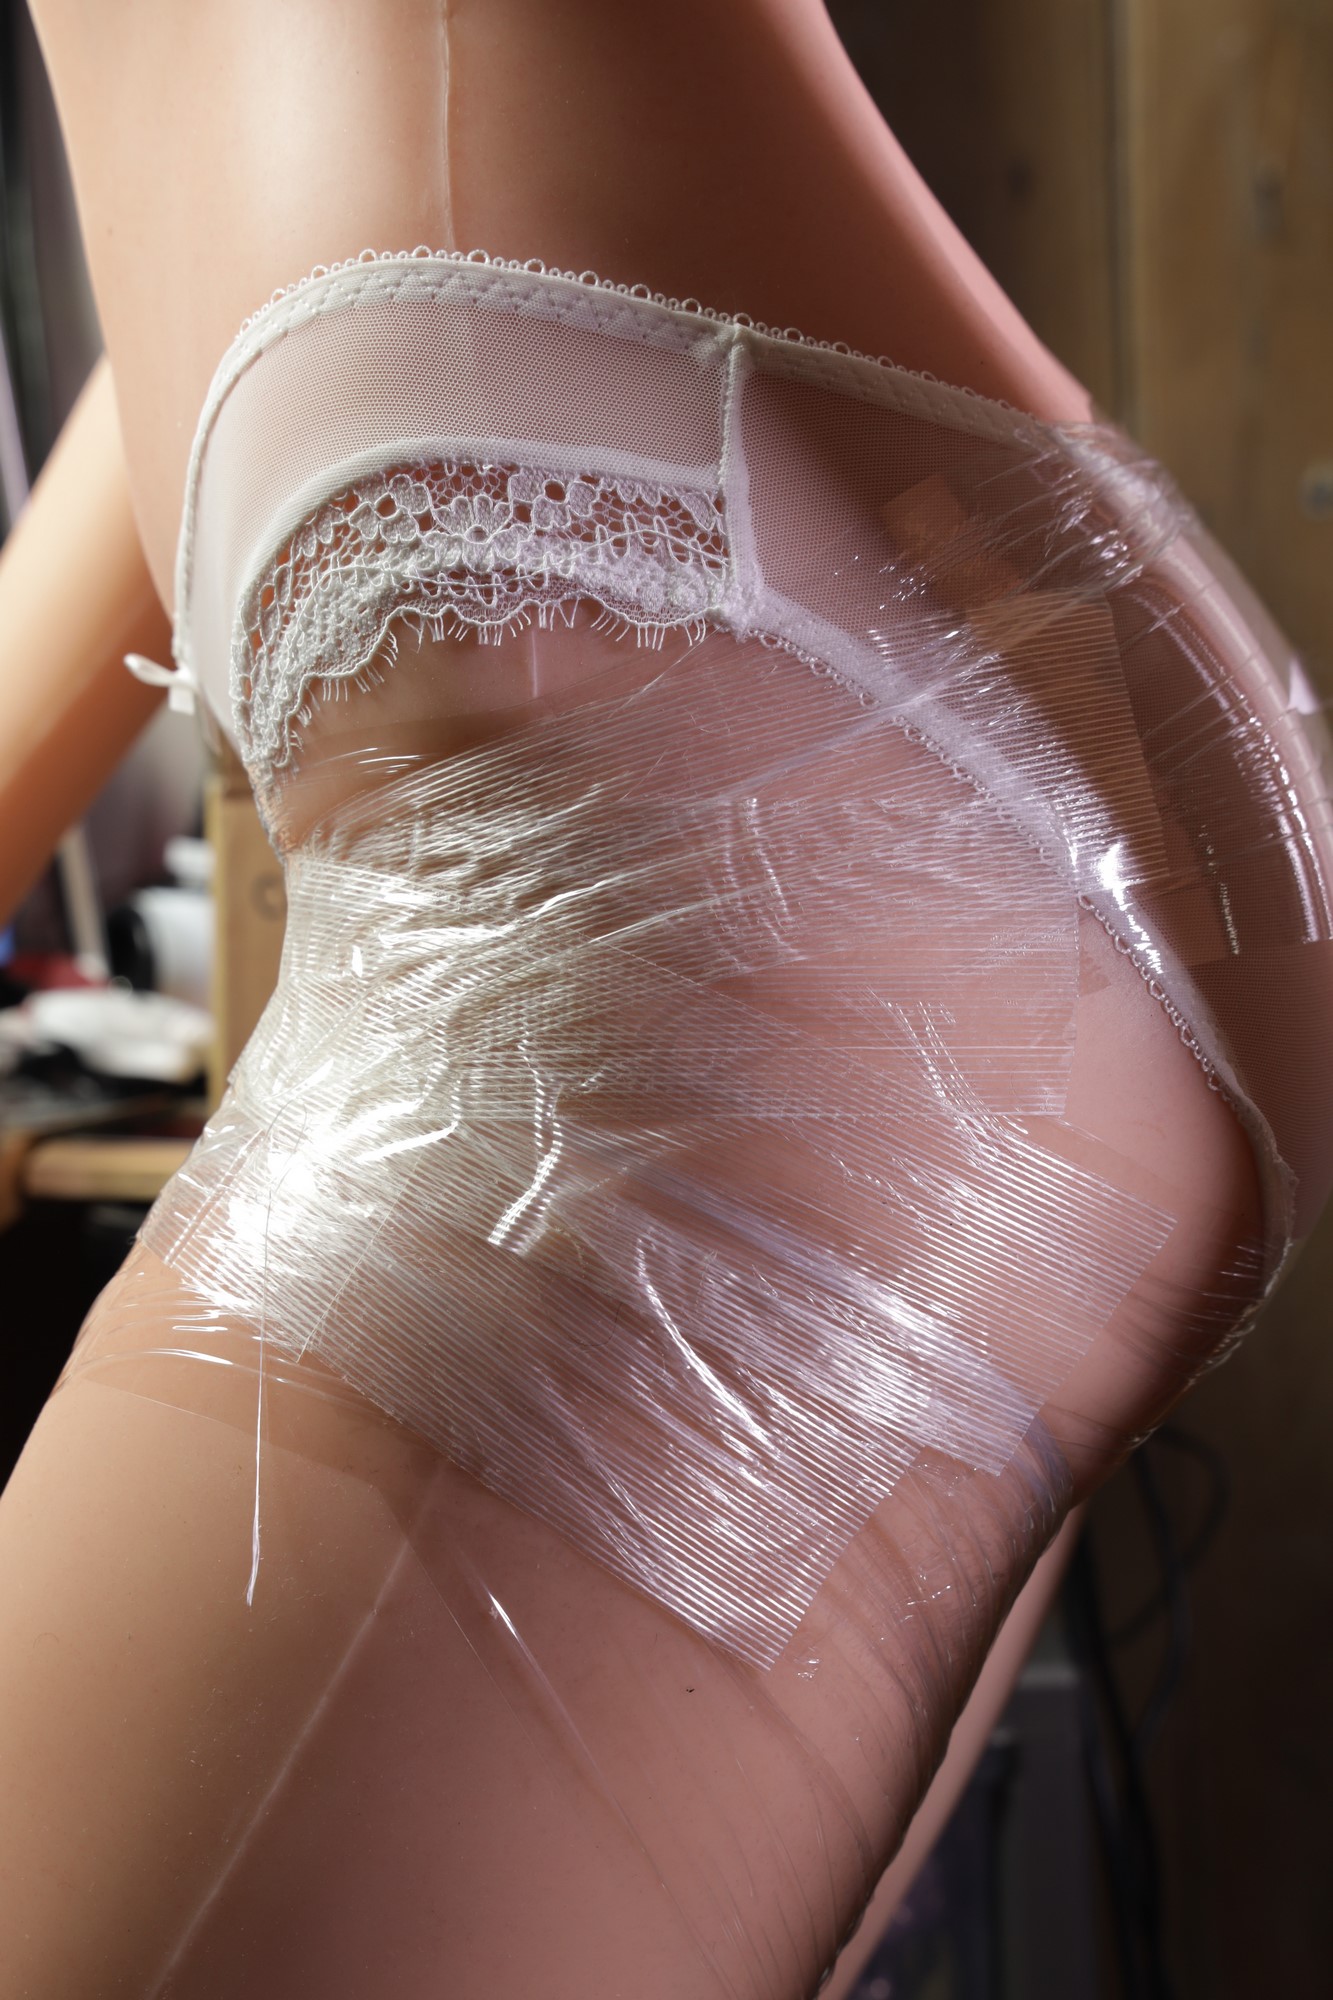
Caution: absolute rest is required during this period, as any movement could cause a secondary displacement of the wound edges, even under the tight dressing.
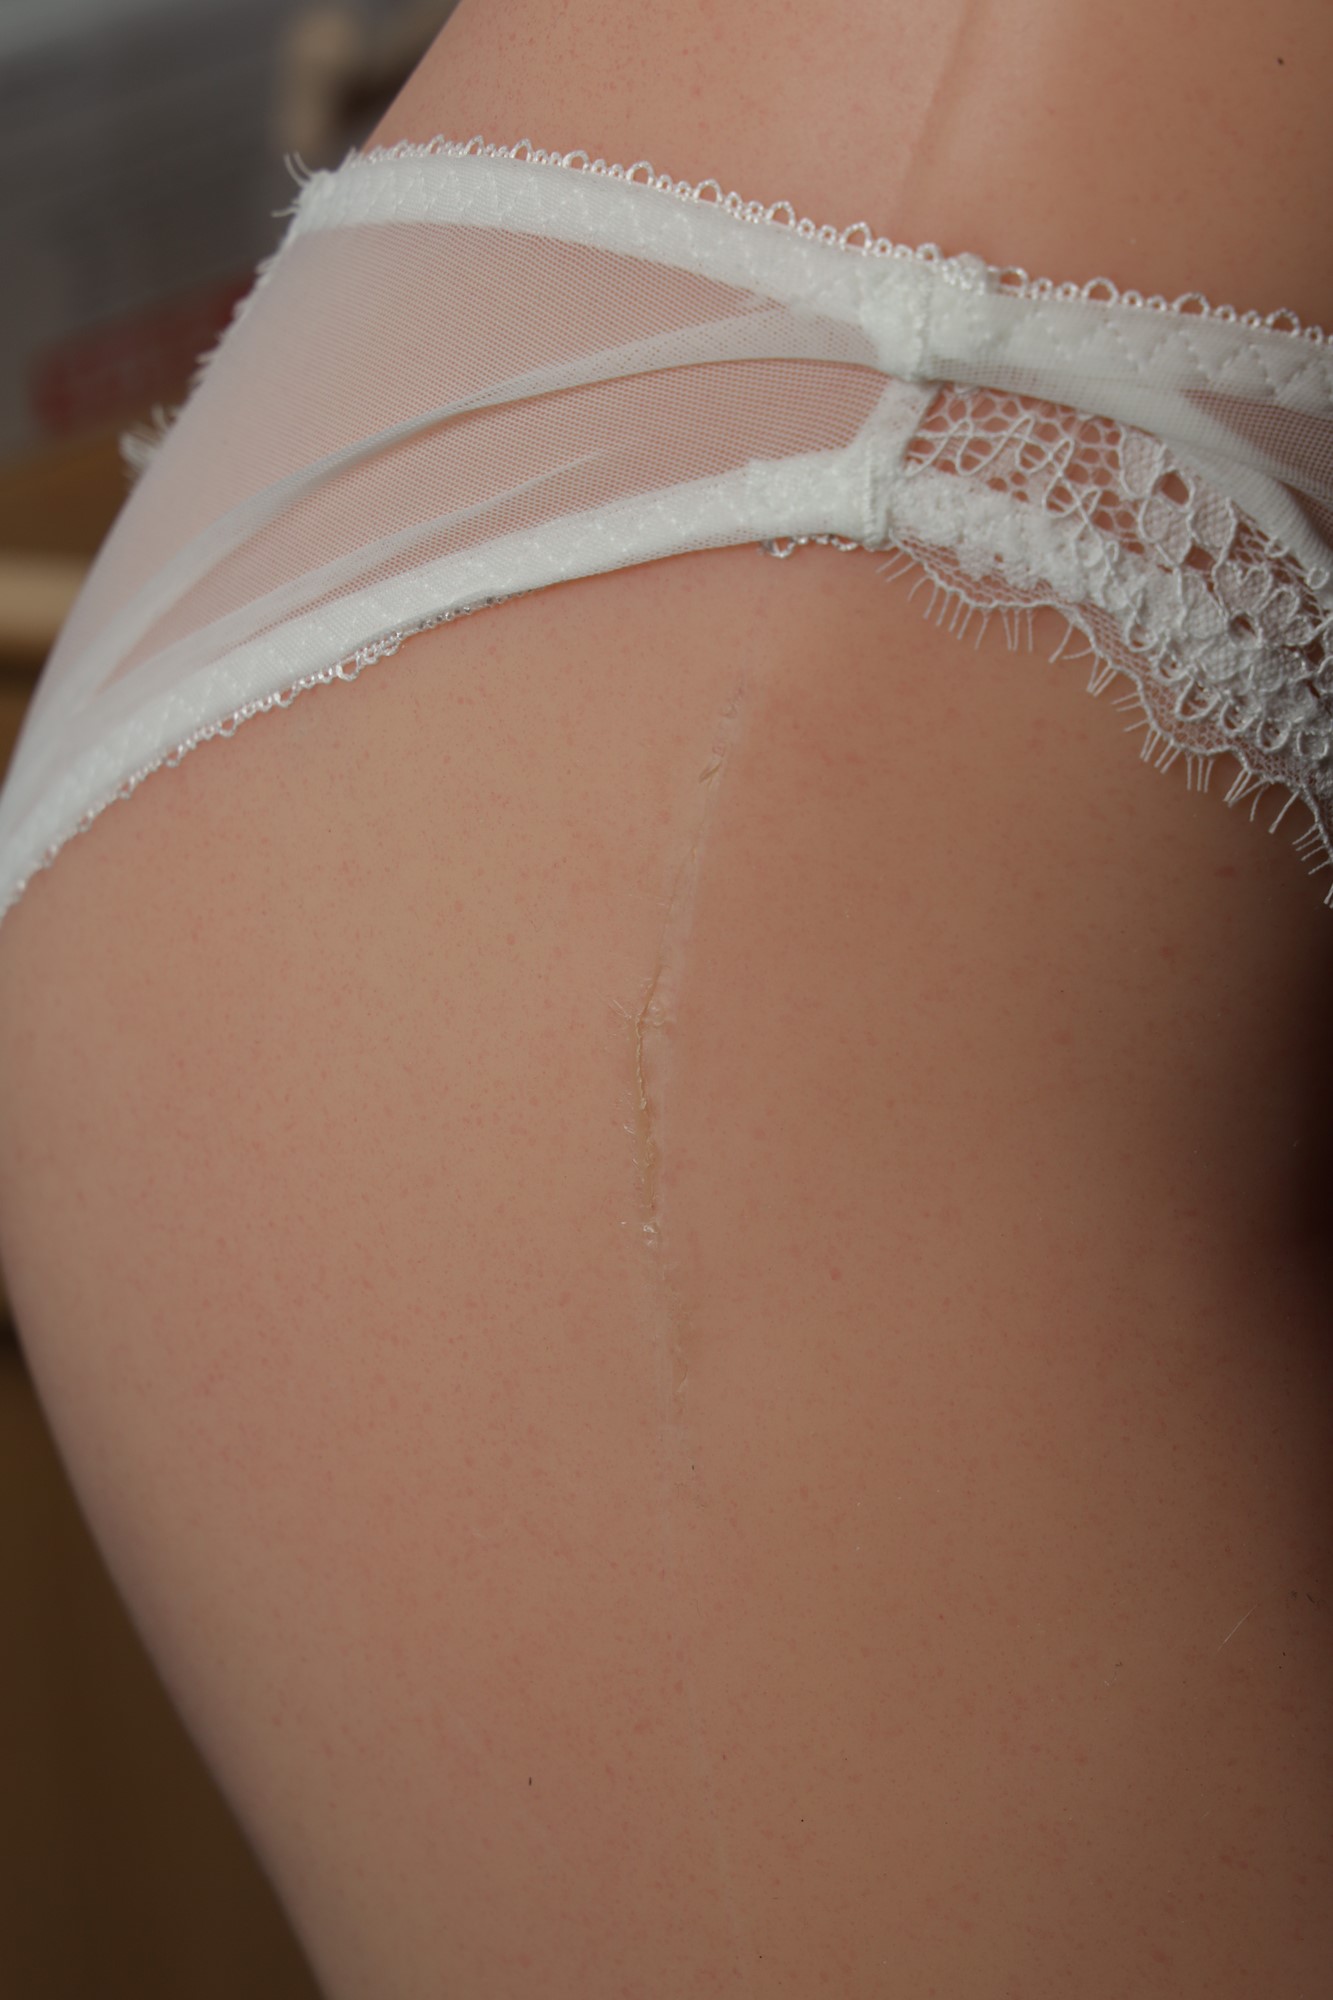
Remove the bandage with scissors, taking care not to damage the silicone surface.
Small bandage marks were present, but faded fairly quickly.
Wound appearance after bandage removal :
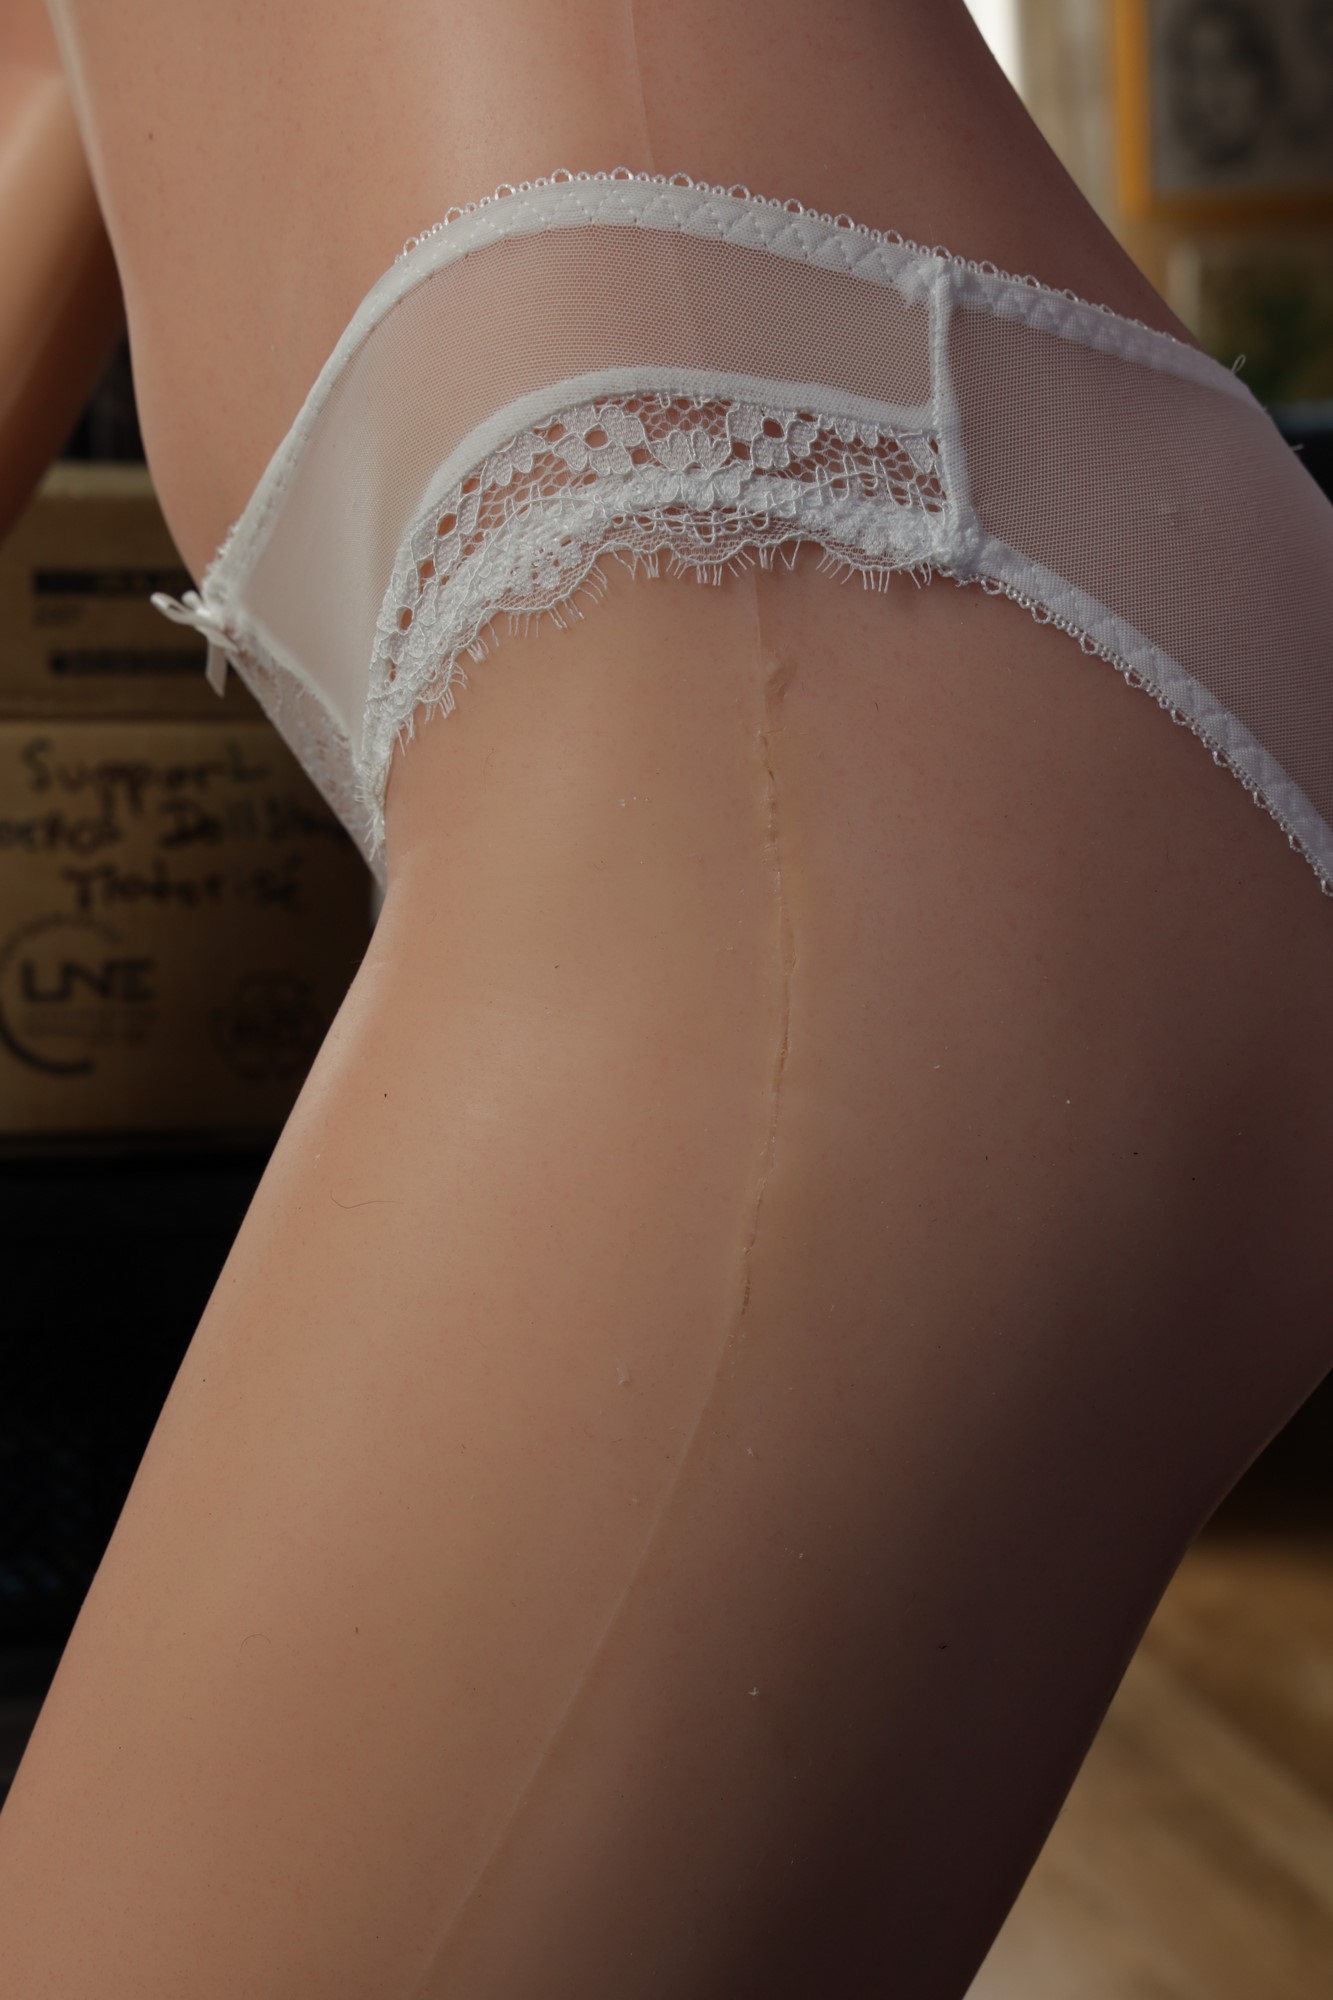
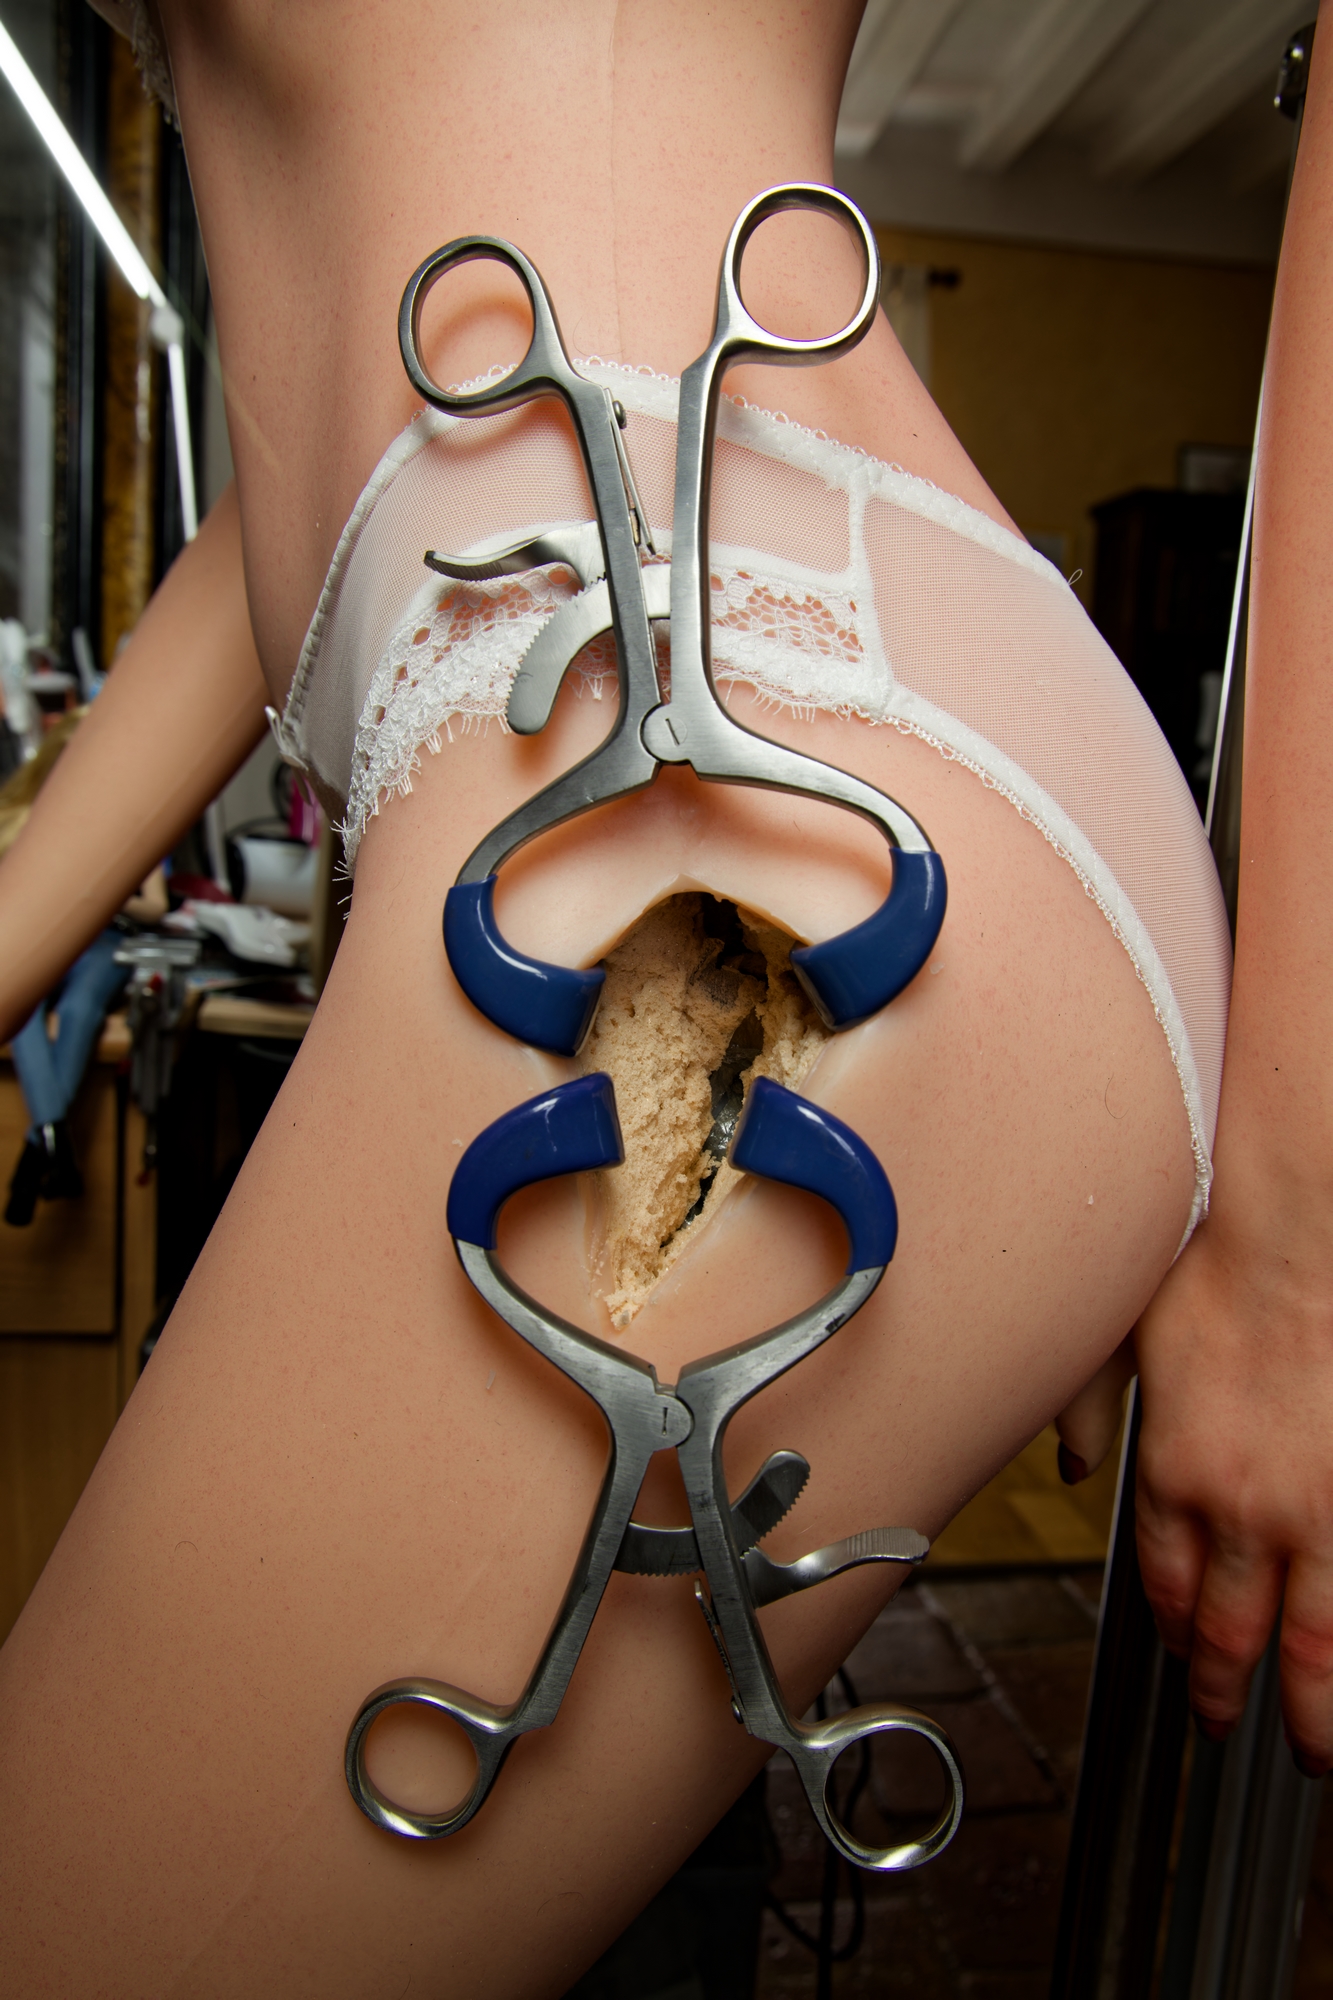
Right hip surgery
Same procedure, after repositioning the body. The only peculiarity I can't explain is that, while the incision was made at the same point on the molding line, the nut was placed much further back, requiring additional pressure on the wound to put the socket in place.
Results:
Back surgery
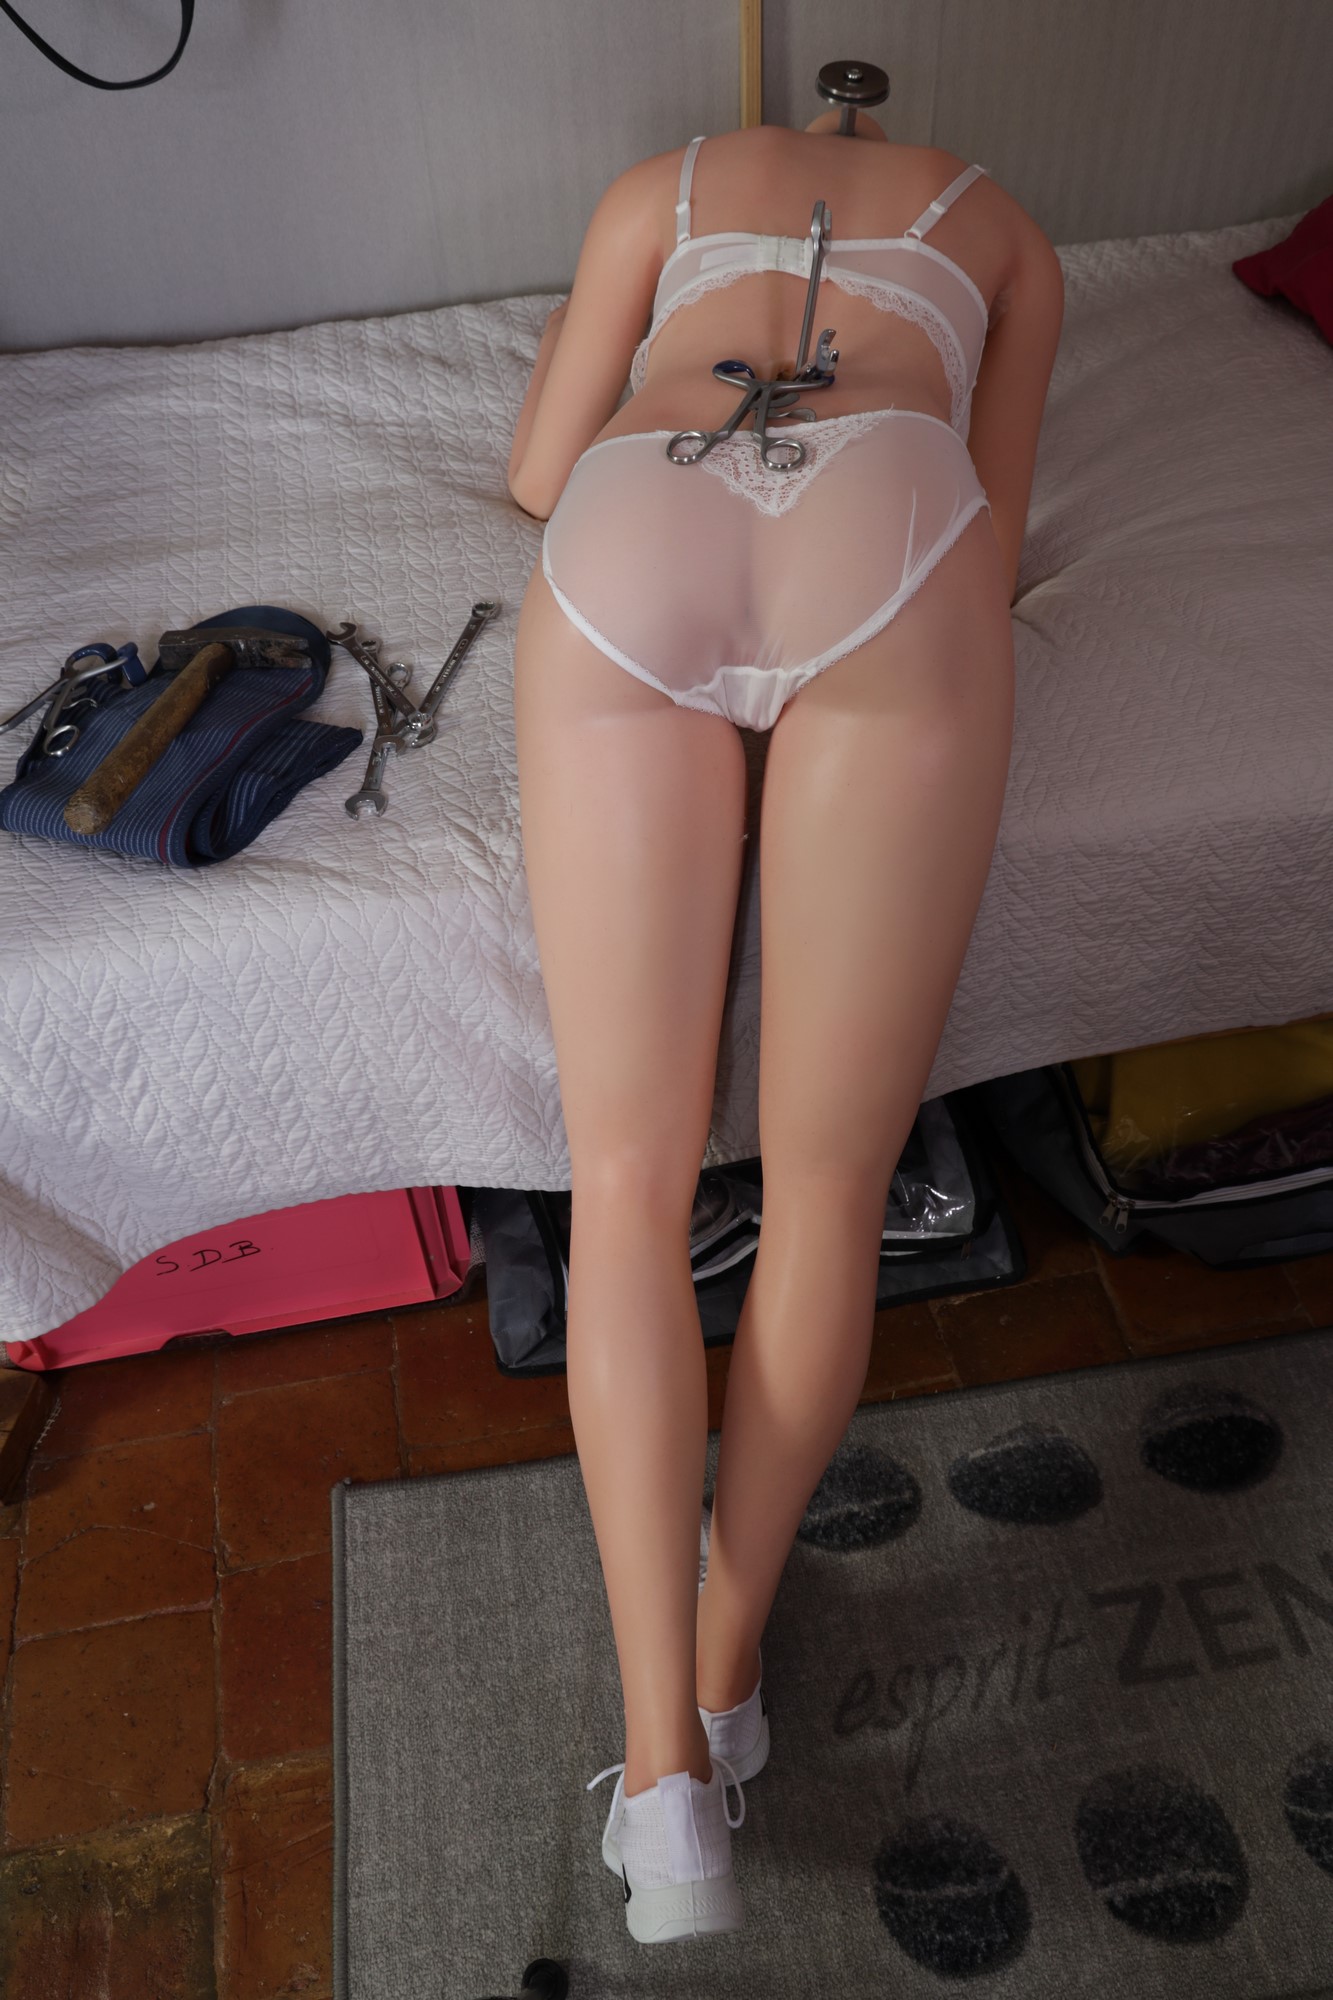
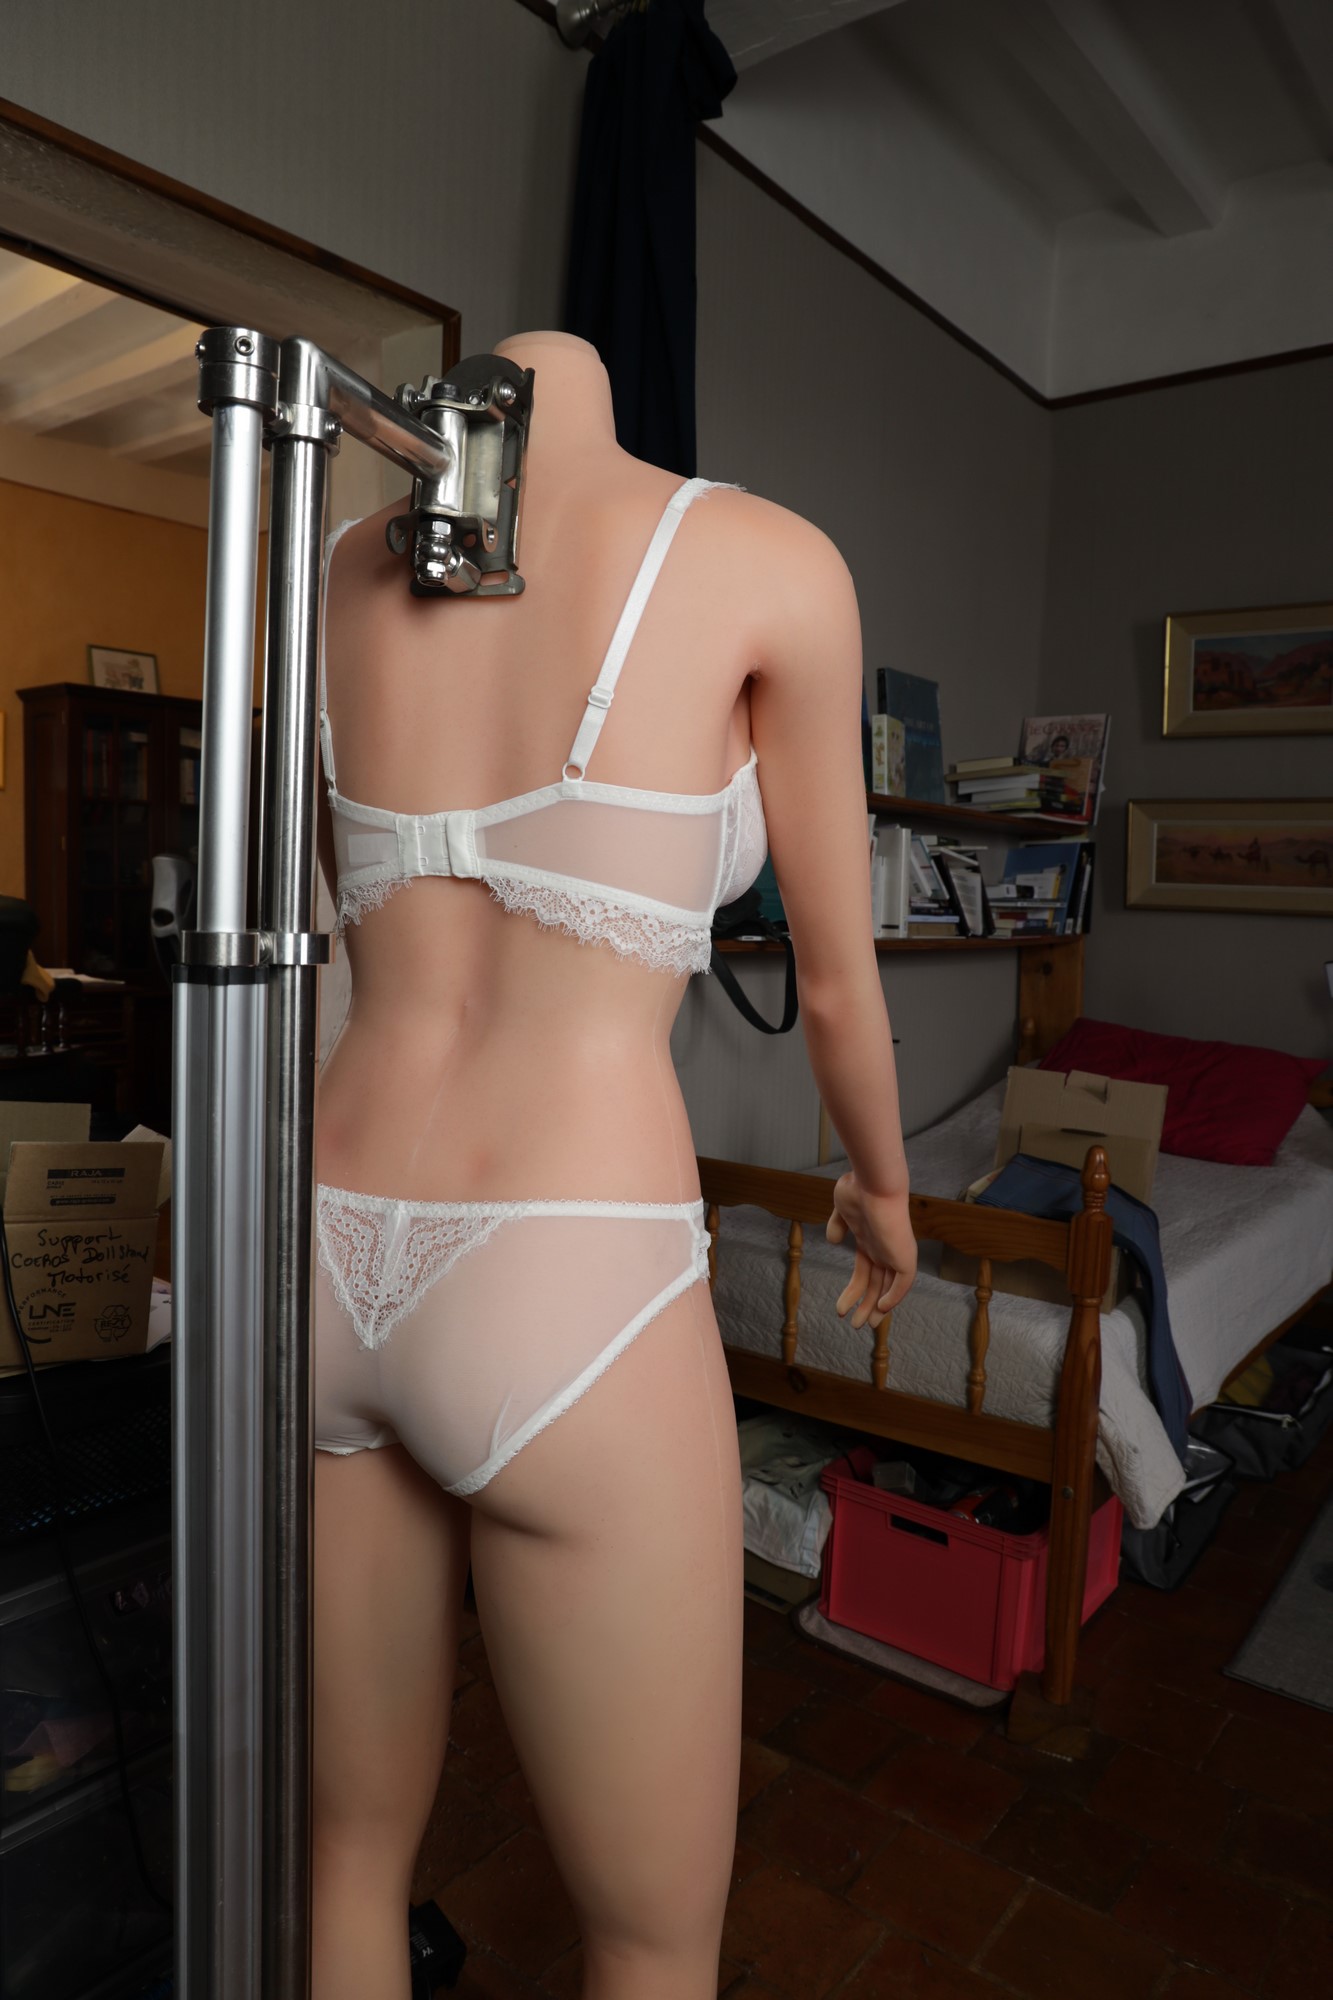
Positionning of body vertically on the headstock table, trying to keep the incision area as clear as possible.
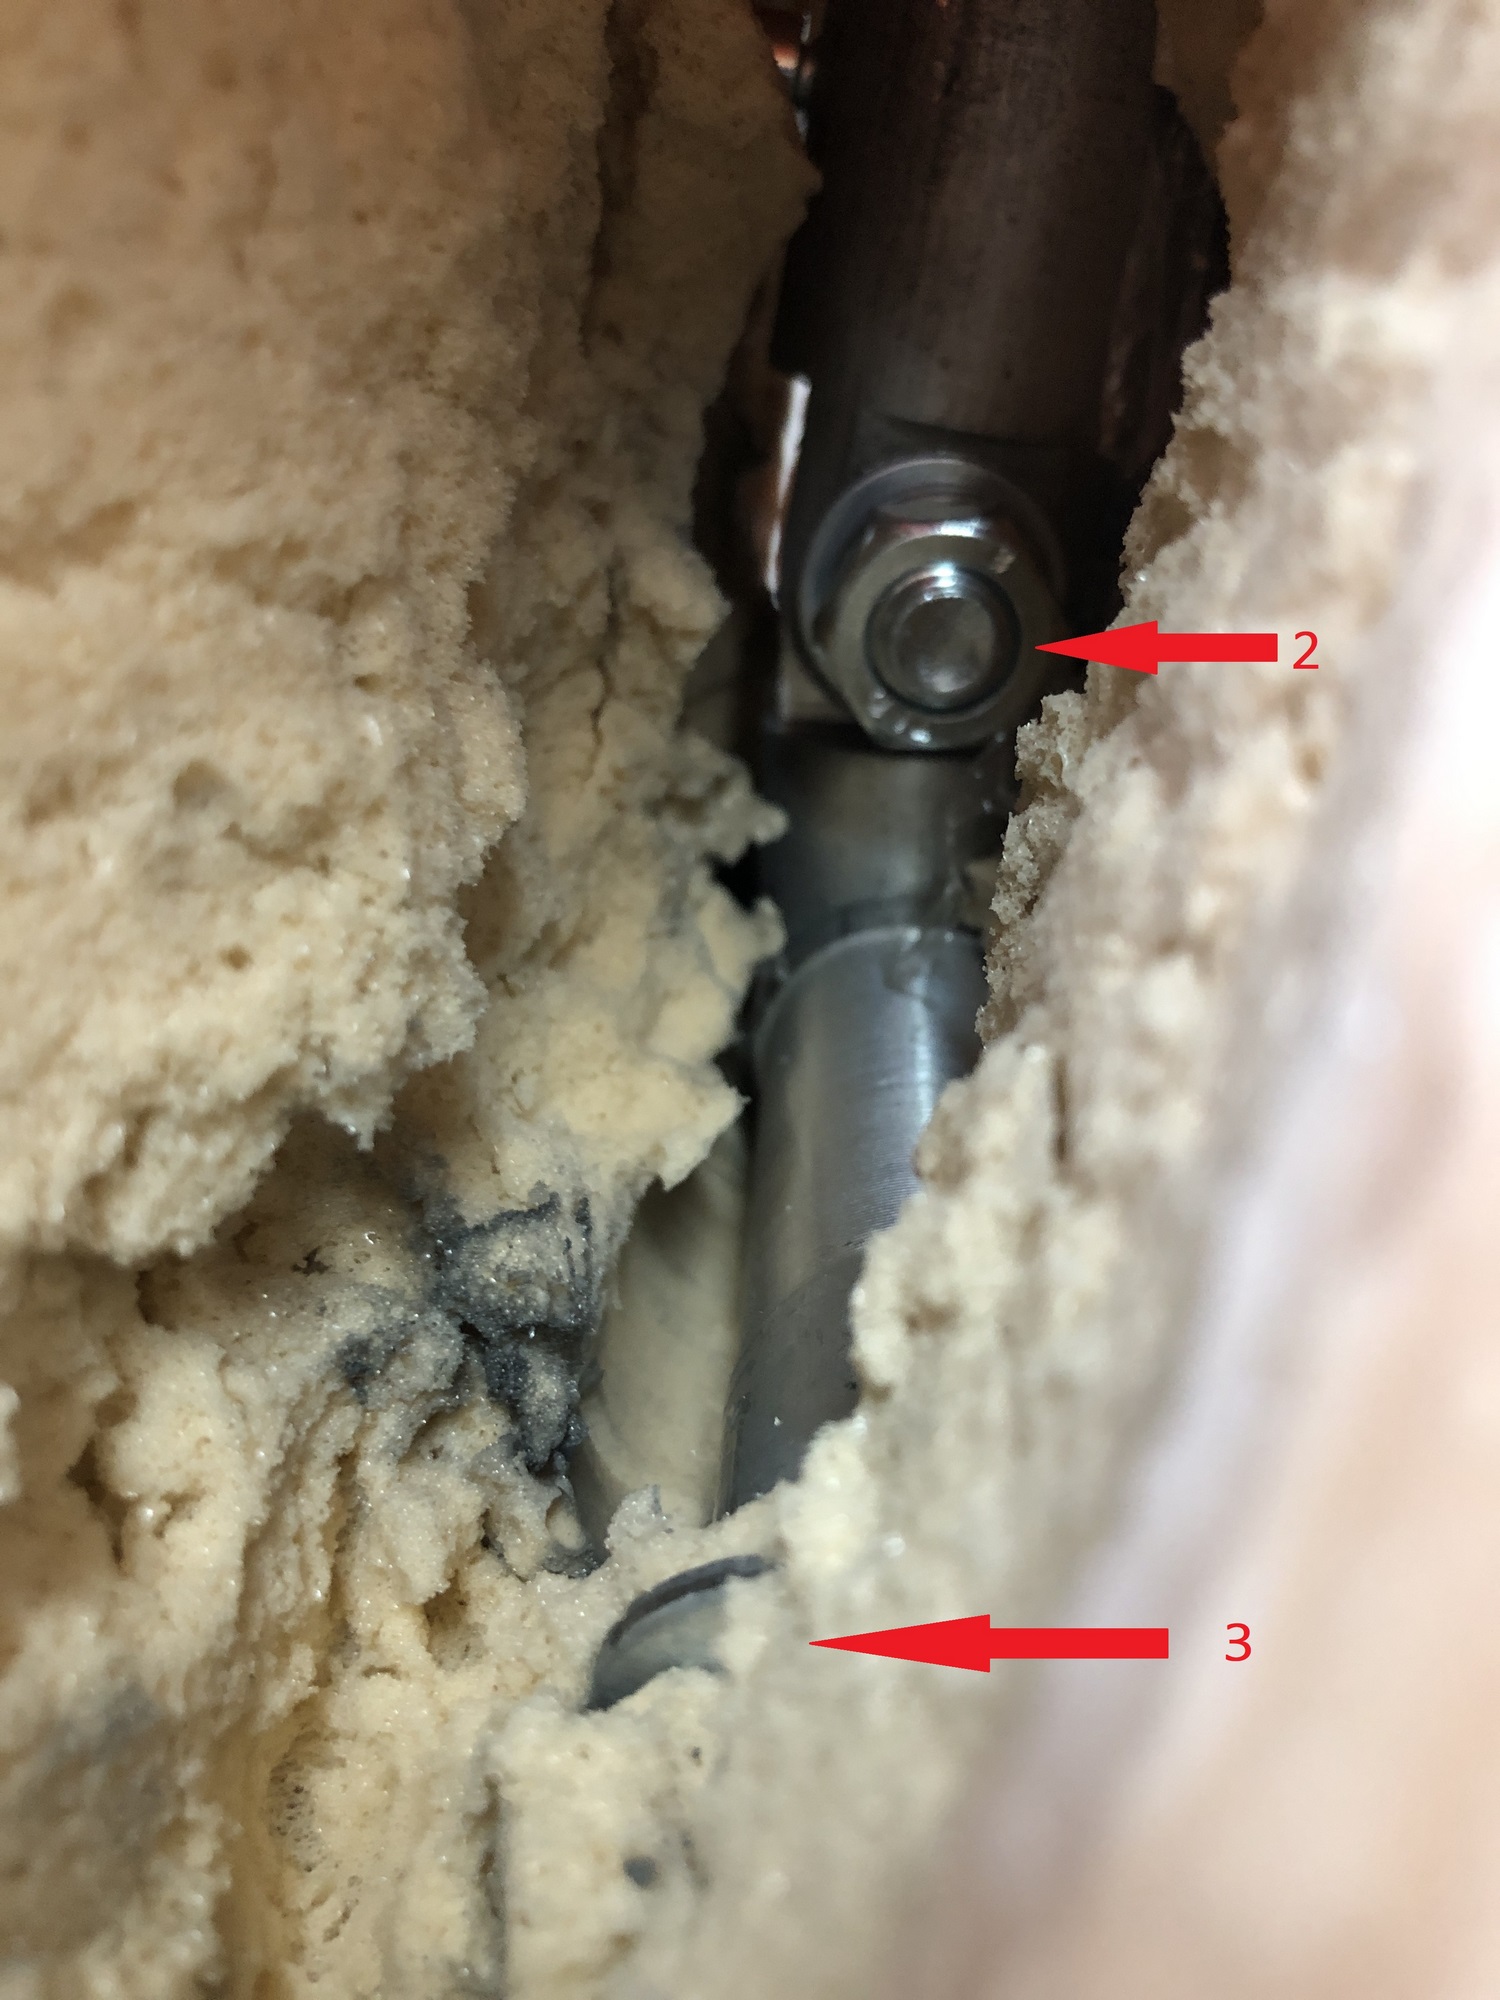
Locating : approximation based on a photo of the skeleton, using the anchor point of the backhole as a reference point:
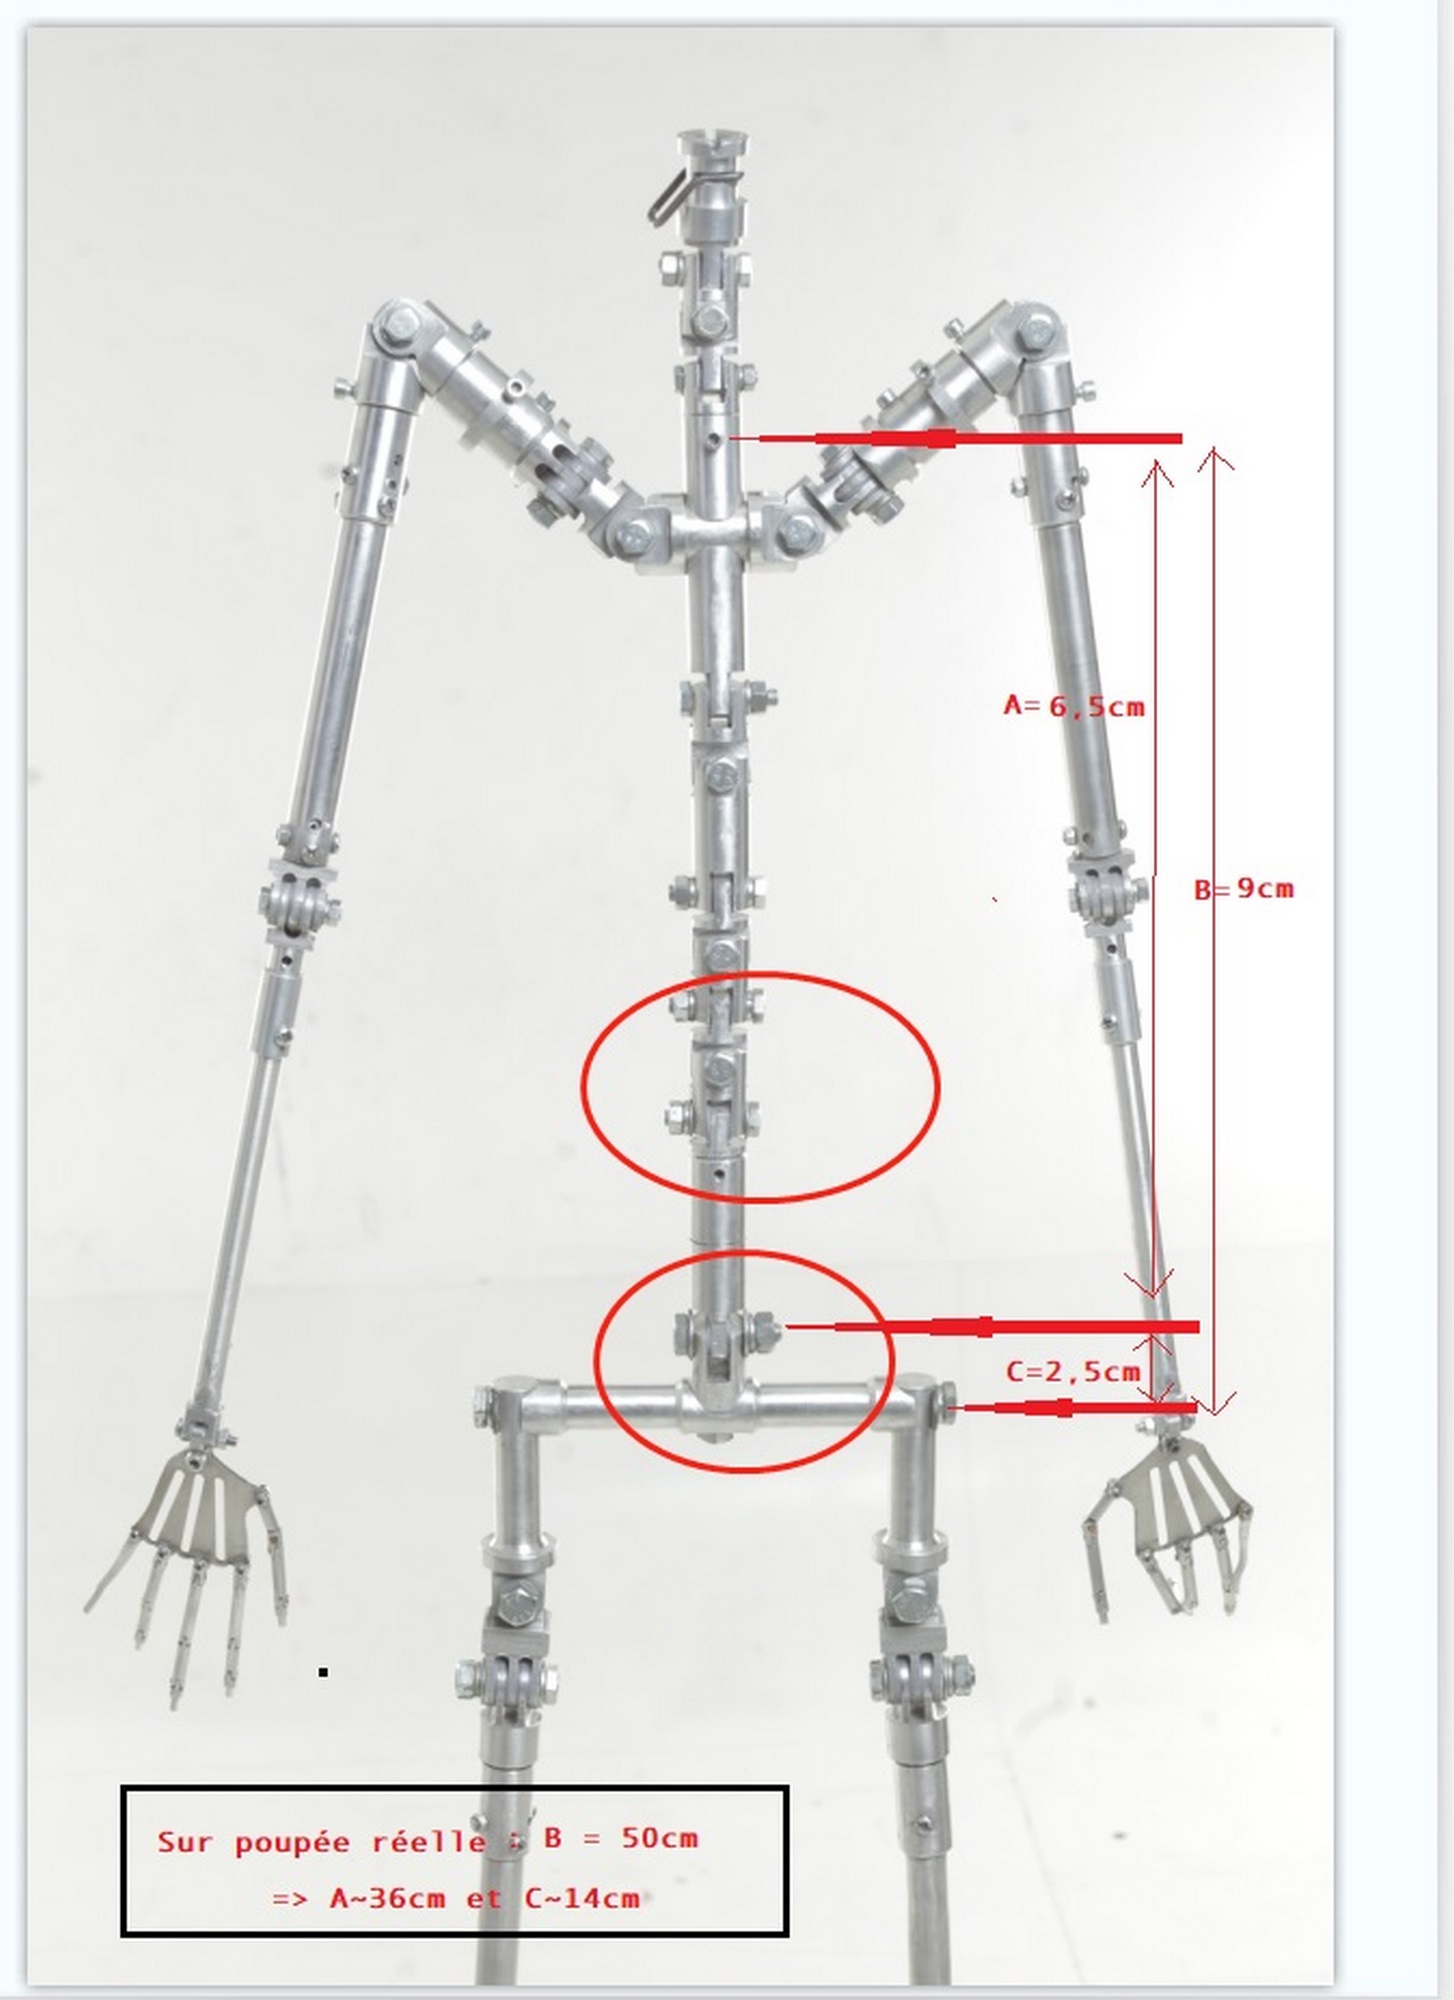
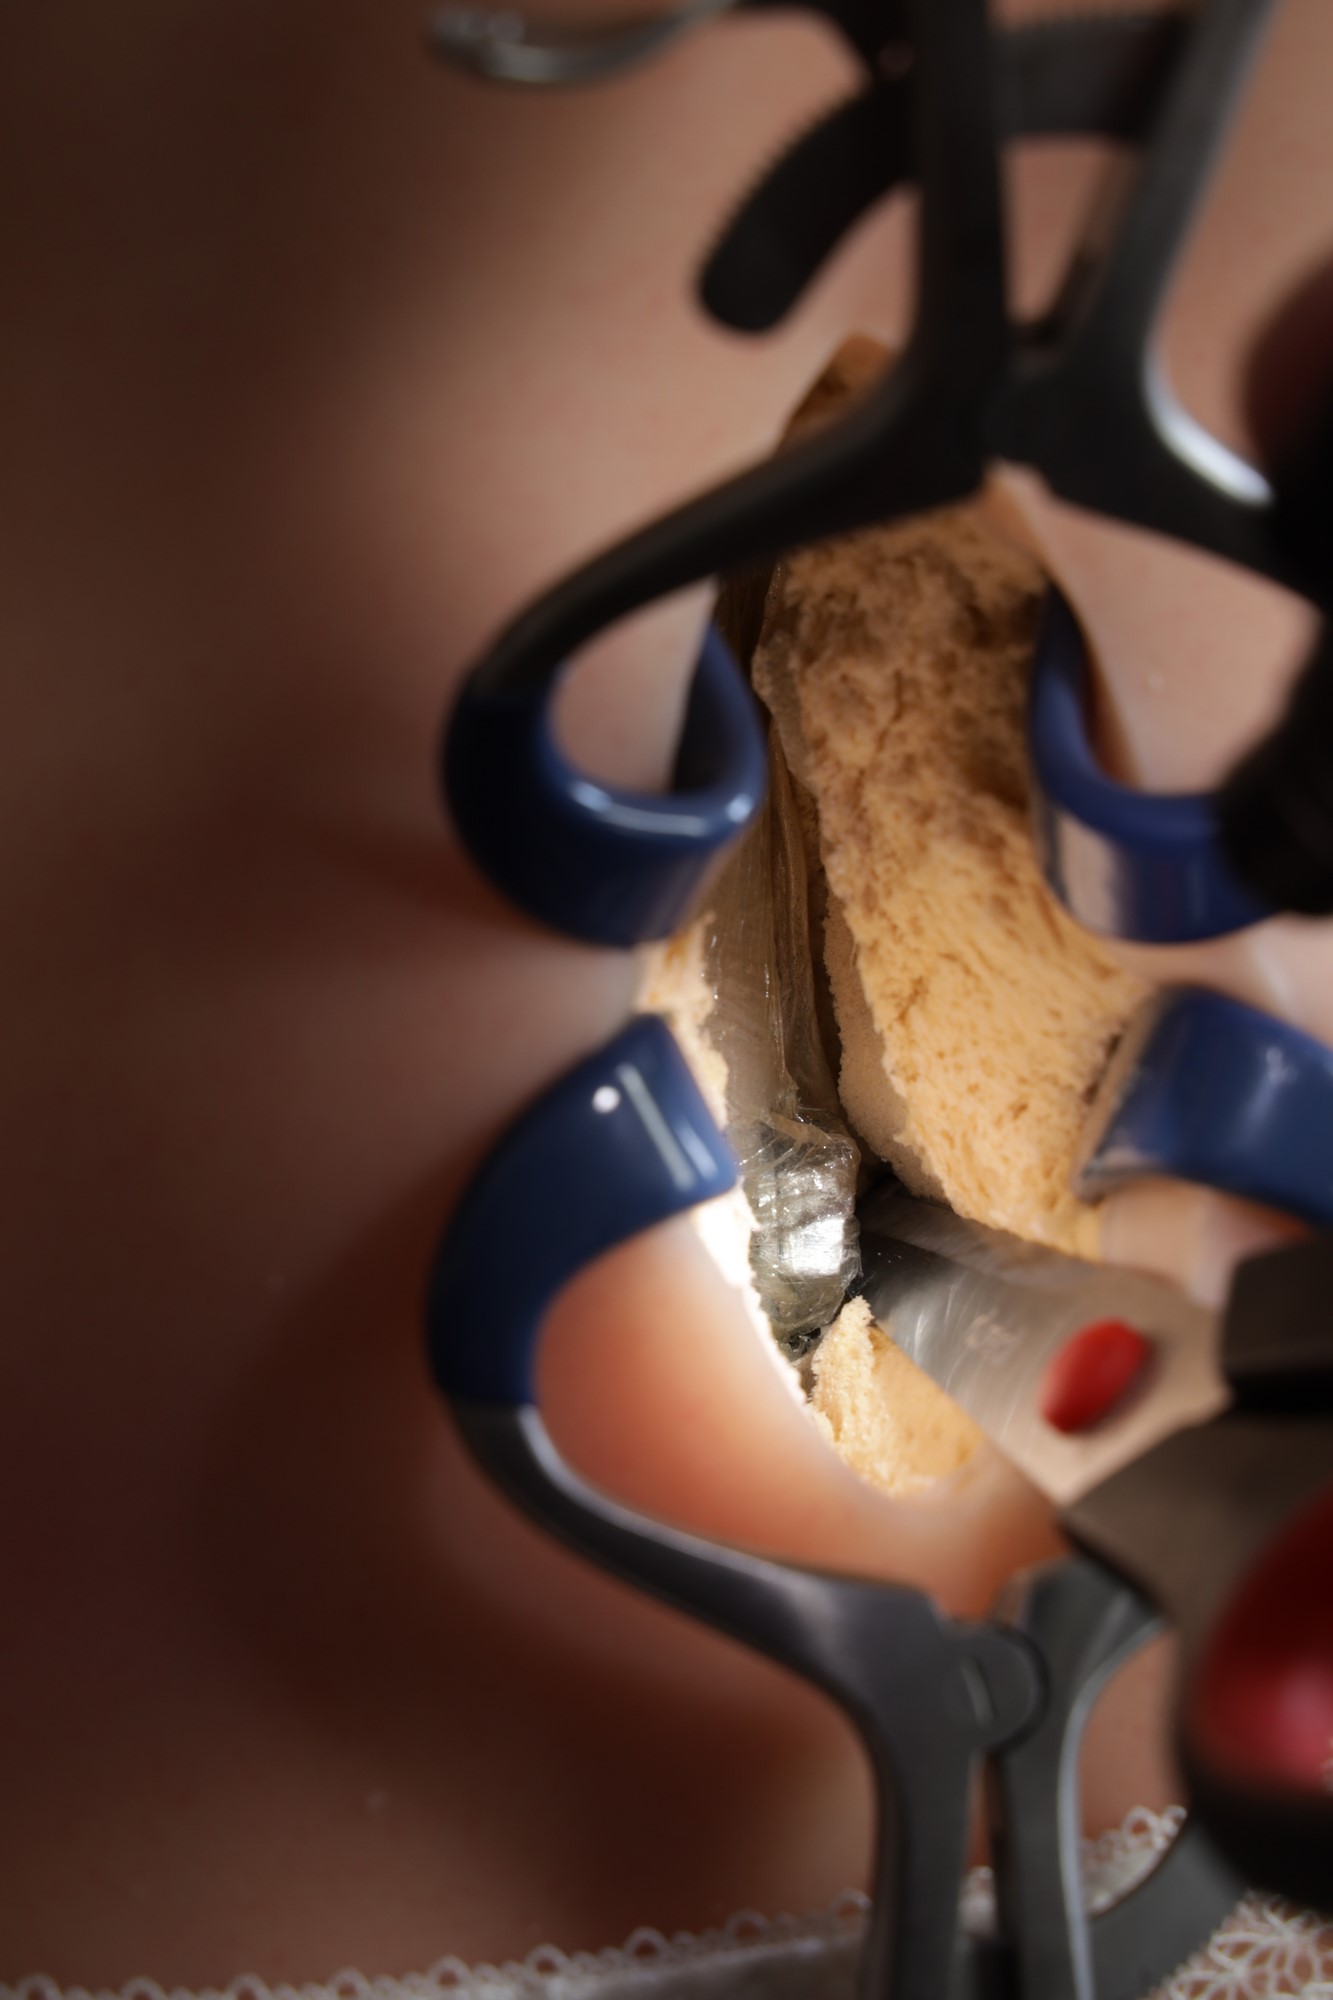
This will prove useful, but not very precise. The initial incision should be enlarged according to palpation. As the thickness of the silicone and the "small body" is less than on the hips, it will be easier to locate with the finger, and the incision will not exceed 9 cm in the end.
Same procedure. Only the socket ratchet is replaced by an eye wrench.

However, as sufficient rigidity was not achieved on the dollstand, the decision was taken to unhook the body and place it in a forward-leaning position on a bed, in order to :
- get a better grip for clamping ;
- gain access to the upper joint, which also appeared to be loose.
This step enabled both joints to be tightened correctly (only the lower one really needed it in the end), but at the cost of a great deal of rotation of the wrench, which led to fears that the threaded rod might break or leak, which fortunately did not happen.
The lower joint was tightened with a 14" eyebolt wrench, to the right of the dorsal column. The upper joint was tightened with a 13" eyebolt wrench, on the left of the dorsal column. This inversion of nut positioning between the two joints is clearly visible on the skeleton photo.
- Arms down: OK
The new tests will then be OK.
Restraint will be performed using the same principle as for the hips, wrapping the body with 5 cm of grafting plastic film, stretching each layer tightly. A ping-pong ball was placed in the lumbar fossa to apply pressure to the concave area that escaped the pressure of the plastic film.
The final step was to reinforce the pressure with reinforced adhesive.
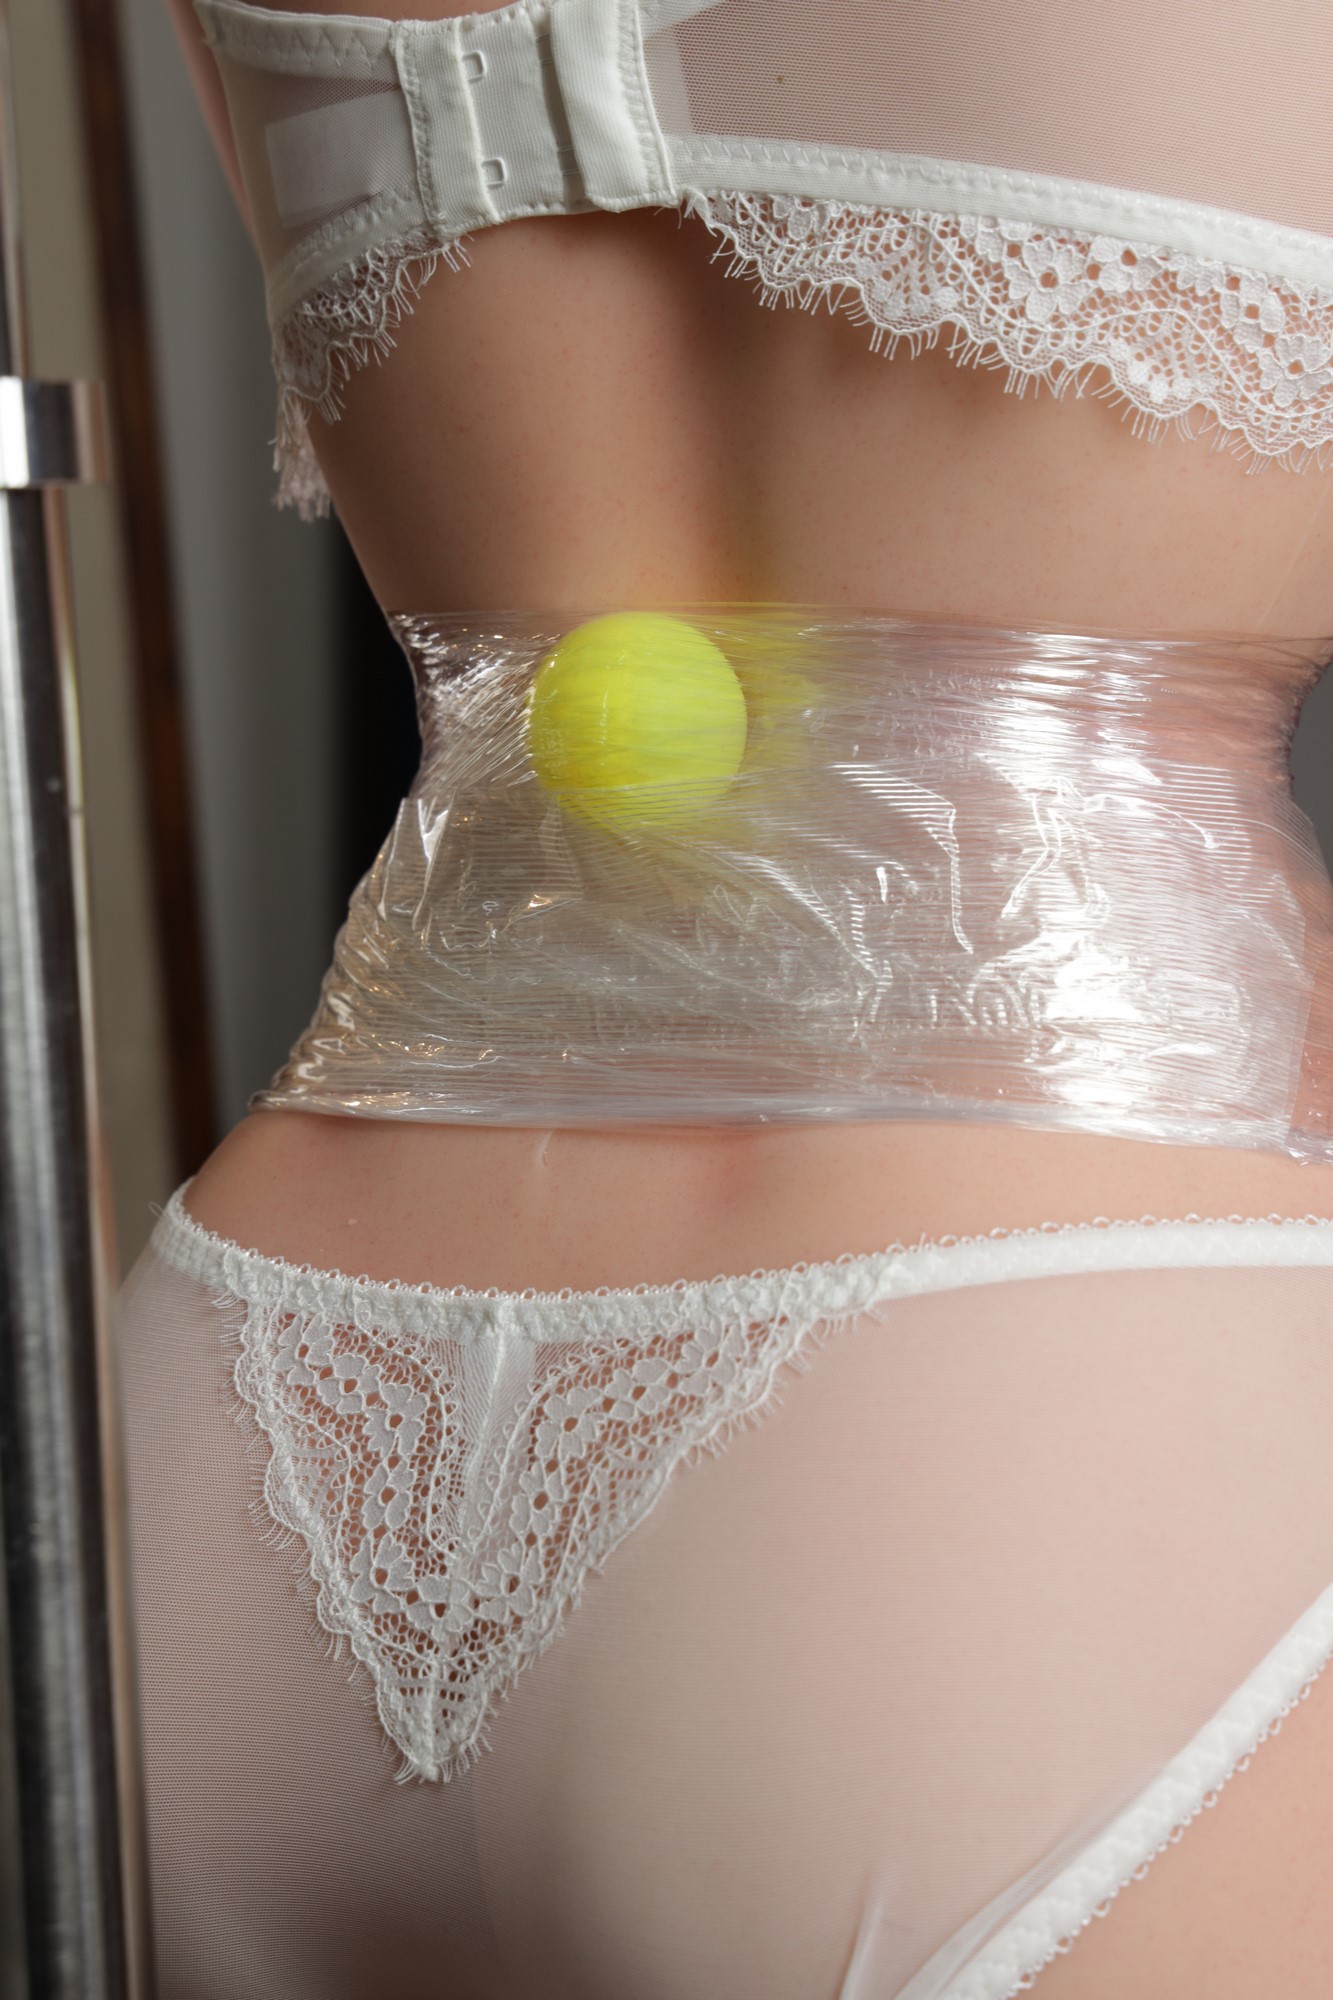
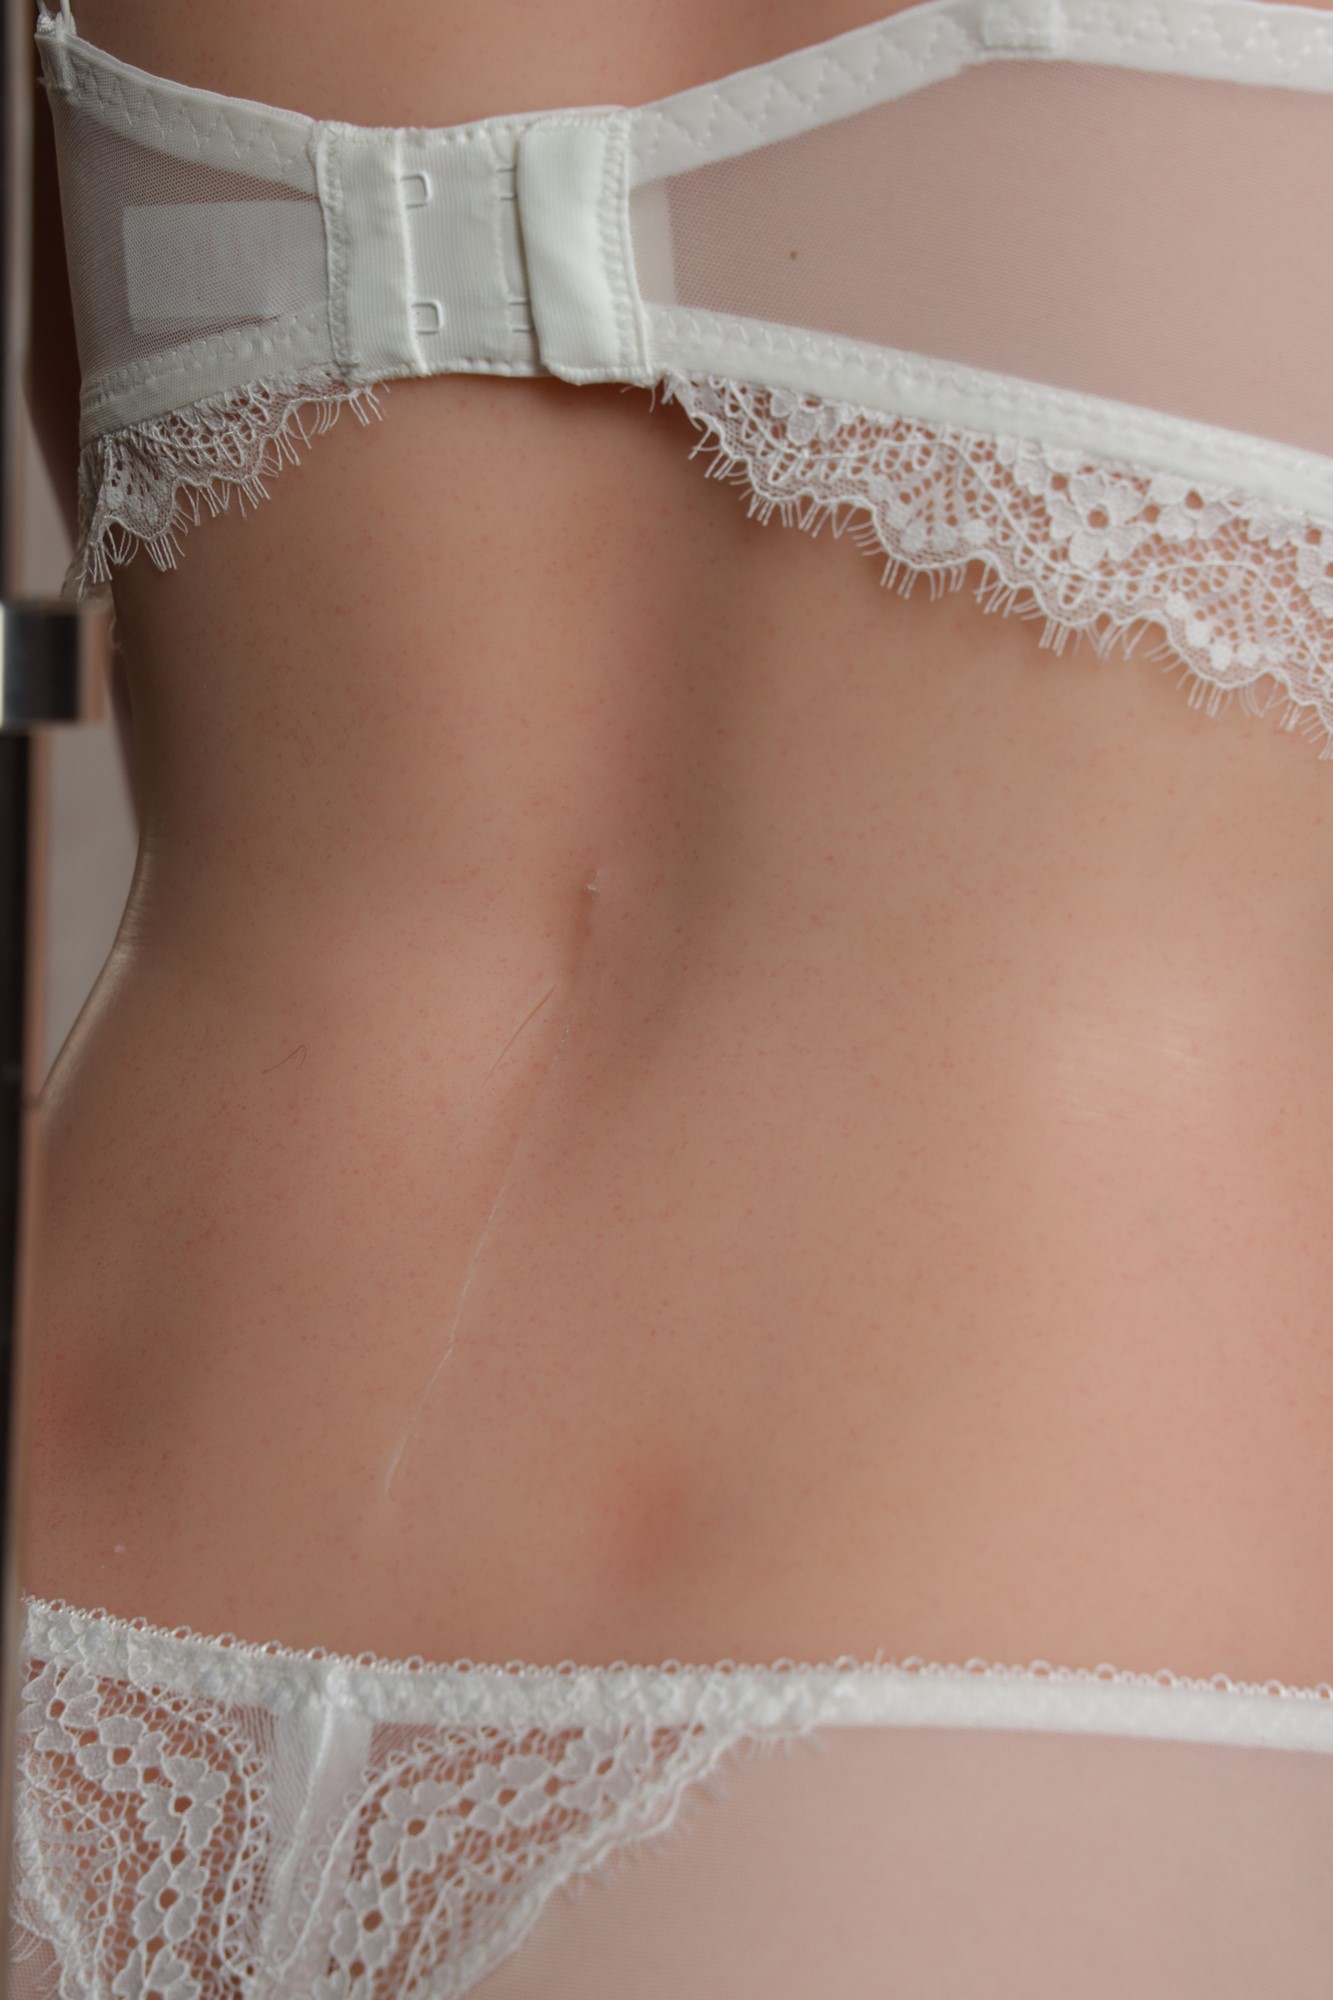
Result after removal of dressing, after overnight glue drying:
Note: when accessing the skeleton, I noticed a transparent plastic film enveloping the metal parts. This can be seen in the close-up photo of the wound on the back, but it seems to cover the entire skeleton. When accessing the nuts, this film has to be broken. I didn't try to replace or repair this protective or insulating film, which would have been very difficult anyway. I can only hope that it won't cause any subsequent problems for the layers above.
Discussion, comments, conclusion
[b- Preliminary information before surgery [/b] : the manufacturer was reactive and responded to my requests for information, but these were insufficient on many points. Location, approach, length of incision, size of nuts (the data provided did not correspond to Western standards), gluing of the "small body", equipment to be provided, restraint methods... etc. had to be improvised before or during the intervention. This type of repair, which is entirely within the reach of a non-professional user, should be the subject of detailed technical data sheets, describing the entire procedure from preparation to restraint. Precise location indications would also be welcome.
- Material : The size of sockets and wrenches has already been mentioned, and a wide range should be available to cover all eventualities. In my opinion, mouth retractors are indispensable for clearing the opening and limiting the incision length to what is strictly necessary. Check beforehand that they do not stain on a silicone sample.
Here's a photo of the necessary equipment.
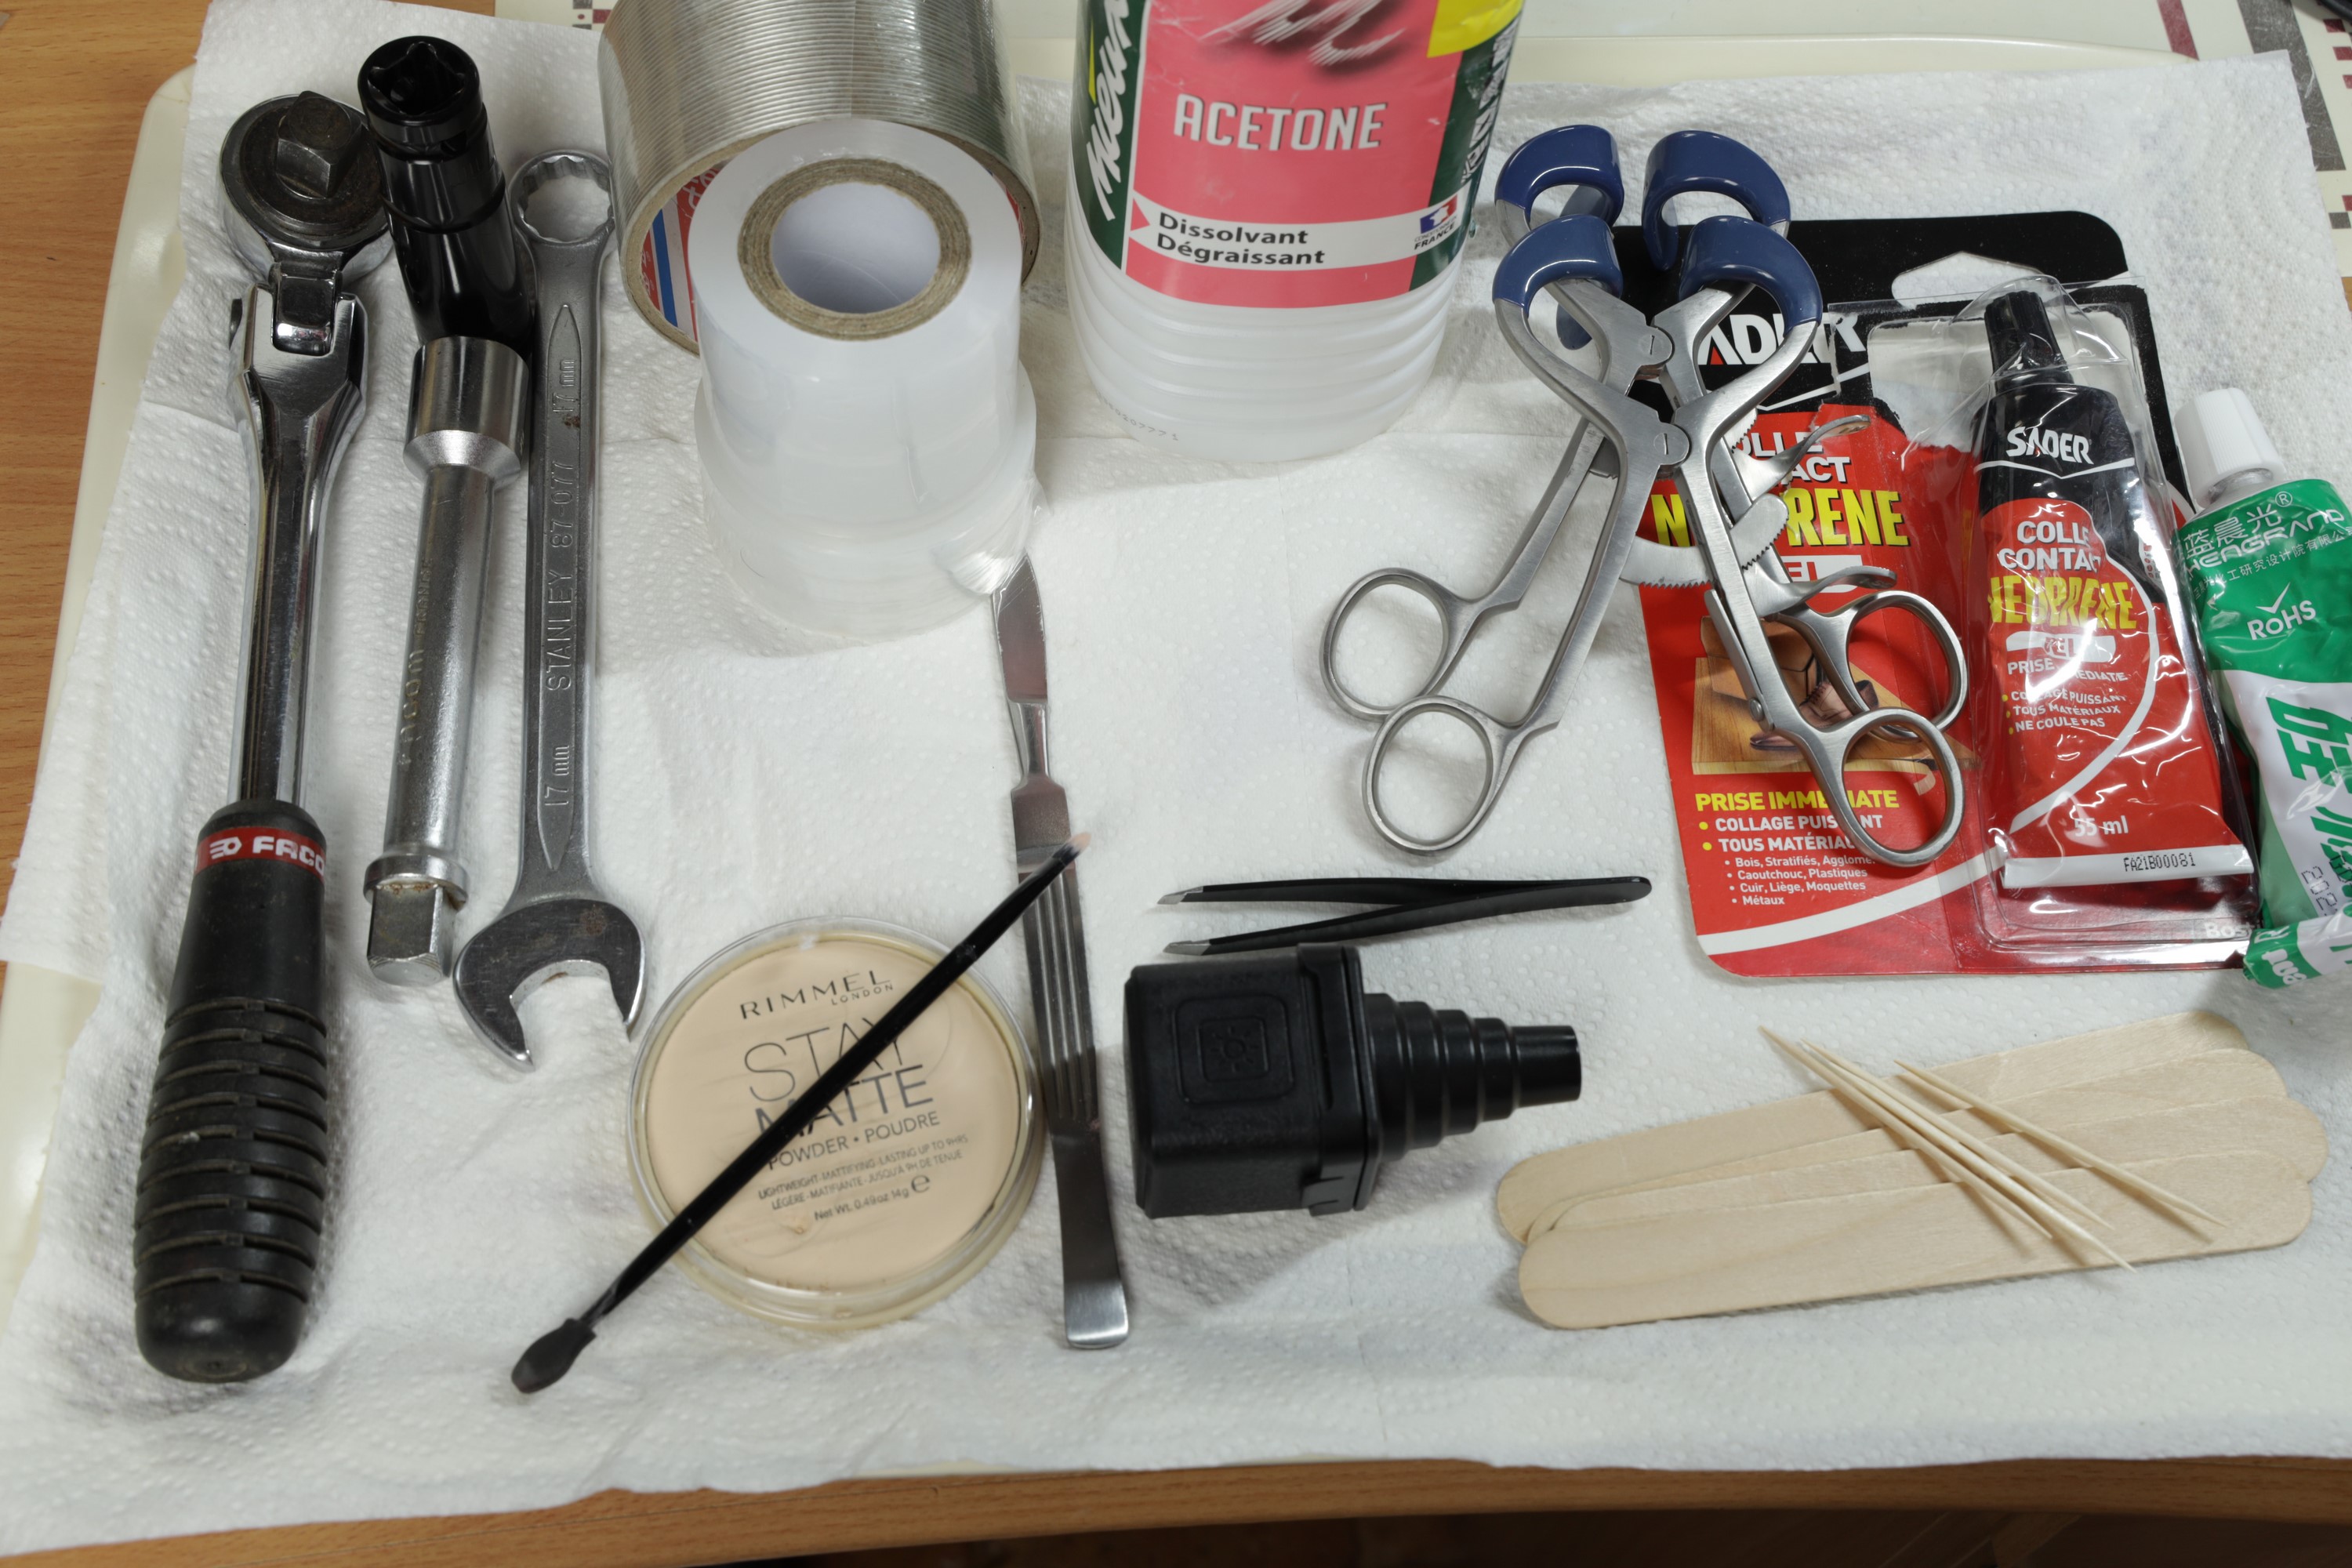
Scalpels are to be preferred to cutters or their derivatives, which have the disadvantage of a flexible blade, making the cut less precise, or a bulge at the base of the blade, making penetration of the tool into the wound more difficult.- Operating procedures : I wouldn't change much at this stage, but there's certainly room for improvement.
[In conclusion[/b], I'd say that this operation is less complicated than it first appeared, as long as you prepare it carefully and carry it out with the minimum of stress.
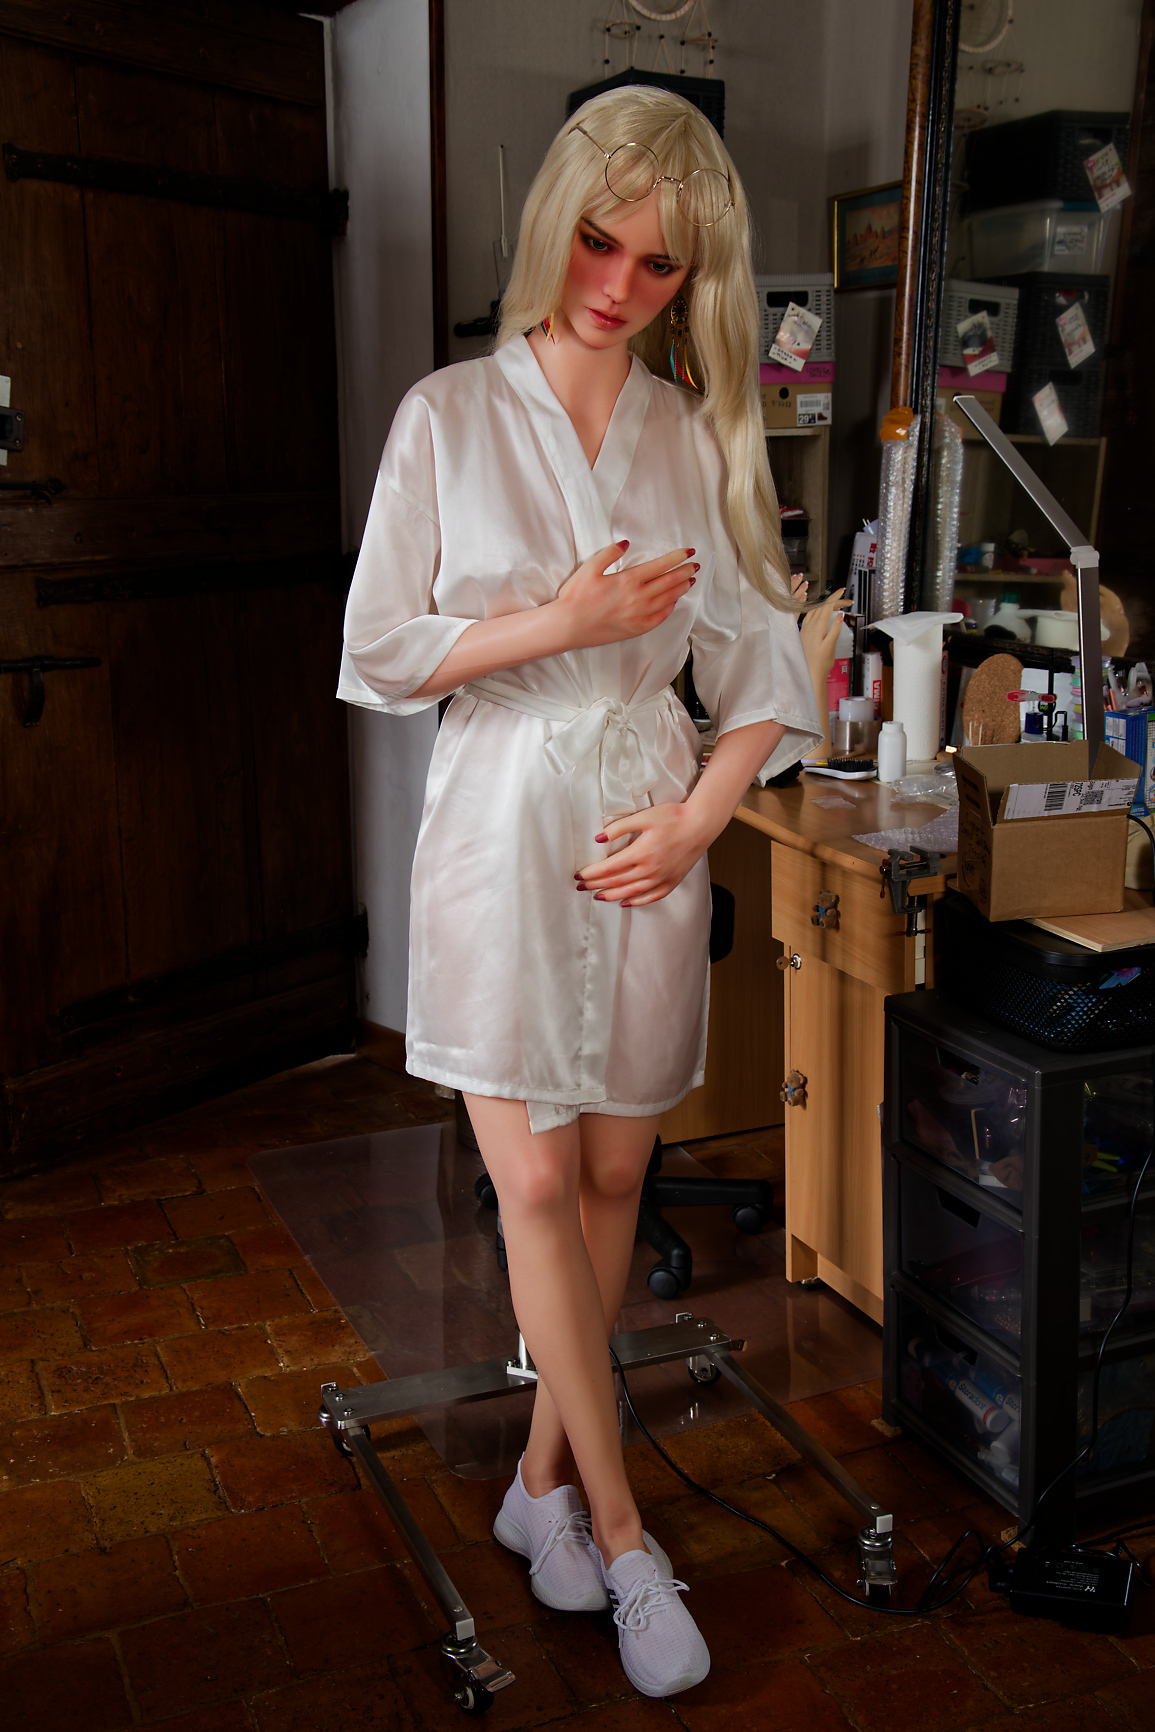
Hadaly's first body (she received a brand-new one: this was a necessary condition to avoid too much stress...), was offered to head Vala, who took the name of... Geena!
Before a more personalized presentation of Geena, here's the miss discovering her body... second-hand! :
I'll be doing a few tests outside dollstand in the days following the end of the procedure. If I notice any problems with scars or standing, I'll report them here.